Welcome! This is the complete step-by-step guide to GetFlex — from installing the app to catching your first Amazon Flex offer. Because GetFlexPro is installed directly from our site (not the Play Store), Android shows a few one-time security prompts during setup. They’re normal — just follow the steps below and you’ll be up and running in a few minutes.
Before you start, you will need: an Android phone and an active membership. Installing the app is free — an active membership ($6, $12, or $20; see the Pricing page) unlocks the assistant features.
Part 1 — Download & install
Step 1
On this download page, tap Download GetFlex to download the app to your phone.

Step 2
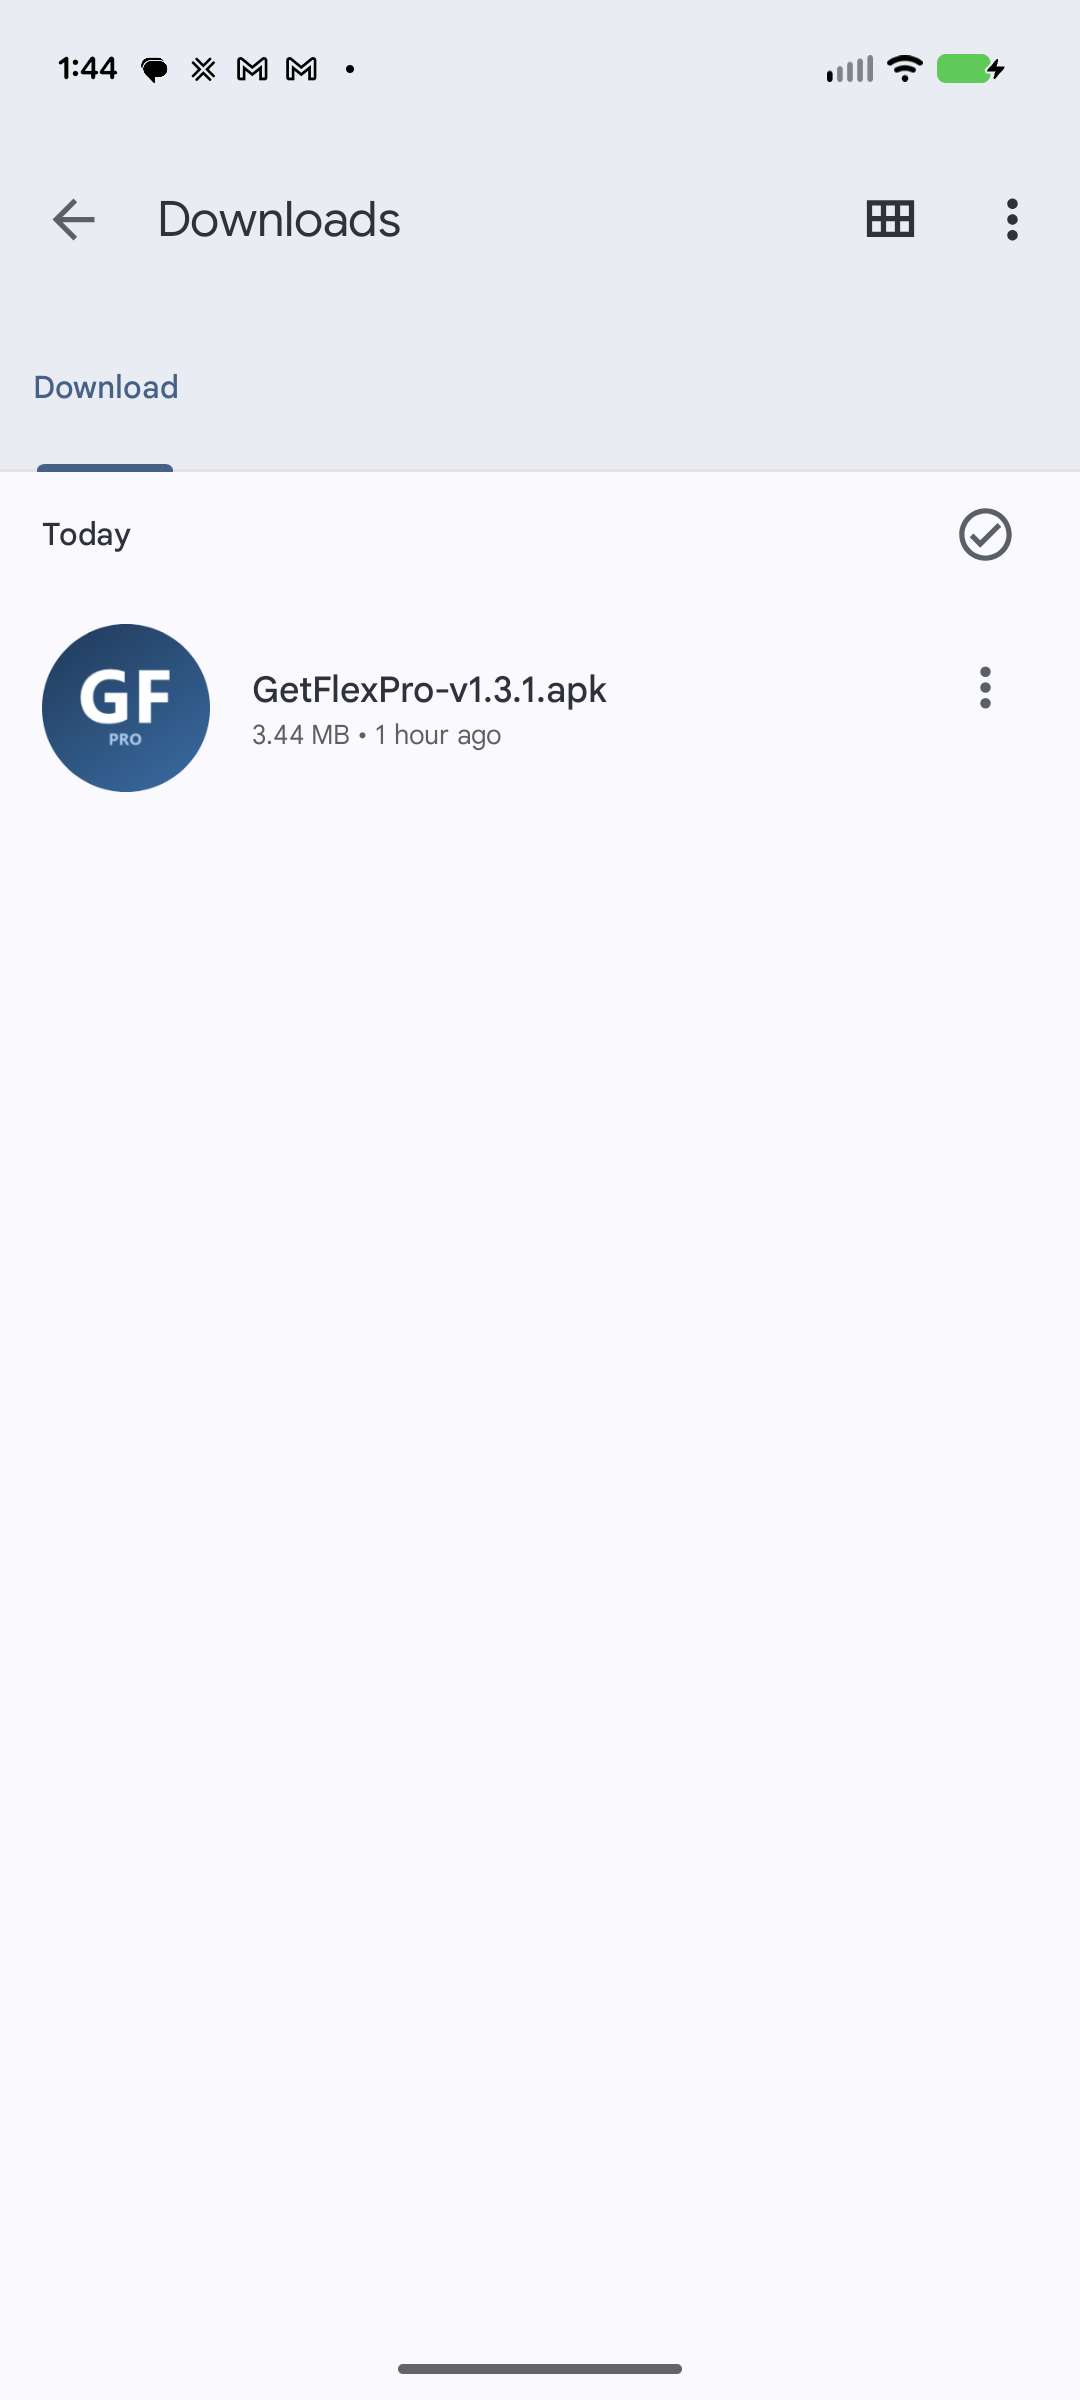
Open the Files app on your phone and go to Downloads.

Step 3
Find the GetFlexPro APK you just downloaded and tap it to open.
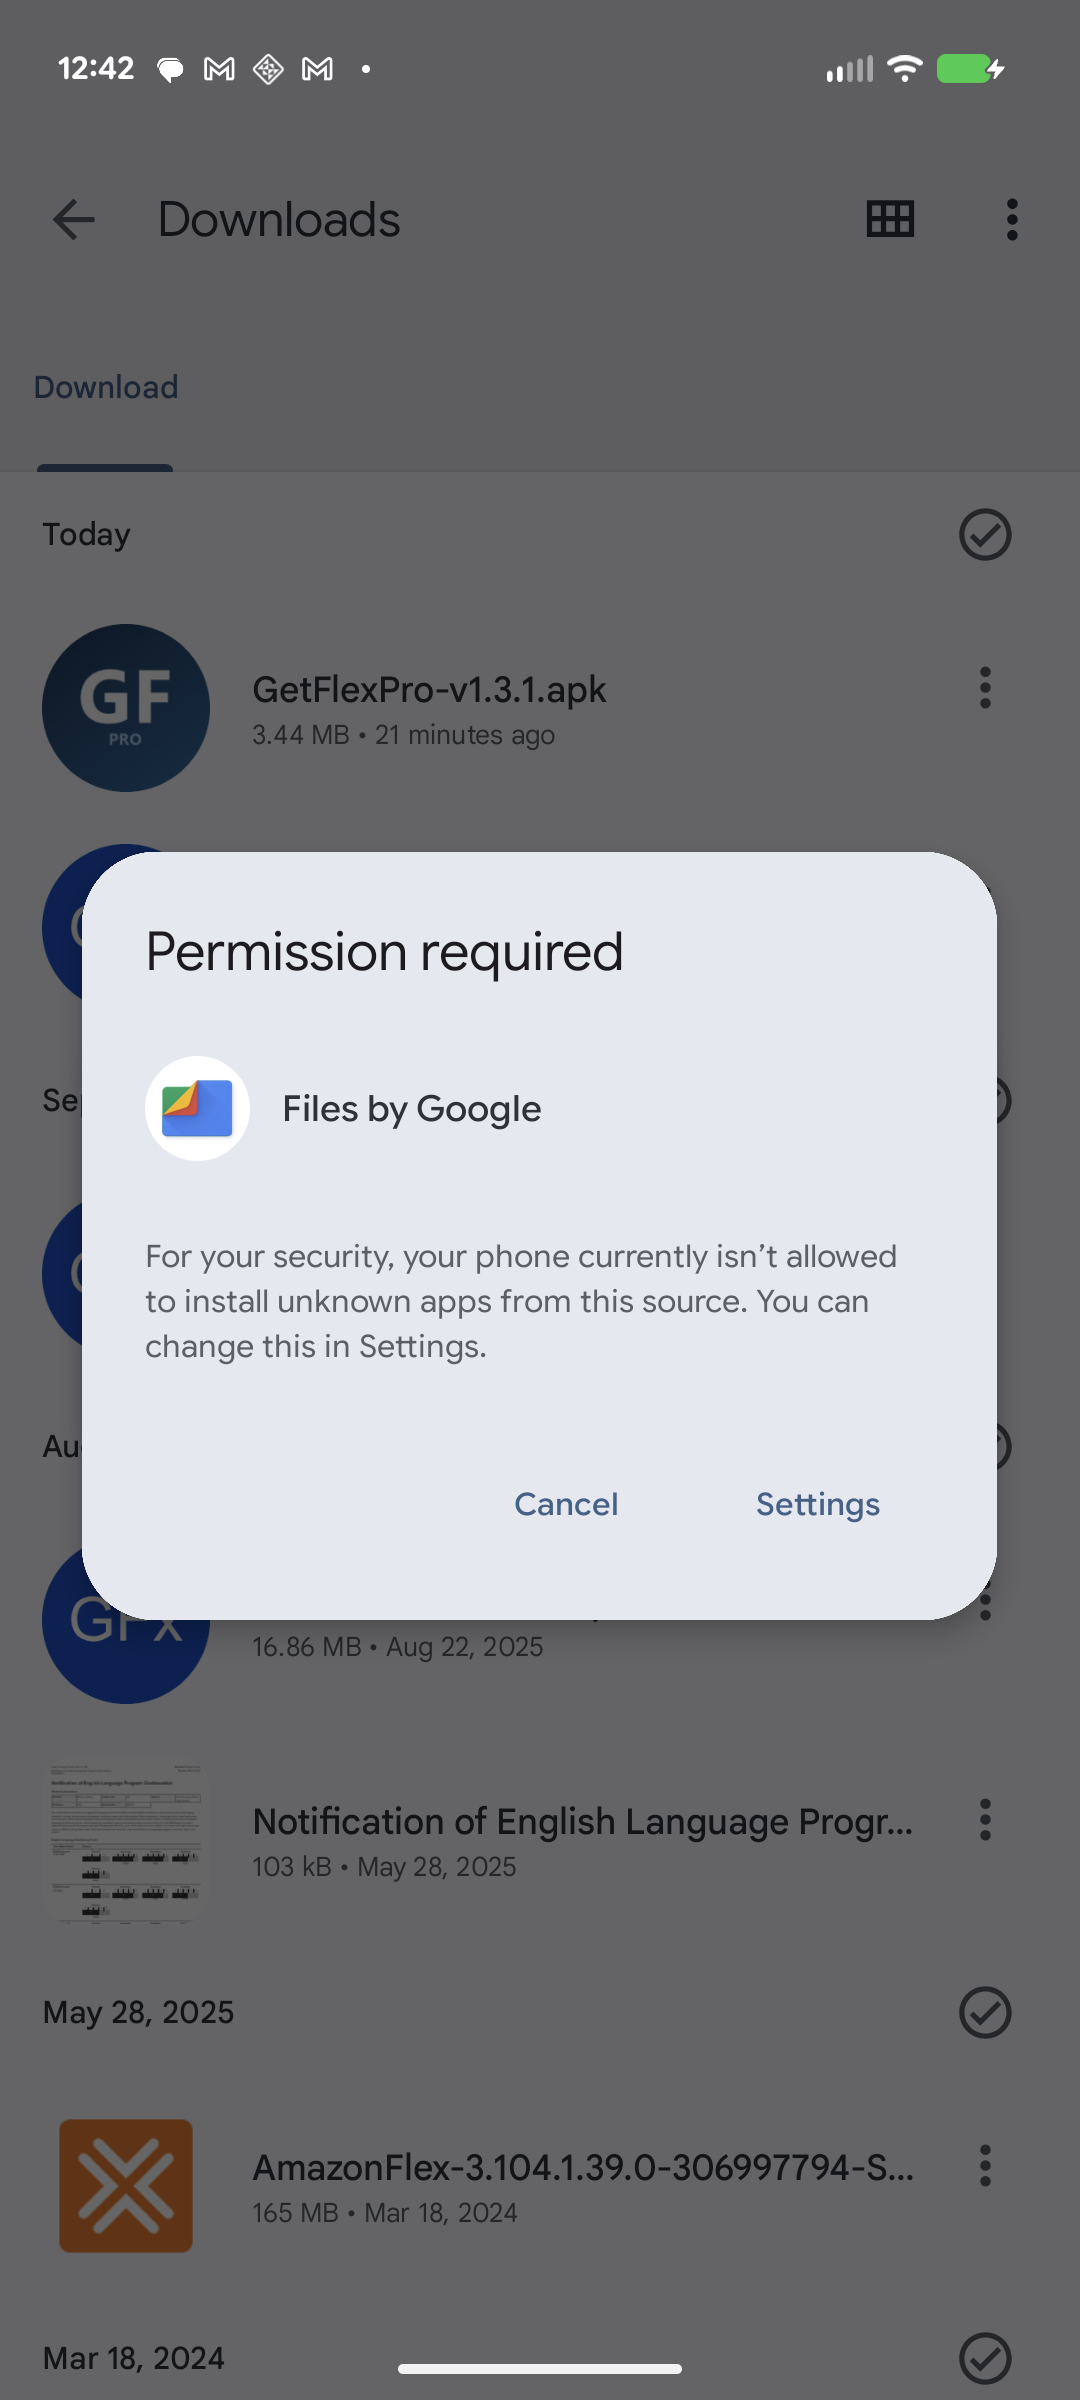
Step 4
Android shows “Permission required” (your phone isn’t allowed to install apps from this source yet). Tap Settings.
Step 5
This opens the Install unknown apps screen for the app you’re installing from (e.g. Files).
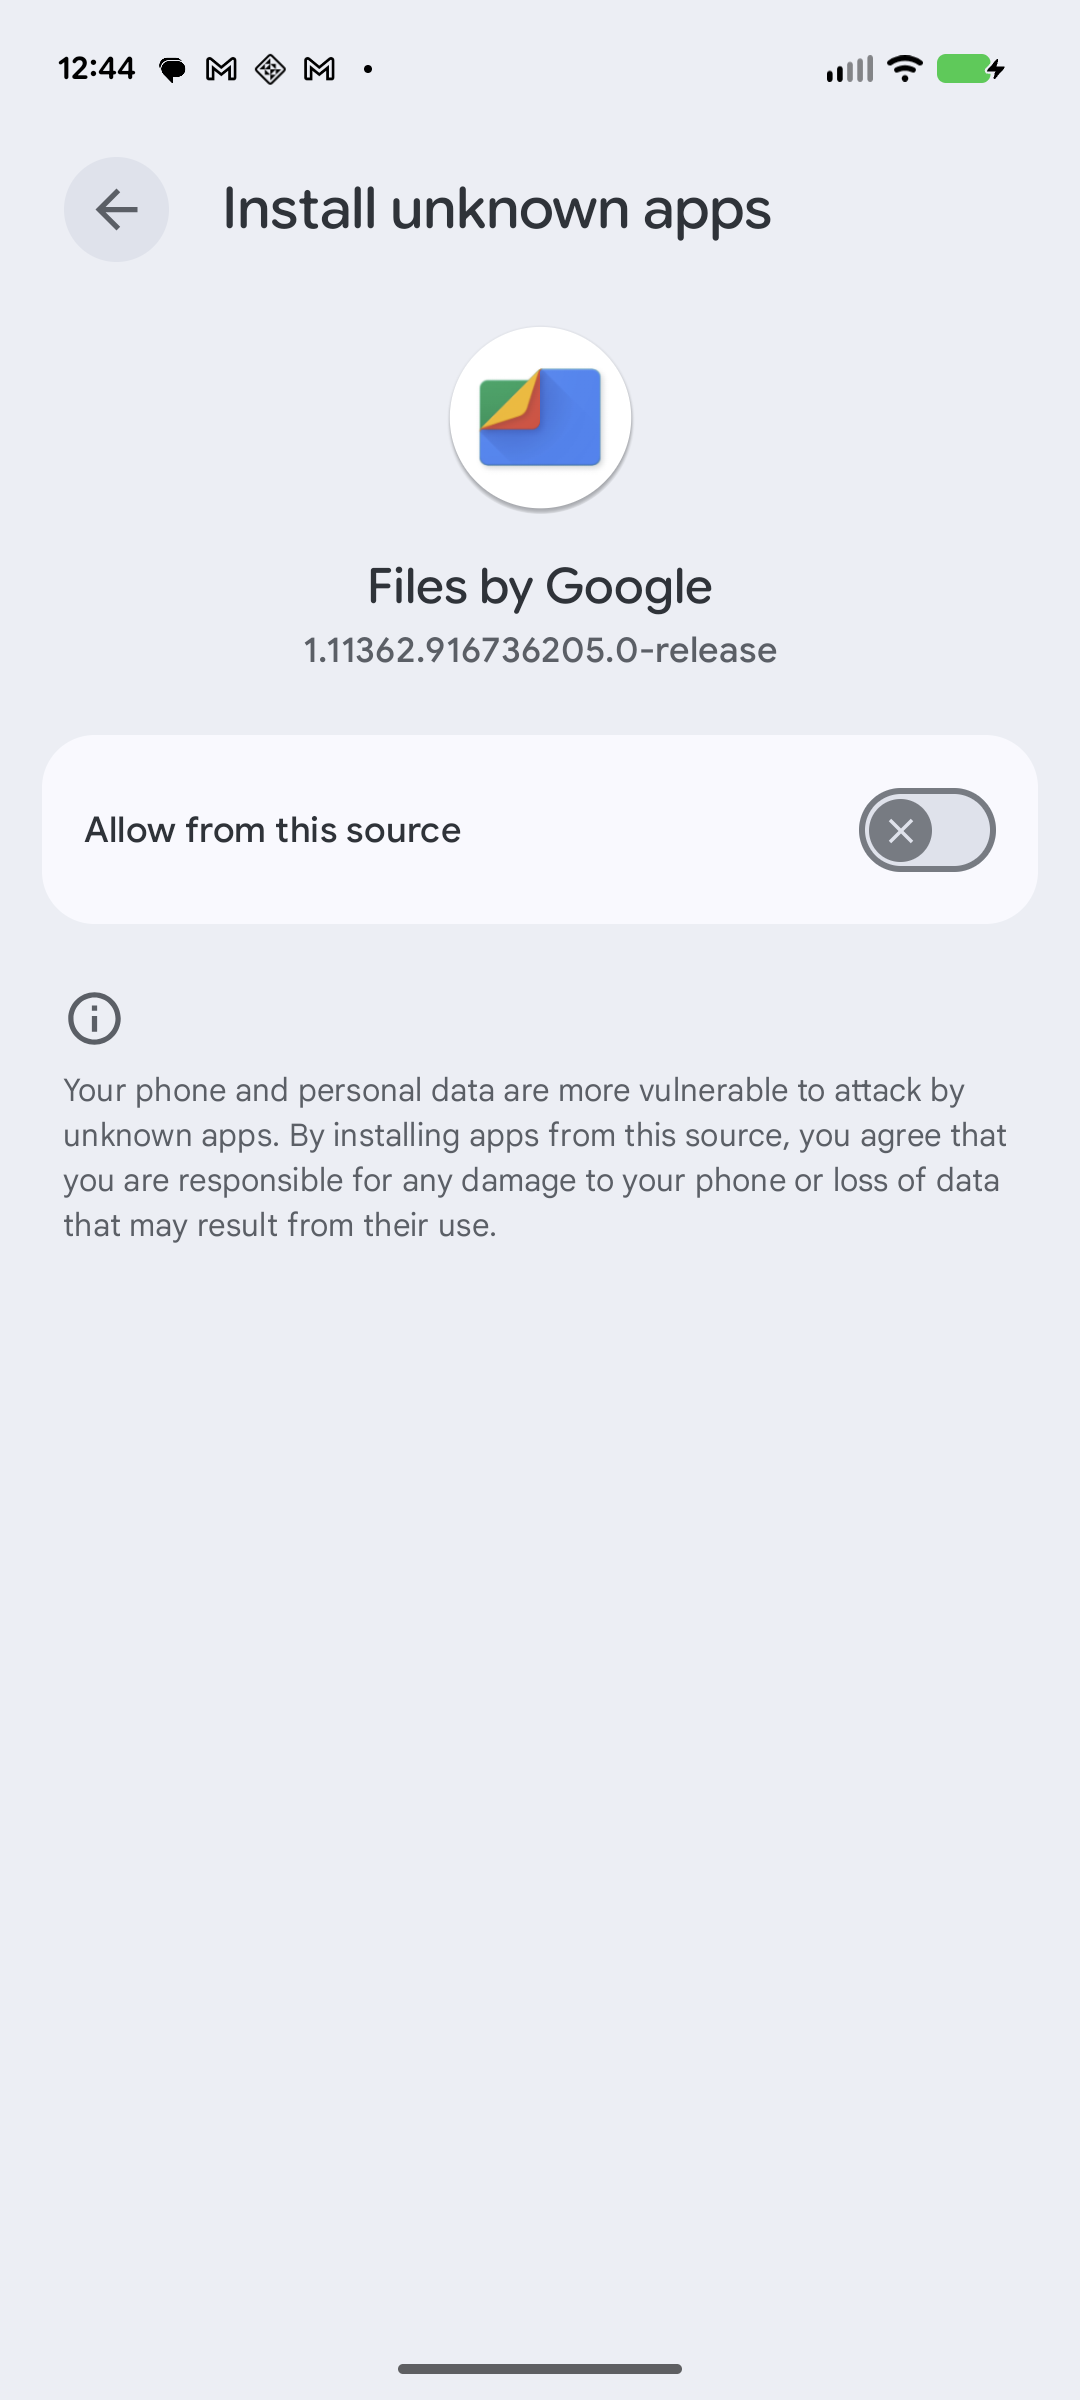
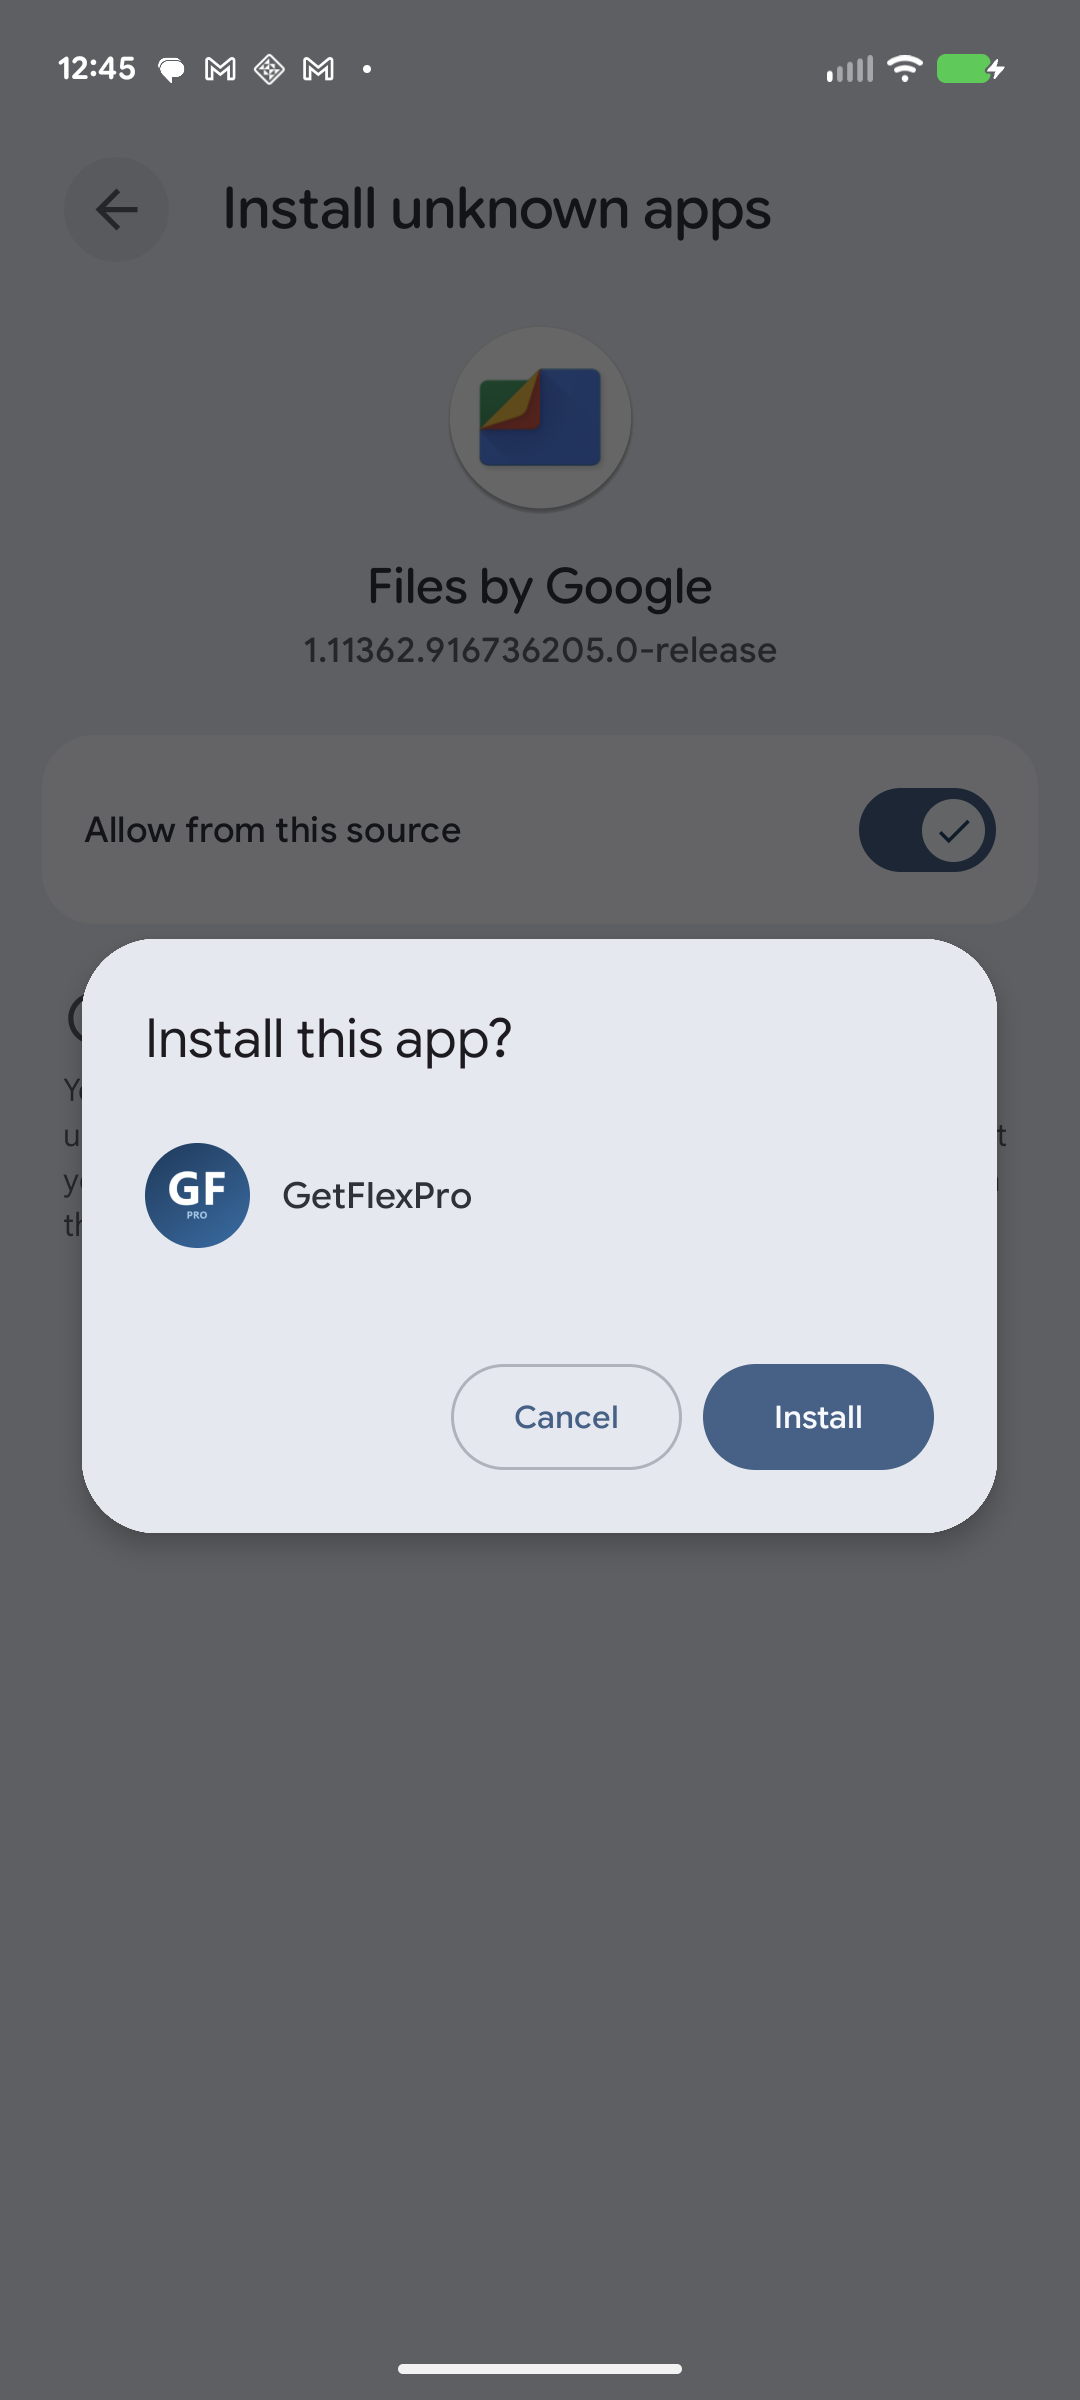
Step 6
Turn on Allow from this source, go back, and when asked to install, tap Install.
Step 7
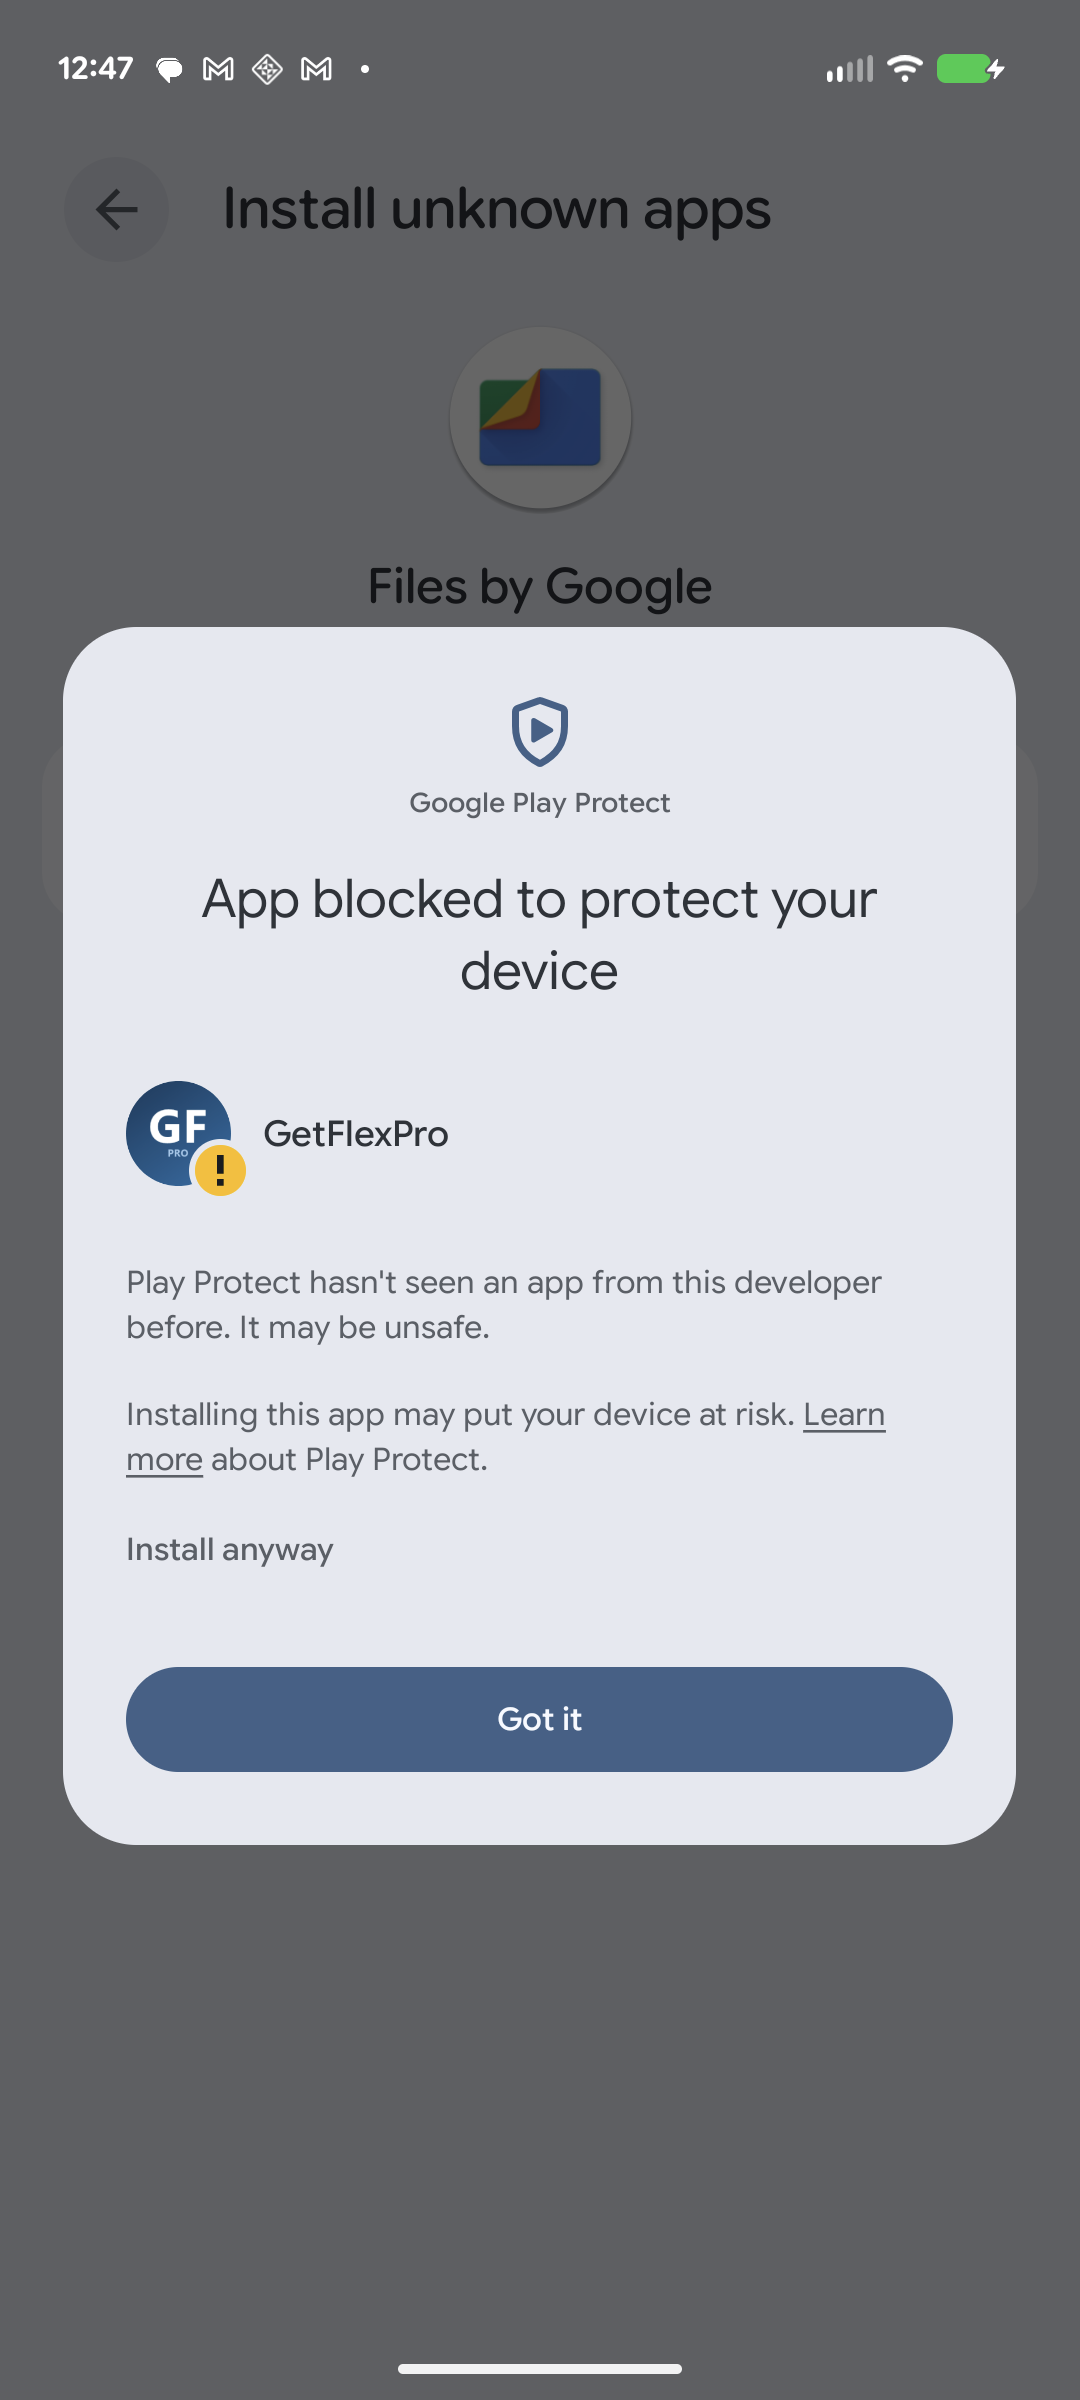
Play Protect may say “App blocked to protect your device” — it just hasn’t seen this developer before, which is normal for new apps. Tap More details.

Step 8
Tap Install anyway to continue. (Do not tap “Got it” — that cancels the install.)
Part 2 — Create your account & sign in
Step 9
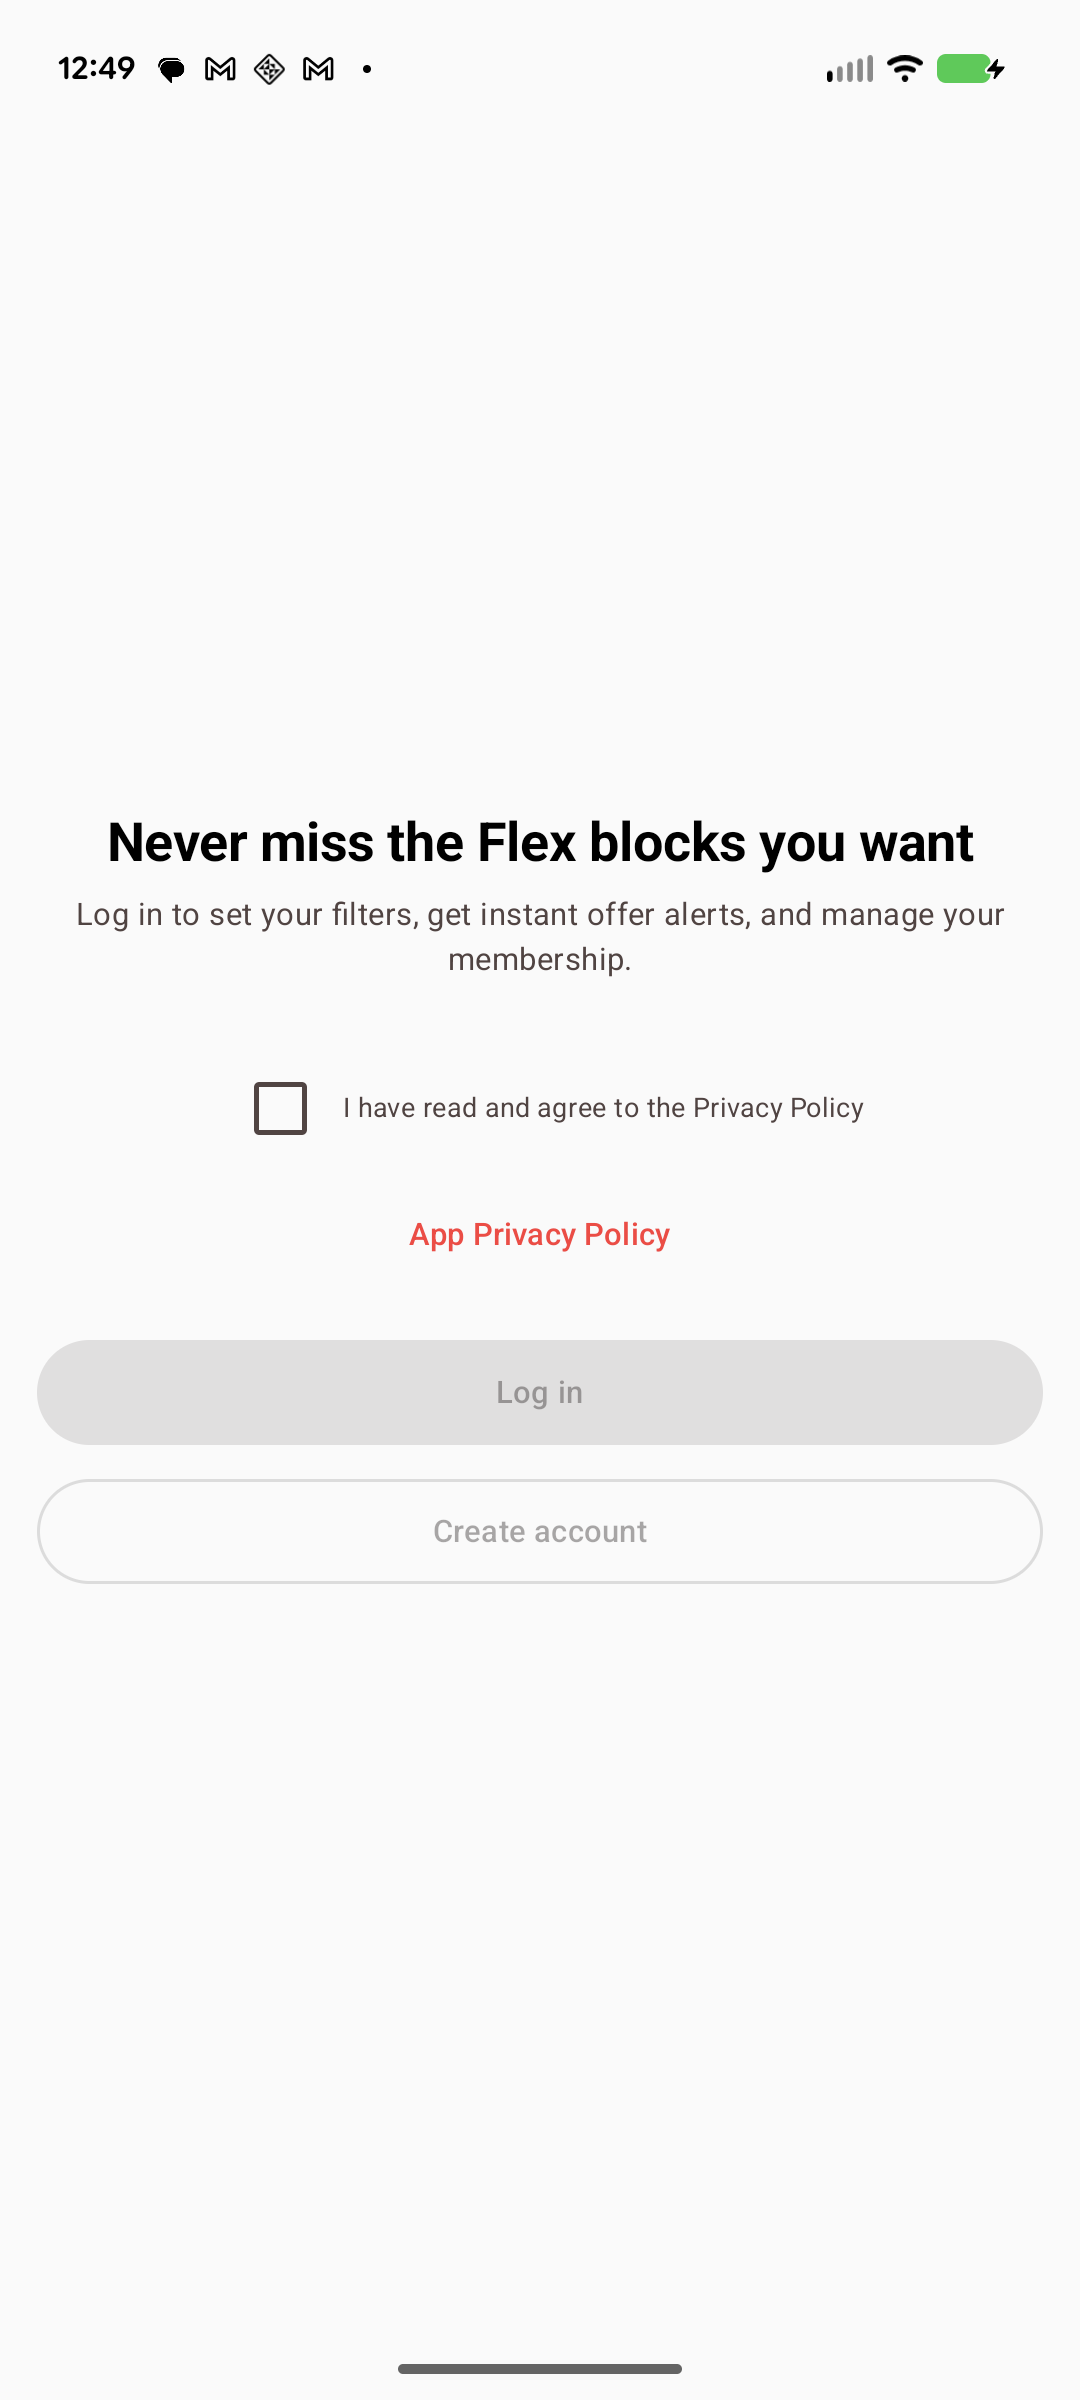
Once installed, open GetFlexPro. You’ll see the sign-in screen.
Step 10
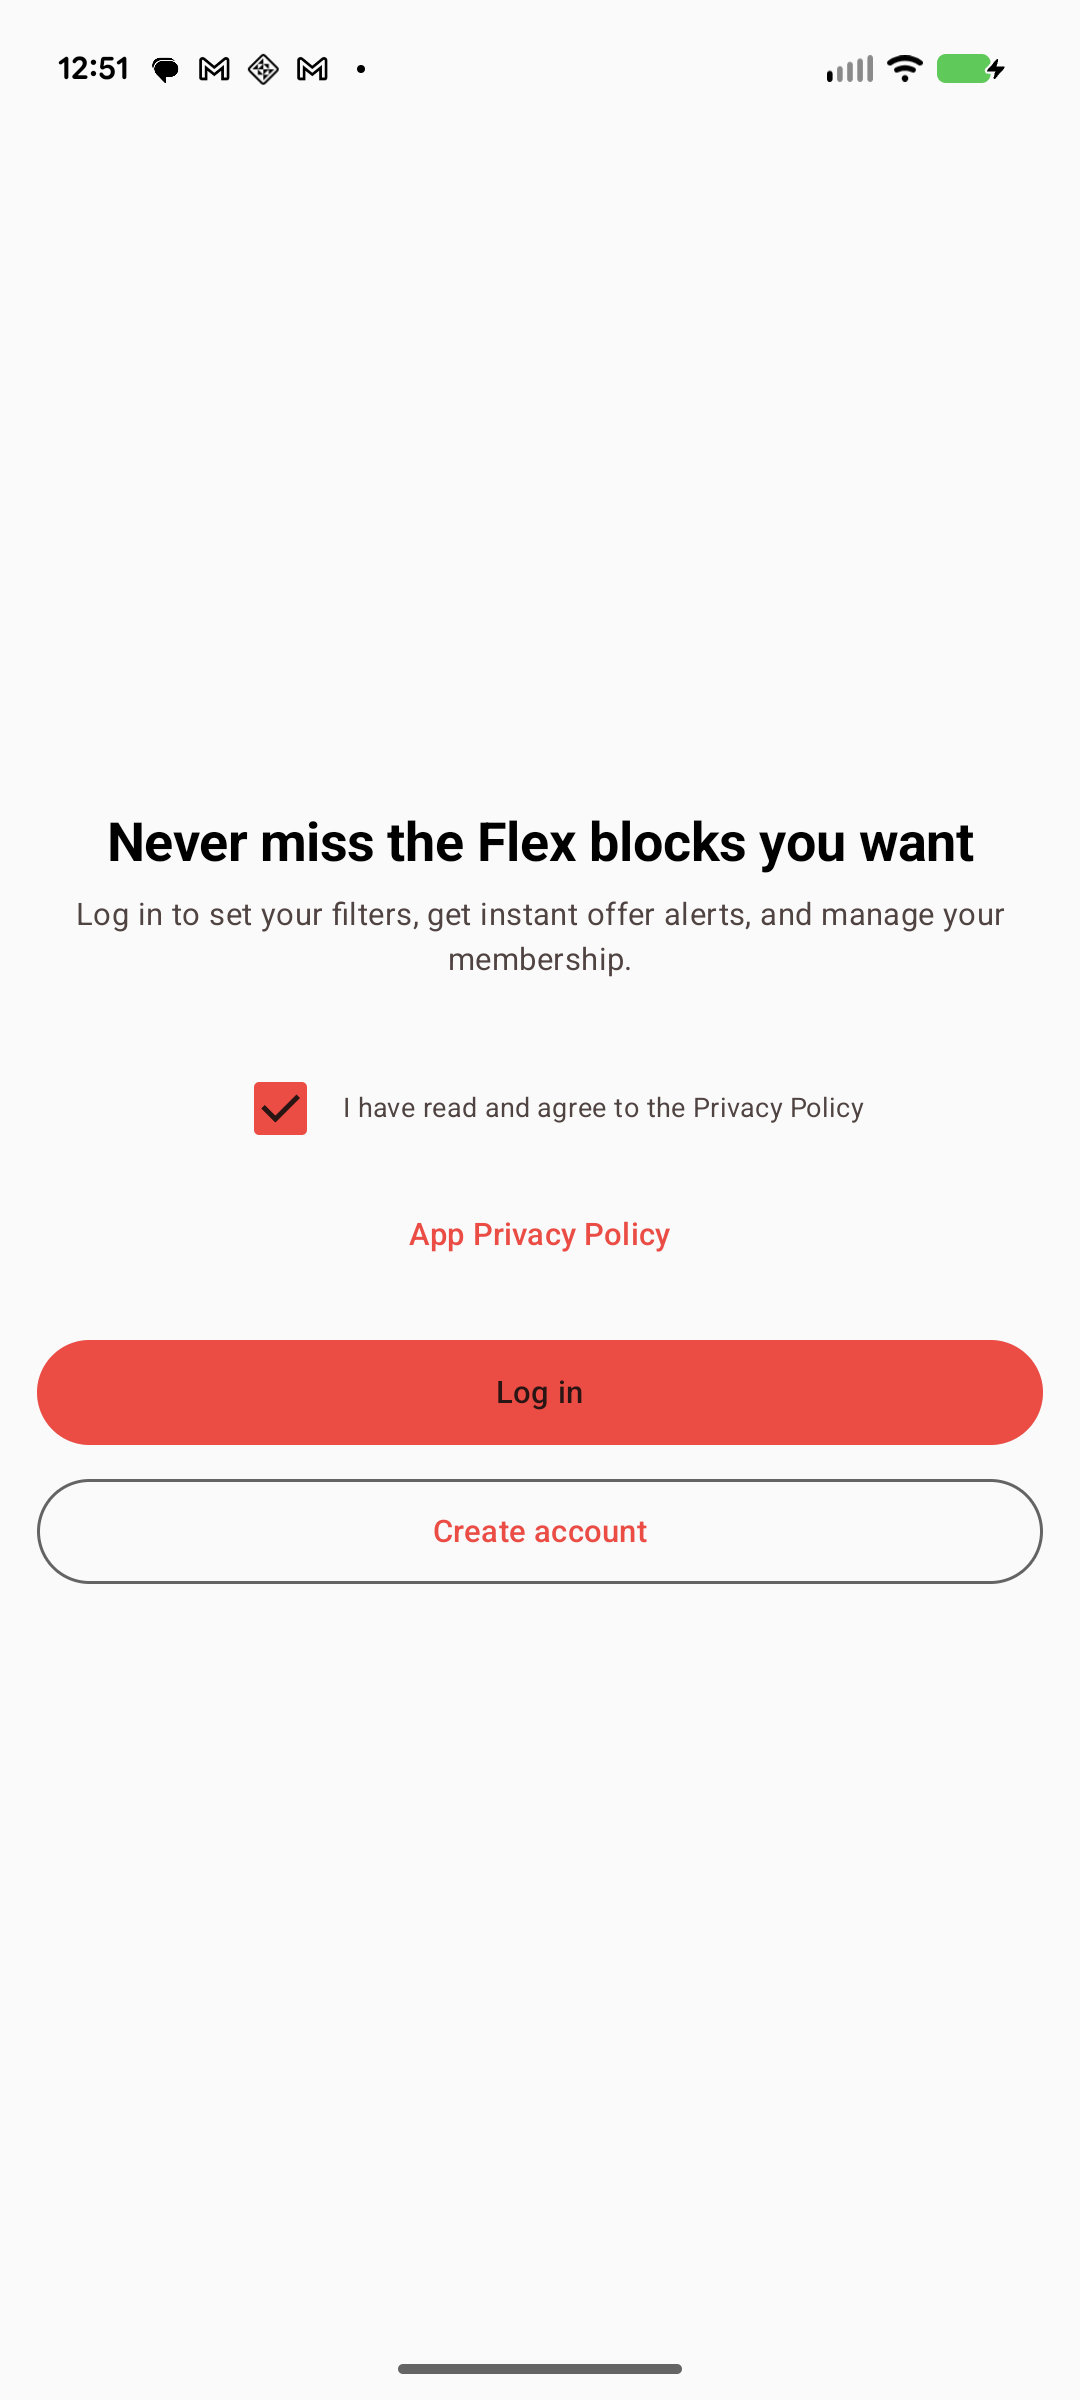
Tick “I have read and agree to the Privacy Policy”, then tap Create account. (Already have an account? Tap Log in instead.)
Step 11
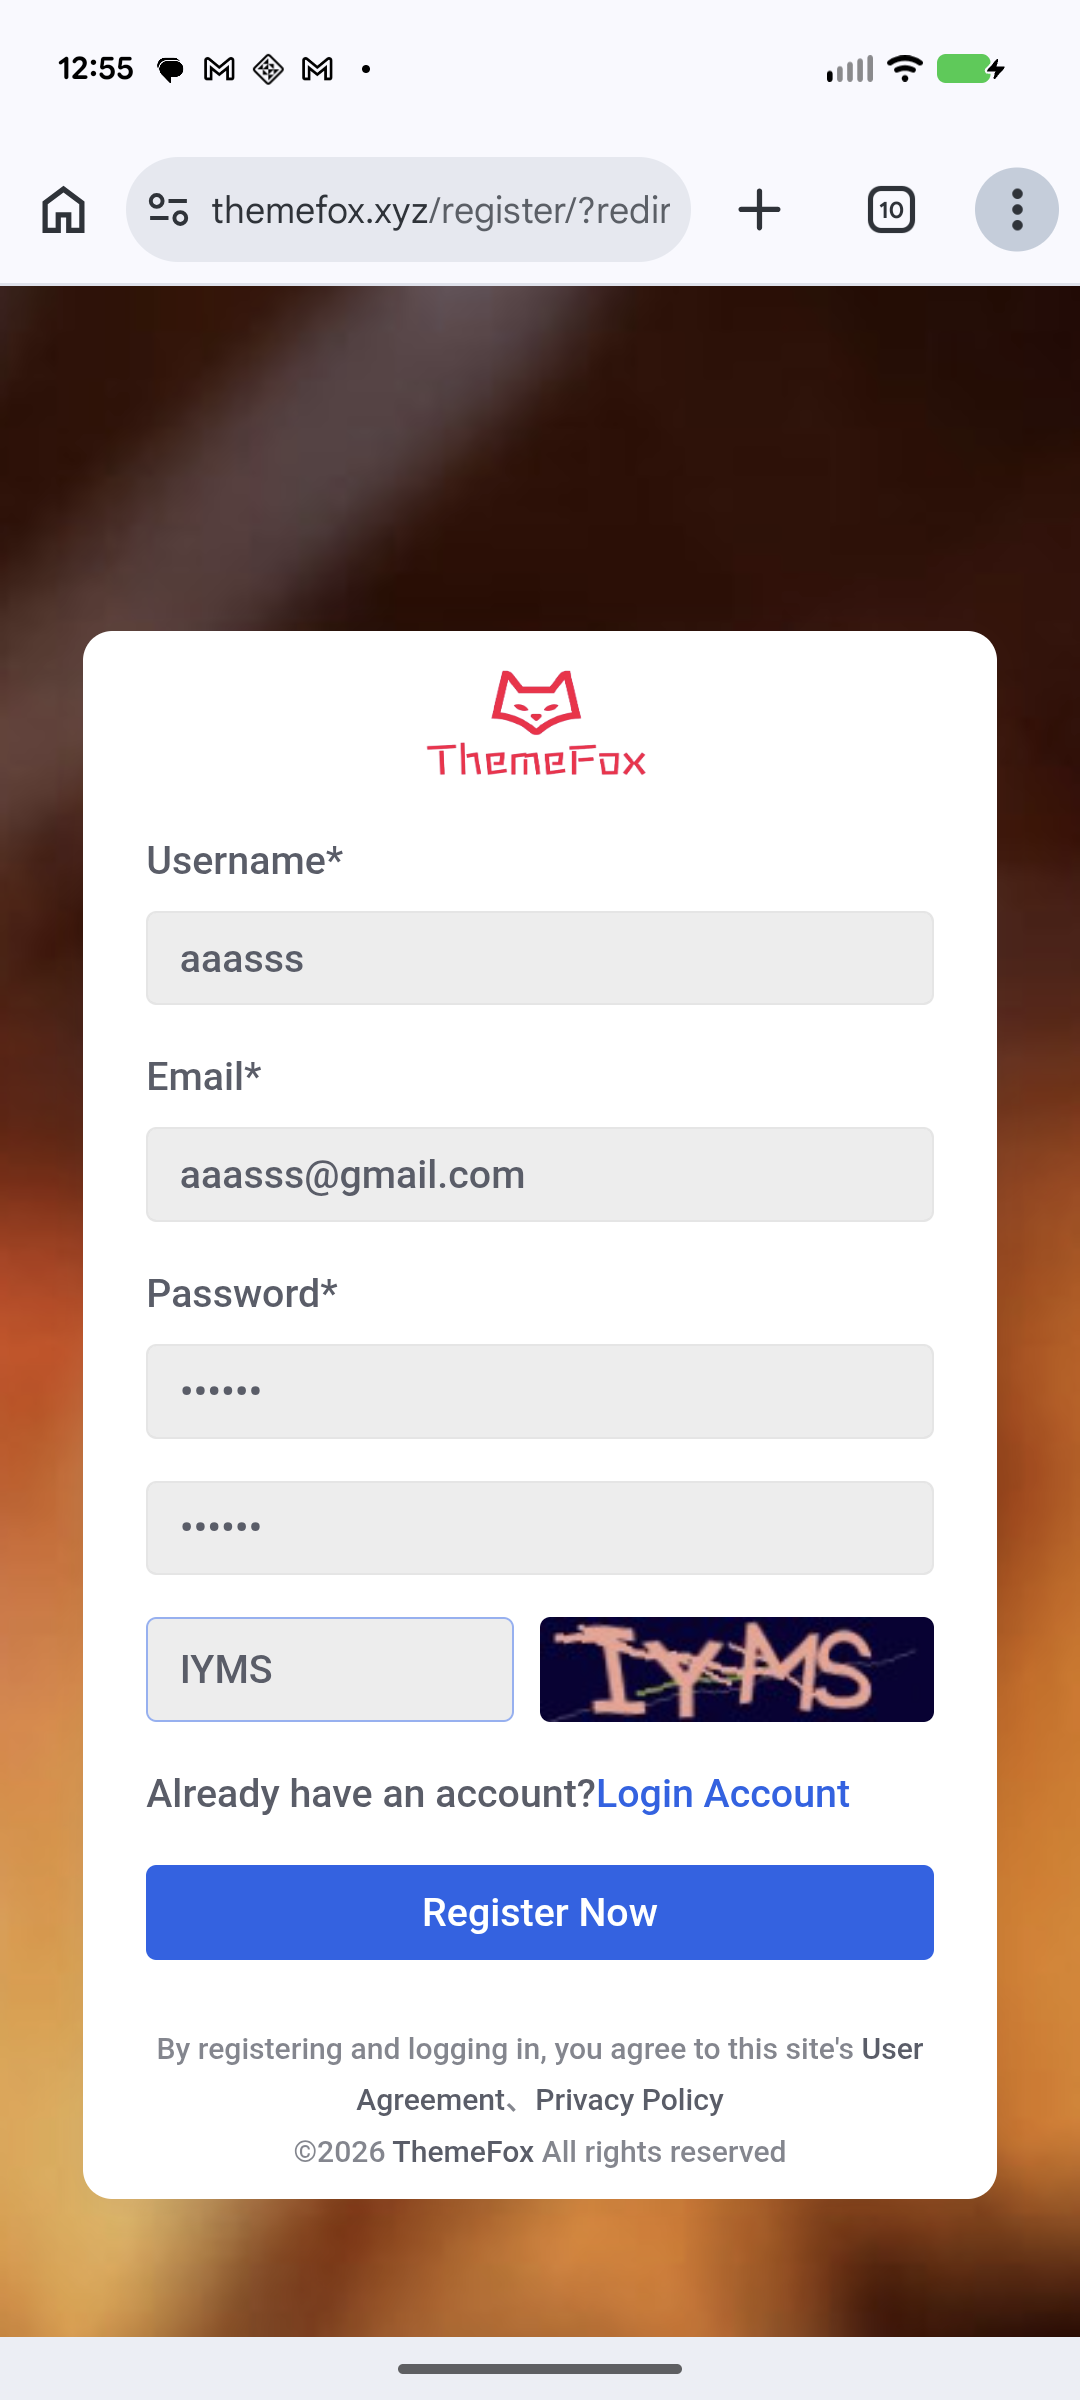
The website registration page opens.
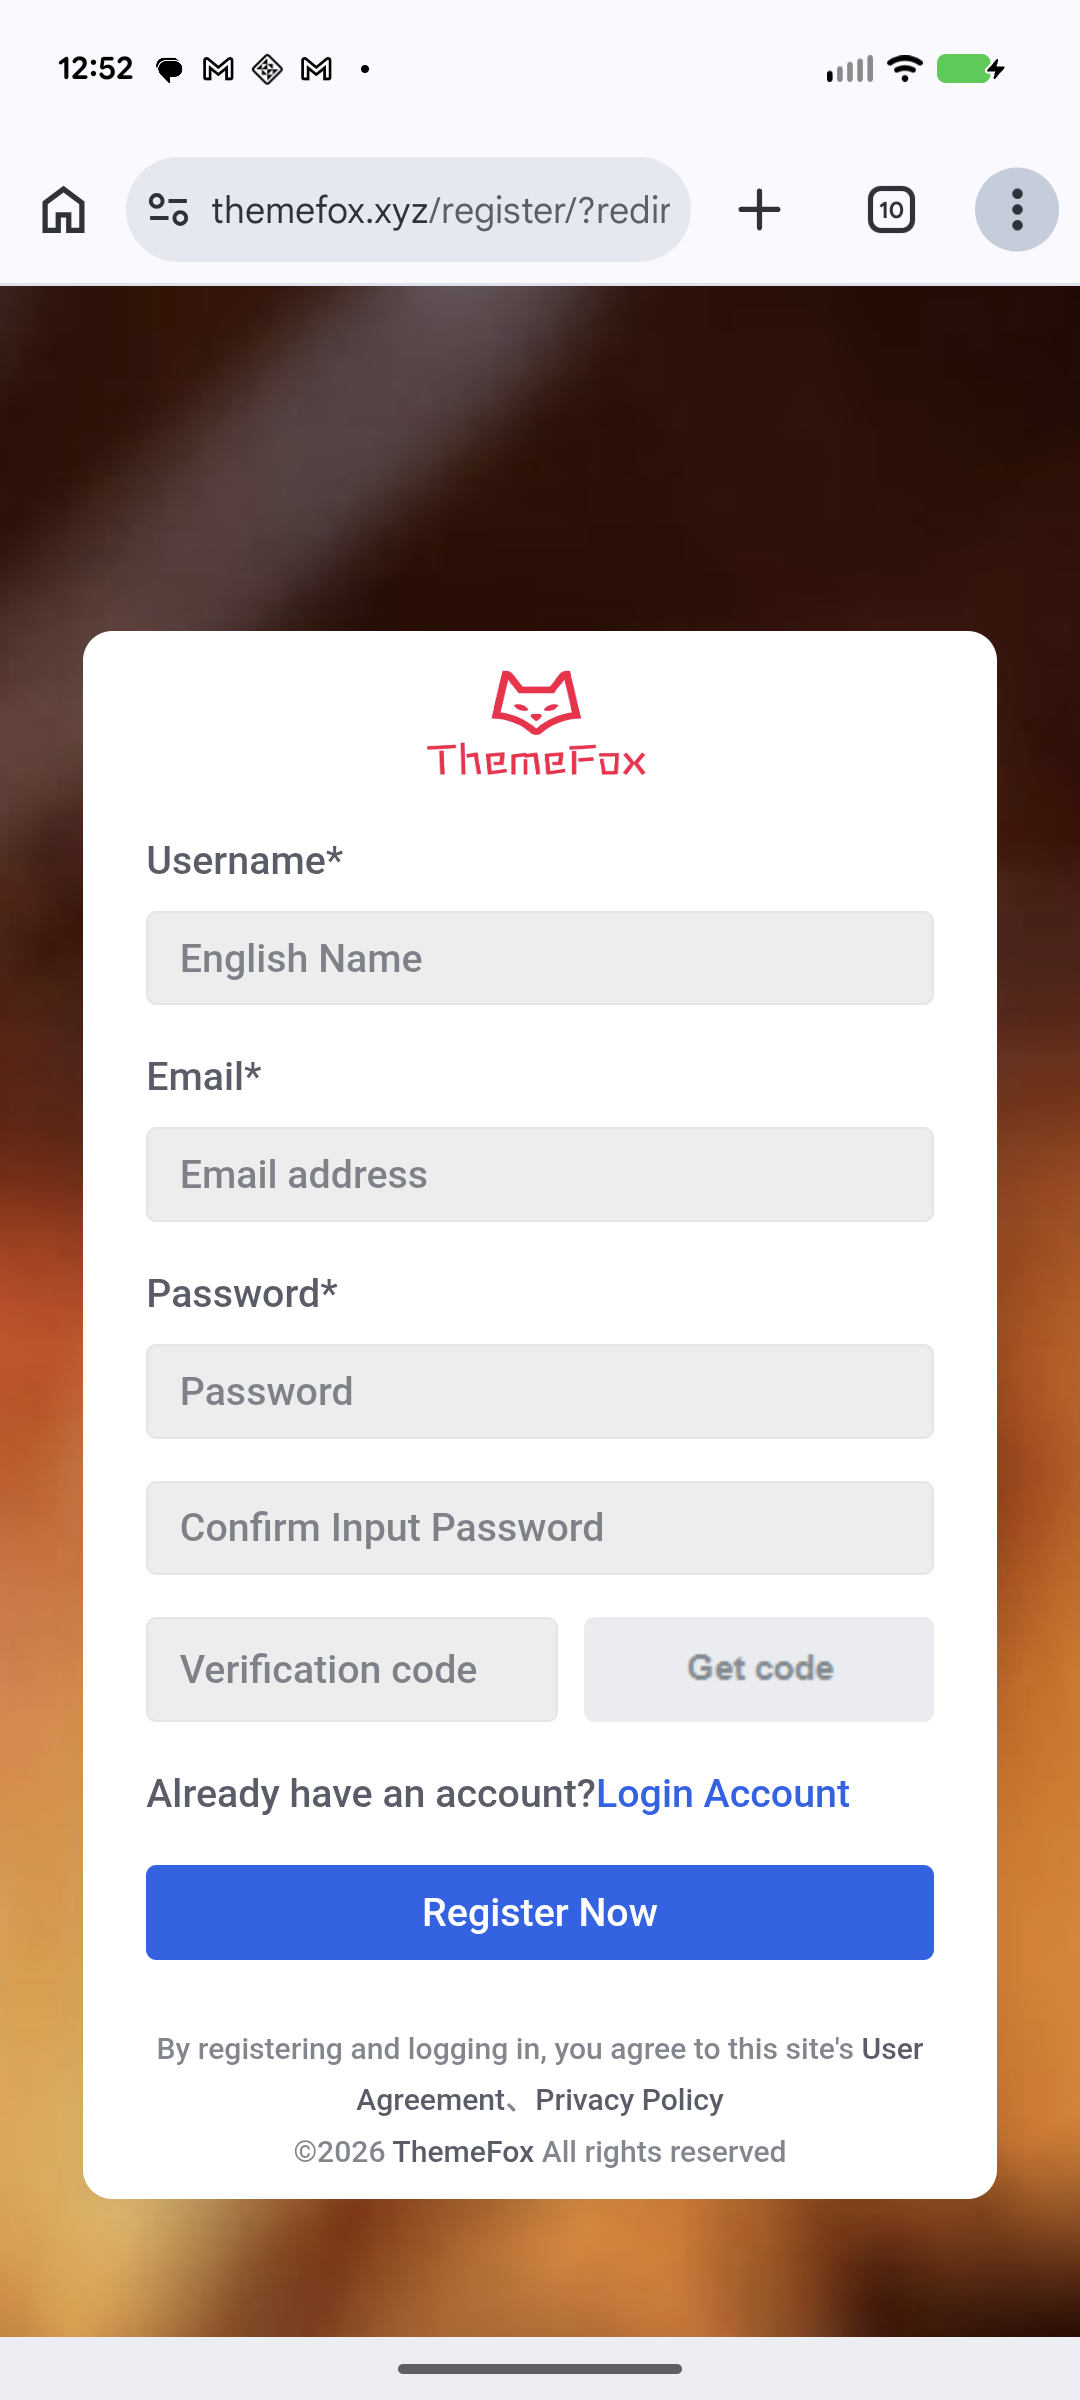
Step 12
Enter your username, email, password and the verification code, then tap Register Now.
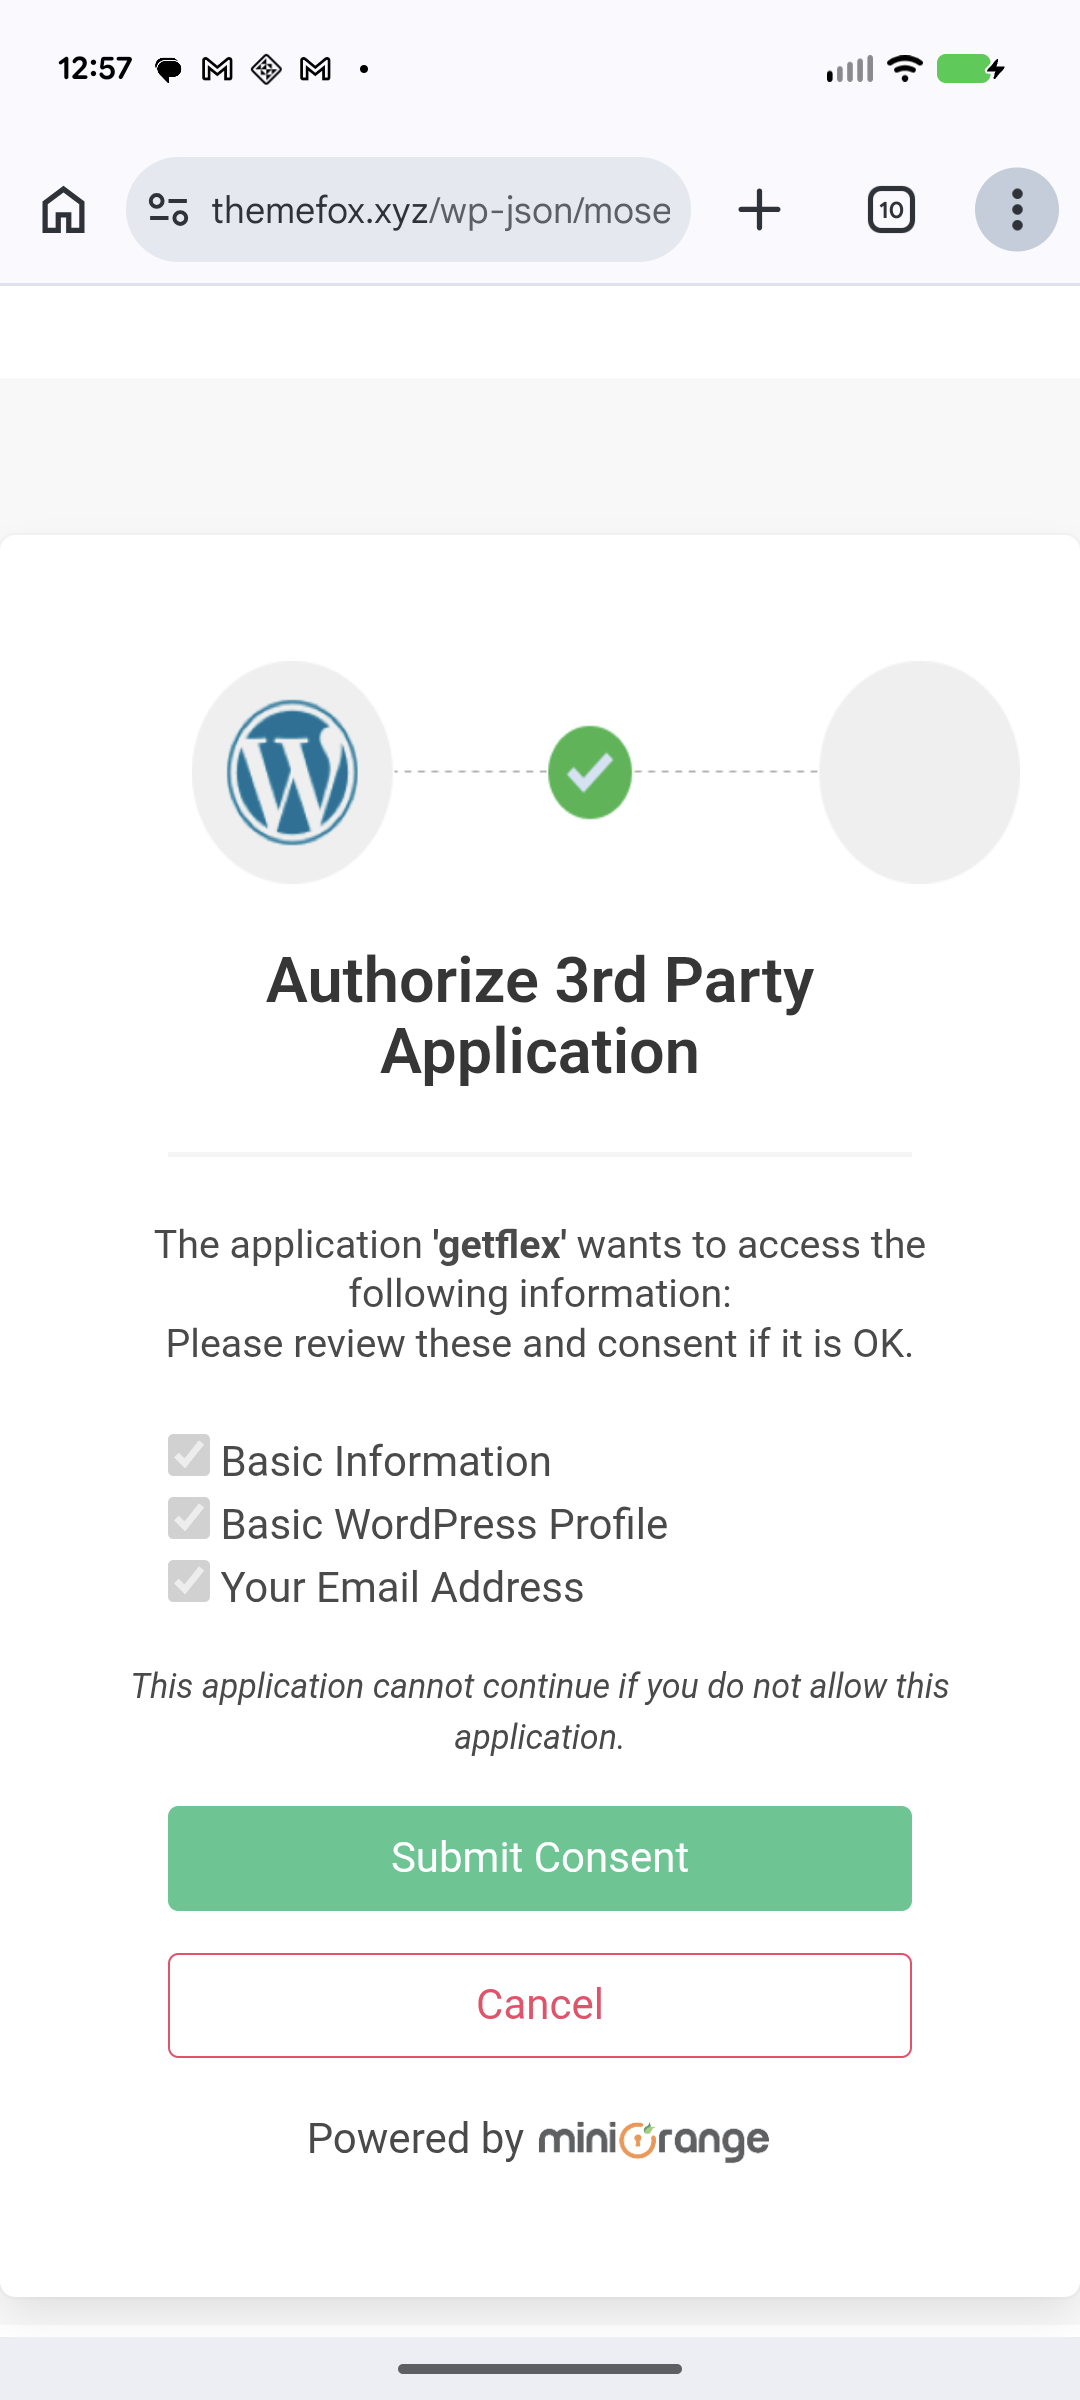
Step 13
After registering you’re taken to the authorization page. Tap Submit Consent.
Step 14
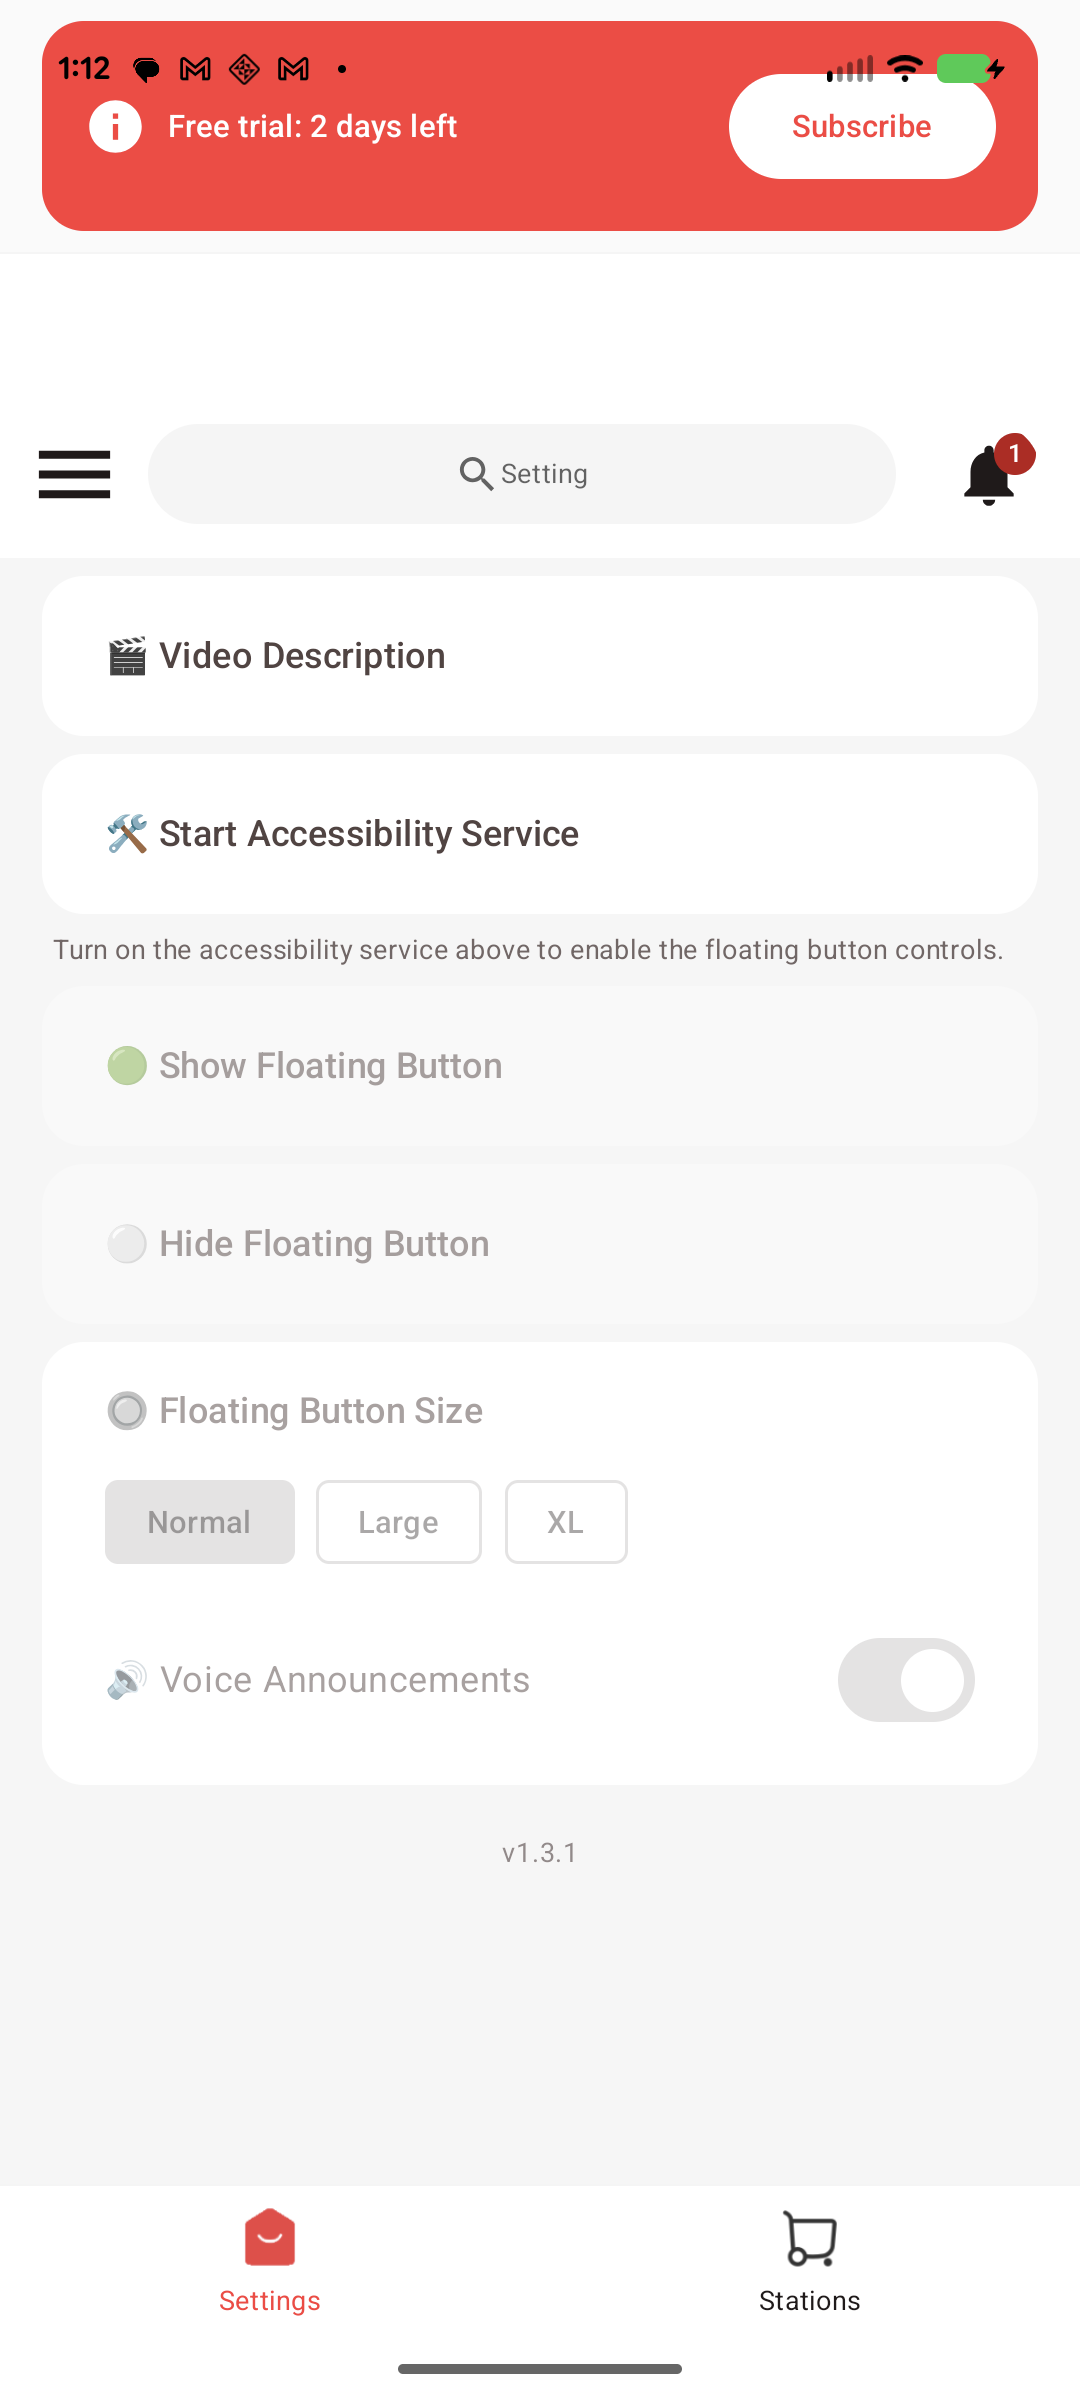
You’re automatically returned to the GetFlexPro home screen, signed in. Tap Start Accessibility Service.

Part 3 — Turn on Accessibility (past Android’s “restricted setting”)
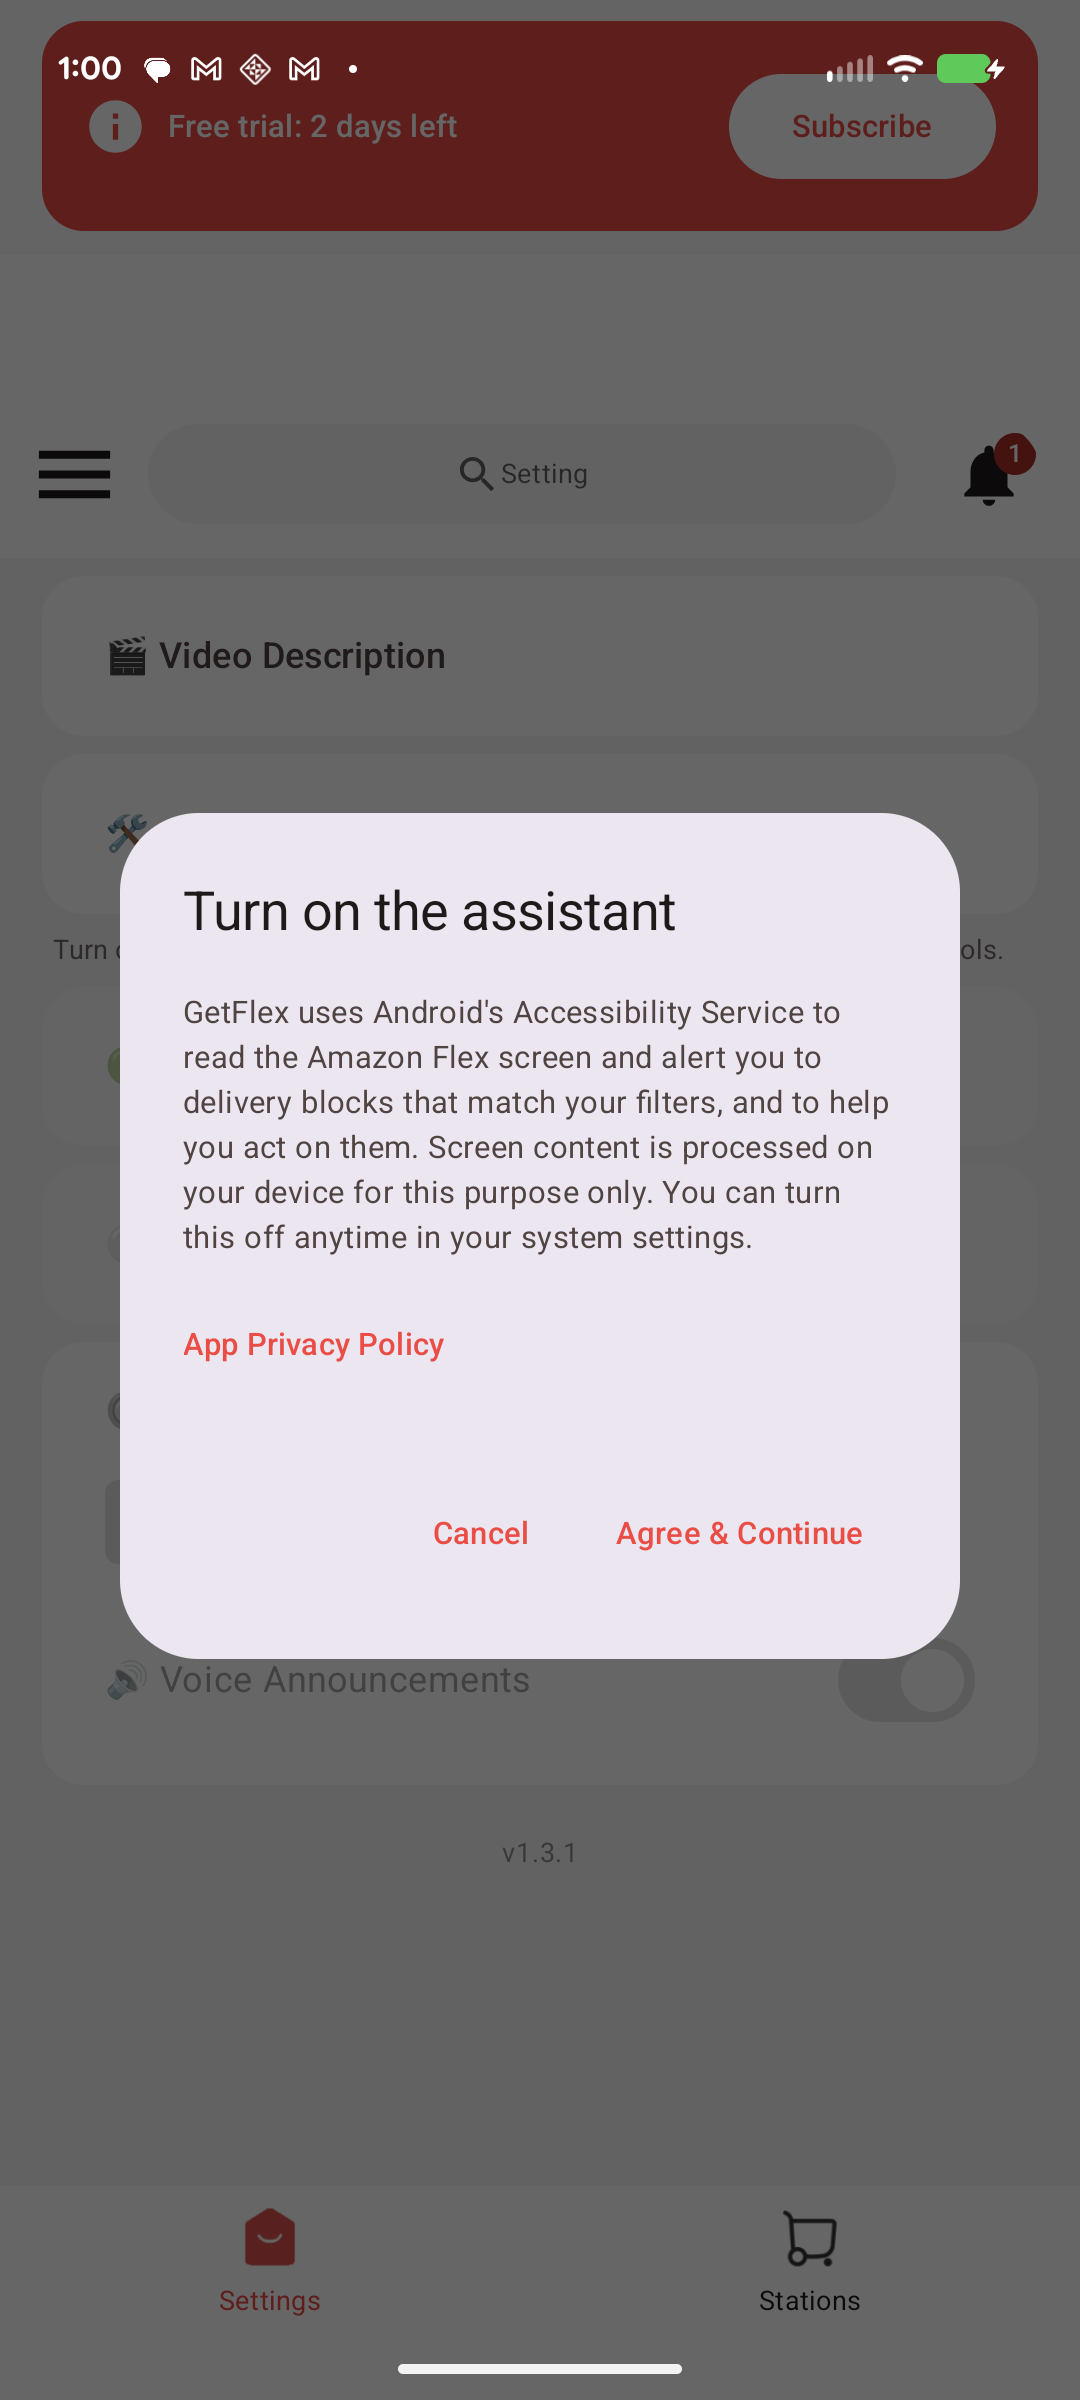
Step 15
GetFlexPro shows a short disclosure of how it uses the Accessibility Service. Tap Agree & Continue.
Step 16
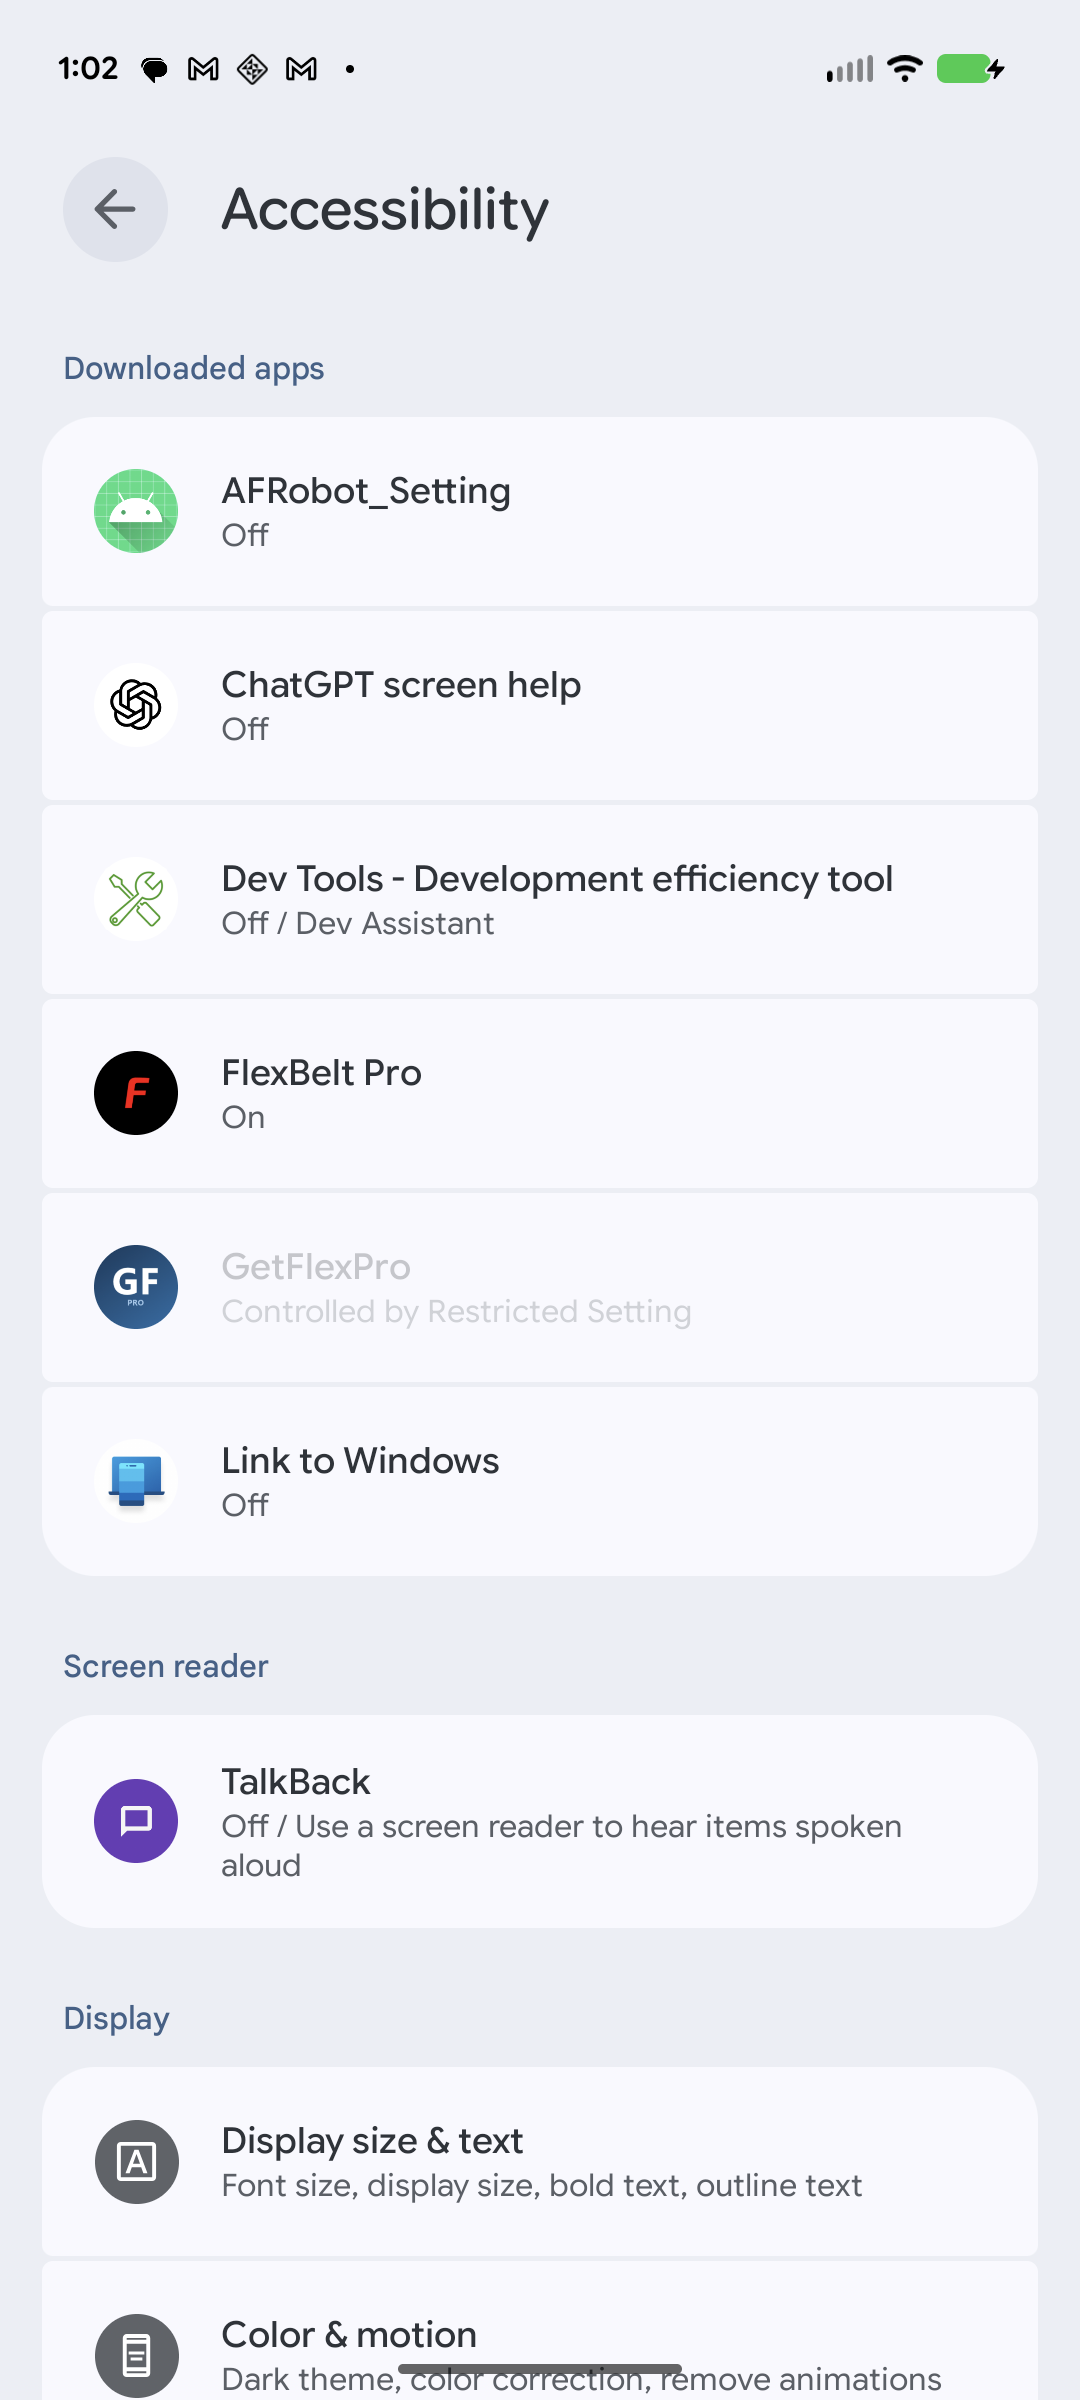
The system Accessibility screen opens. GetFlexPro is greyed out (“Controlled by Restricted Setting”) and can’t be turned on yet — this is normal for apps installed from the web.
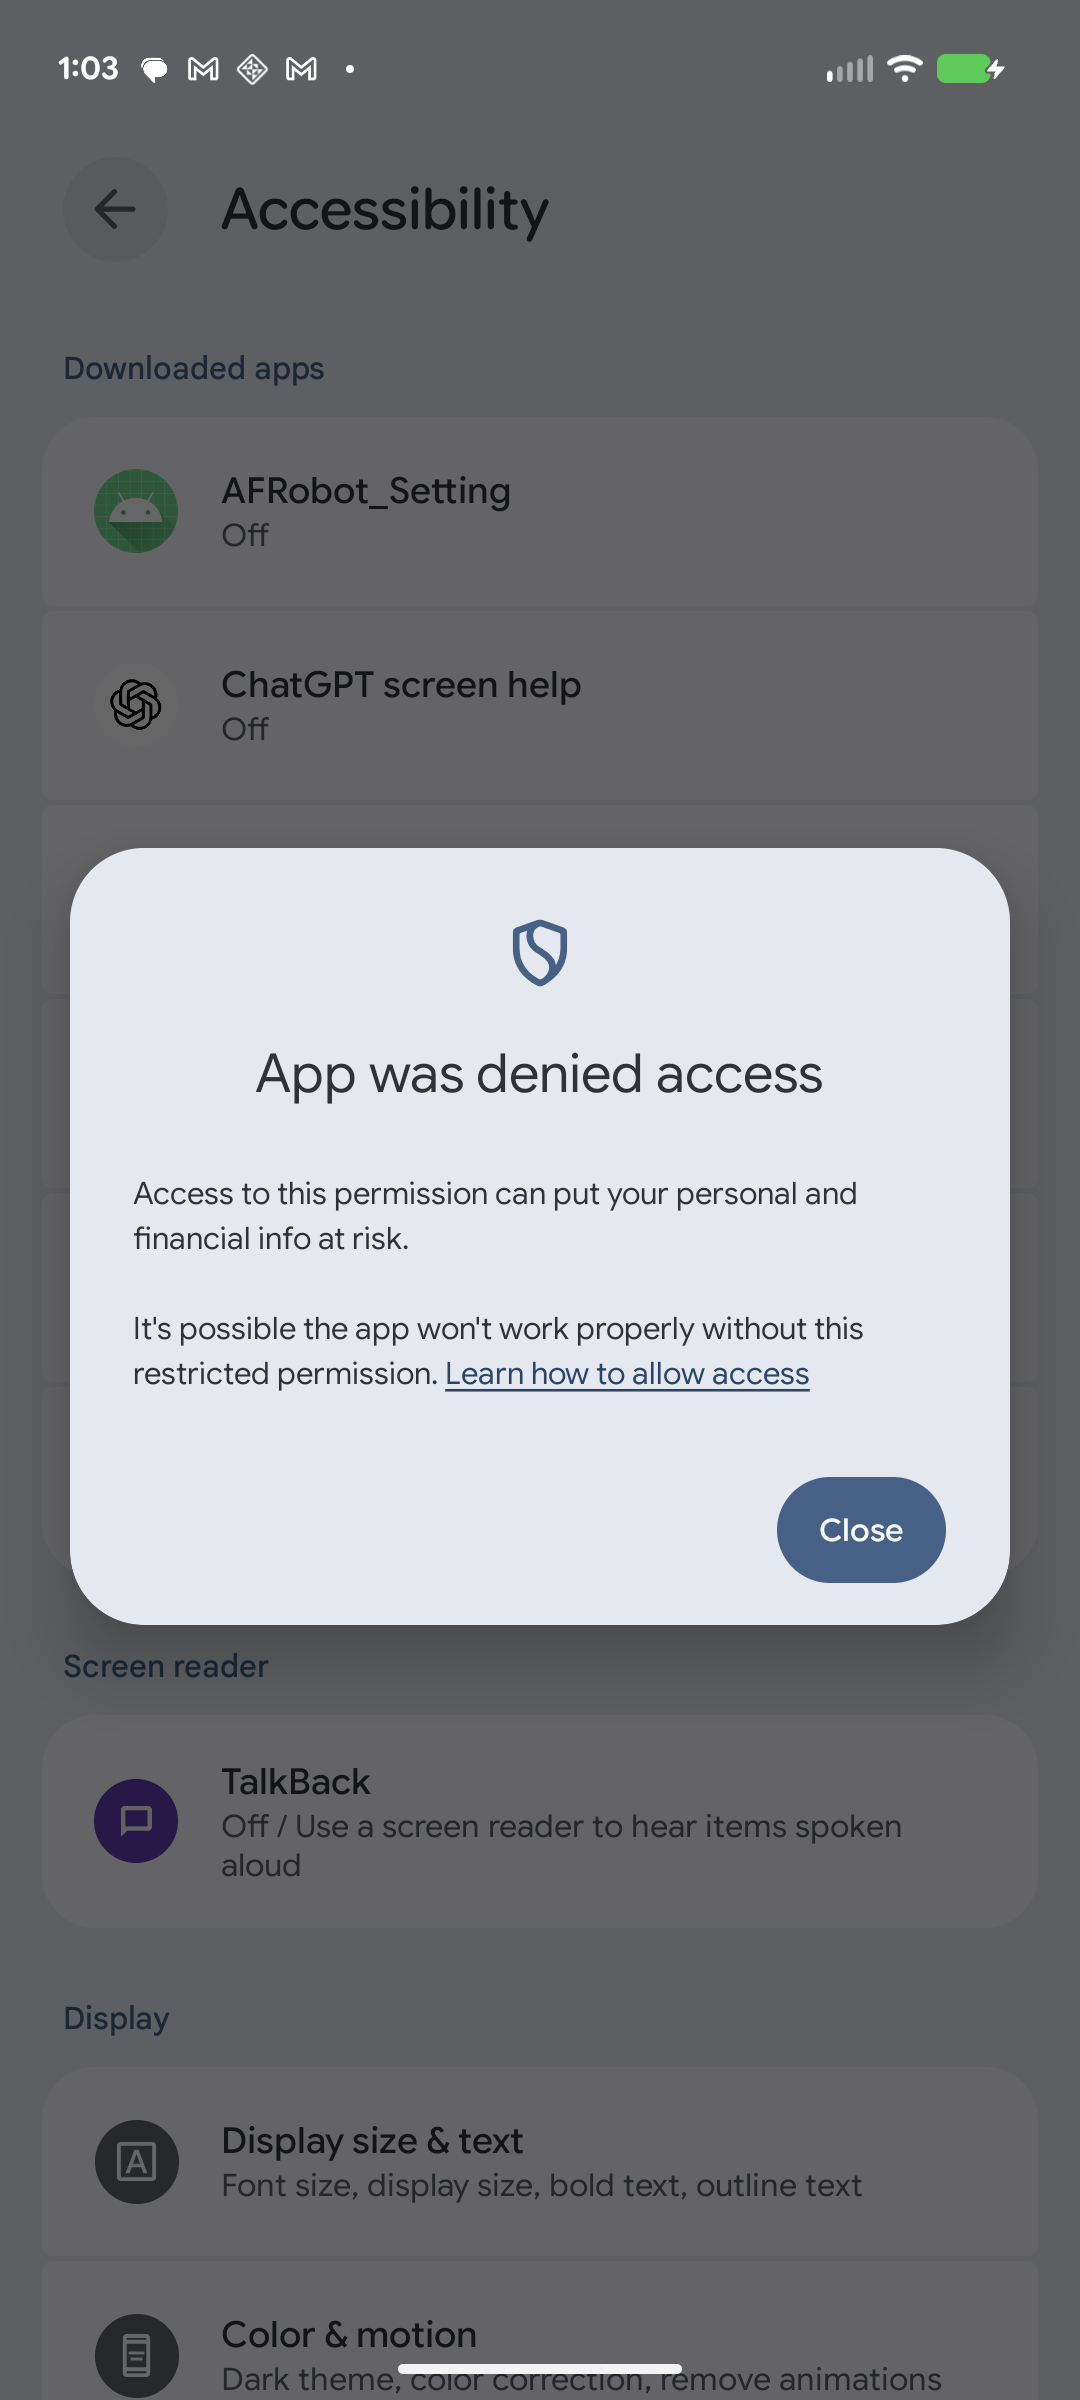
Step 17
Android shows “App was denied access”. Tap Close, then use the back arrow to return to GetFlexPro.
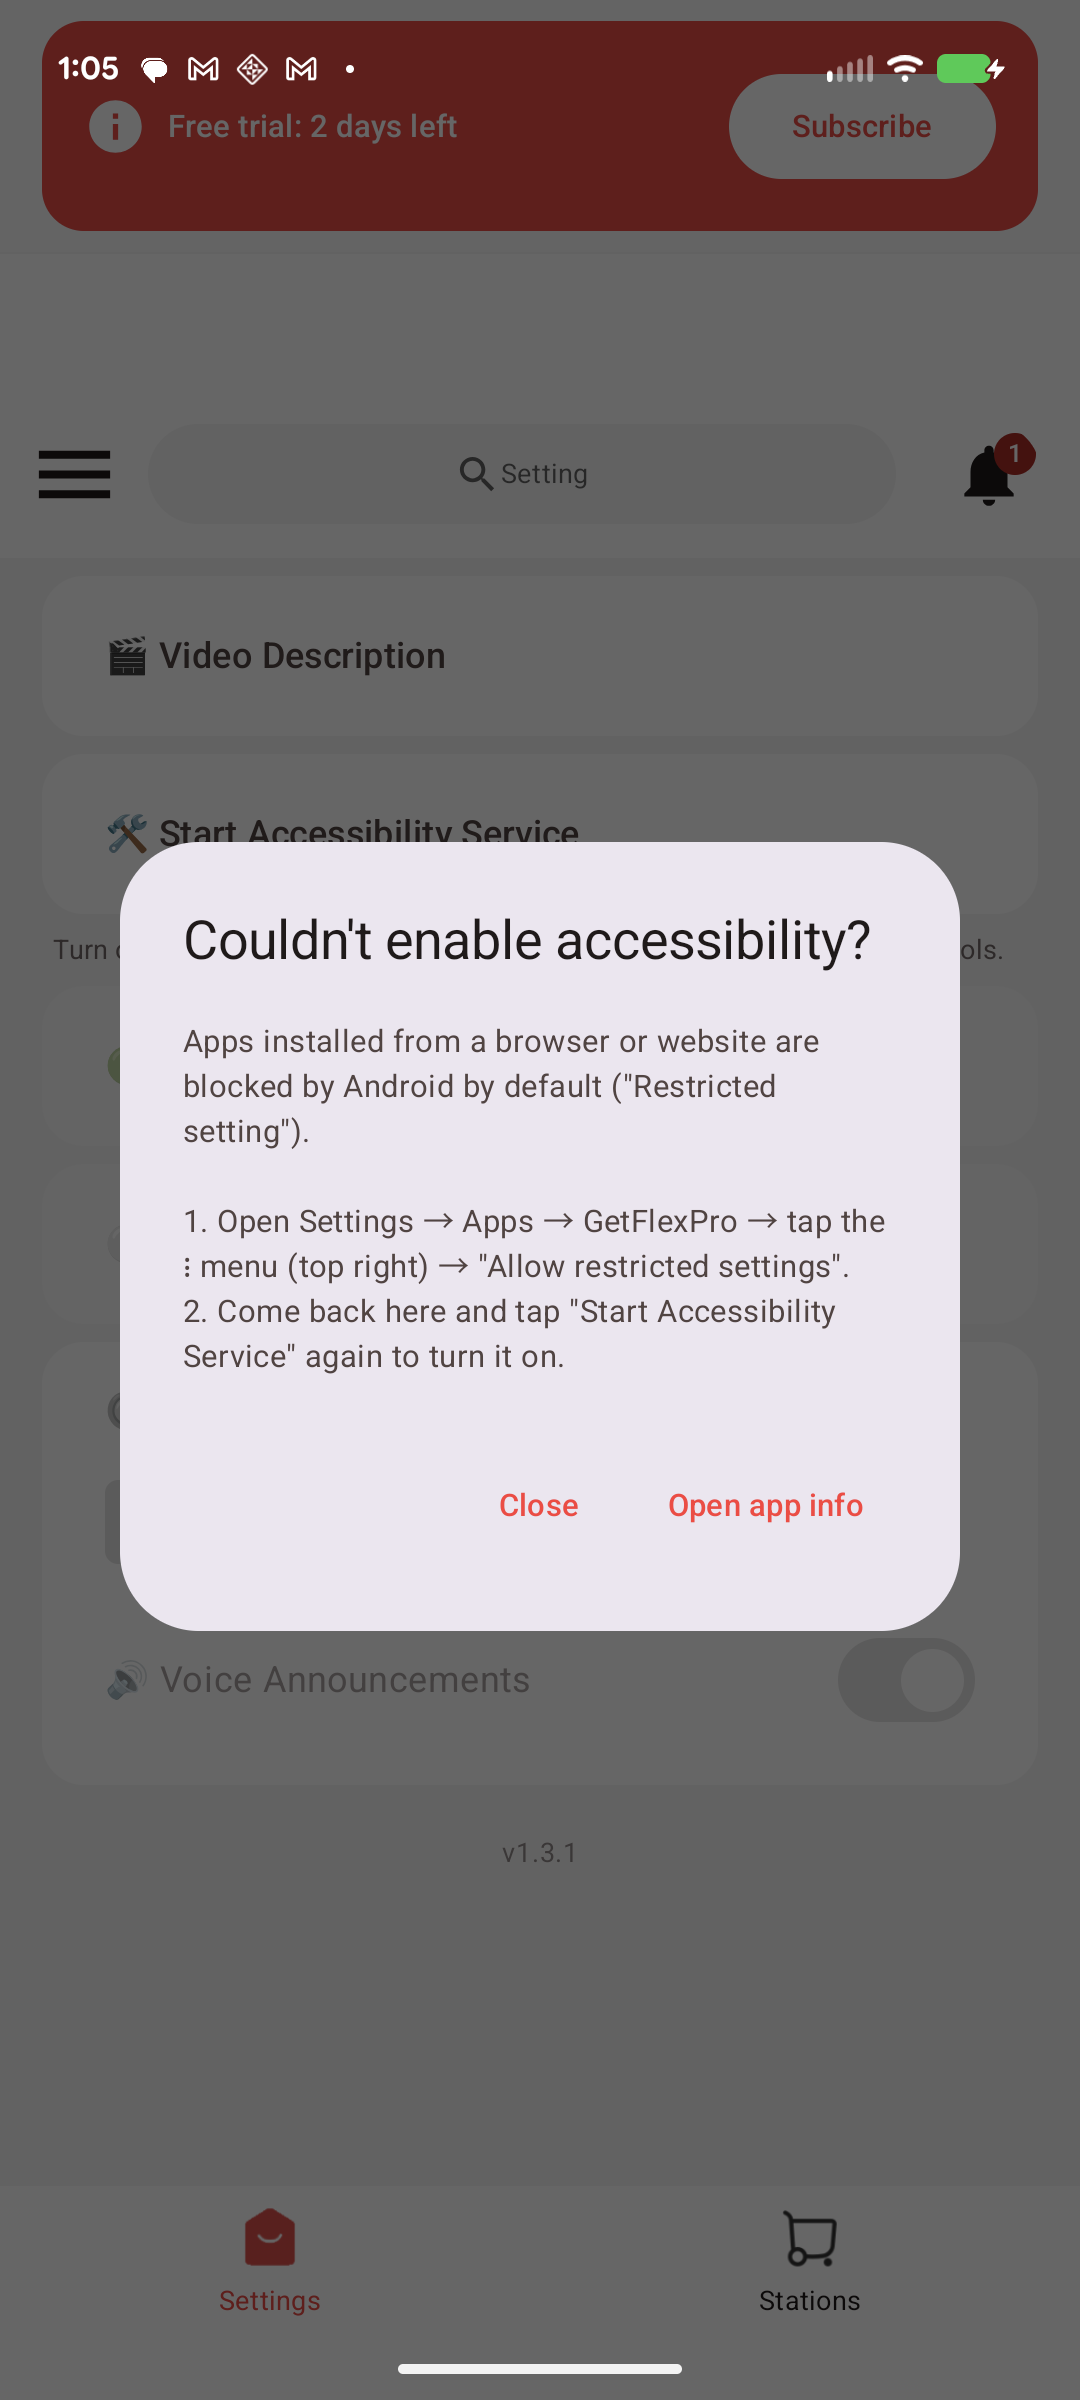
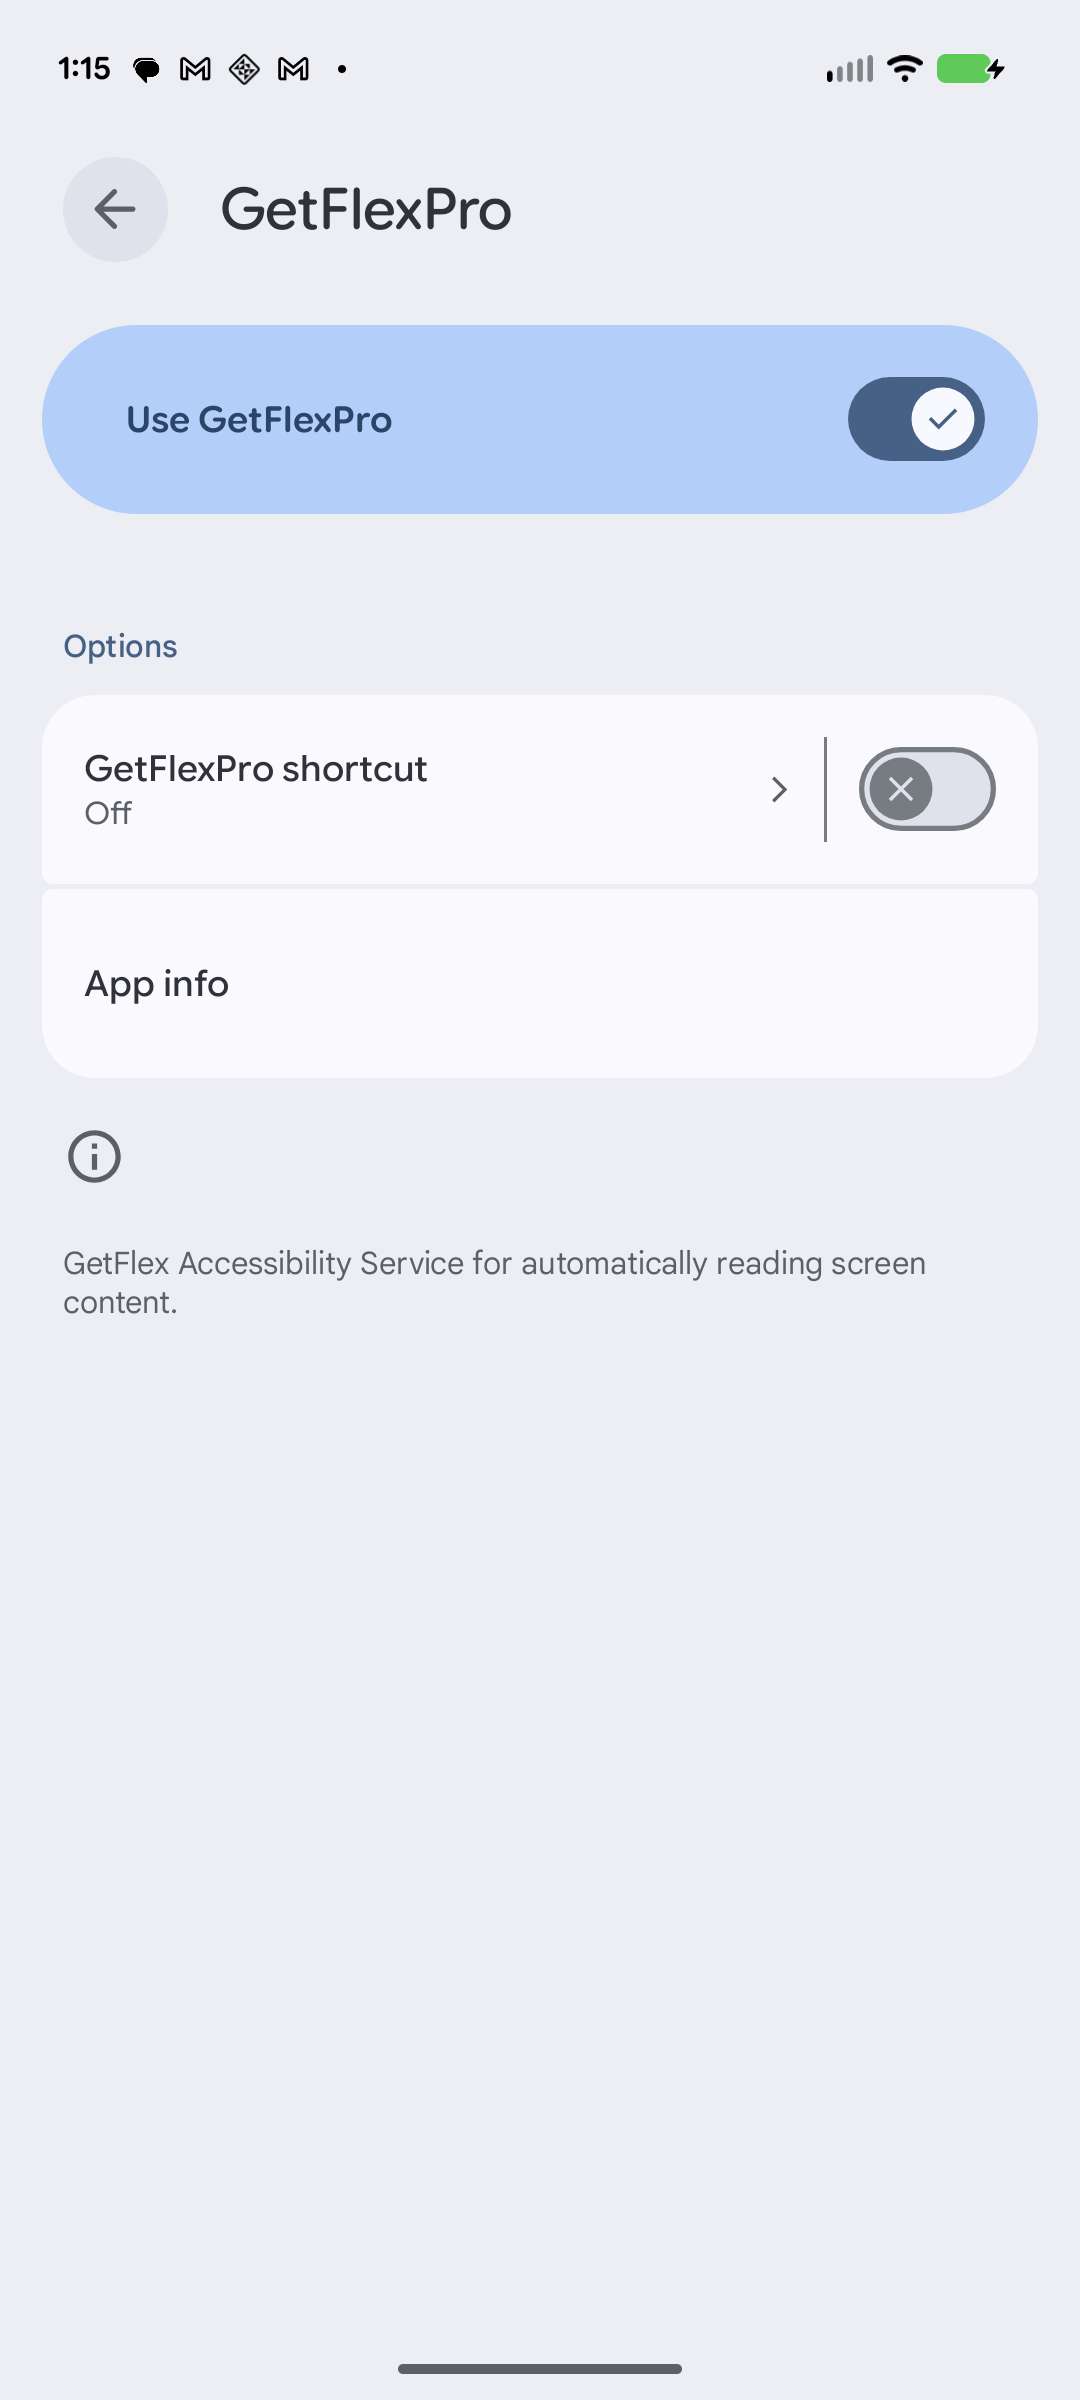
Step 18
GetFlexPro detects this and shows you exactly what to do. Tap Open app info.
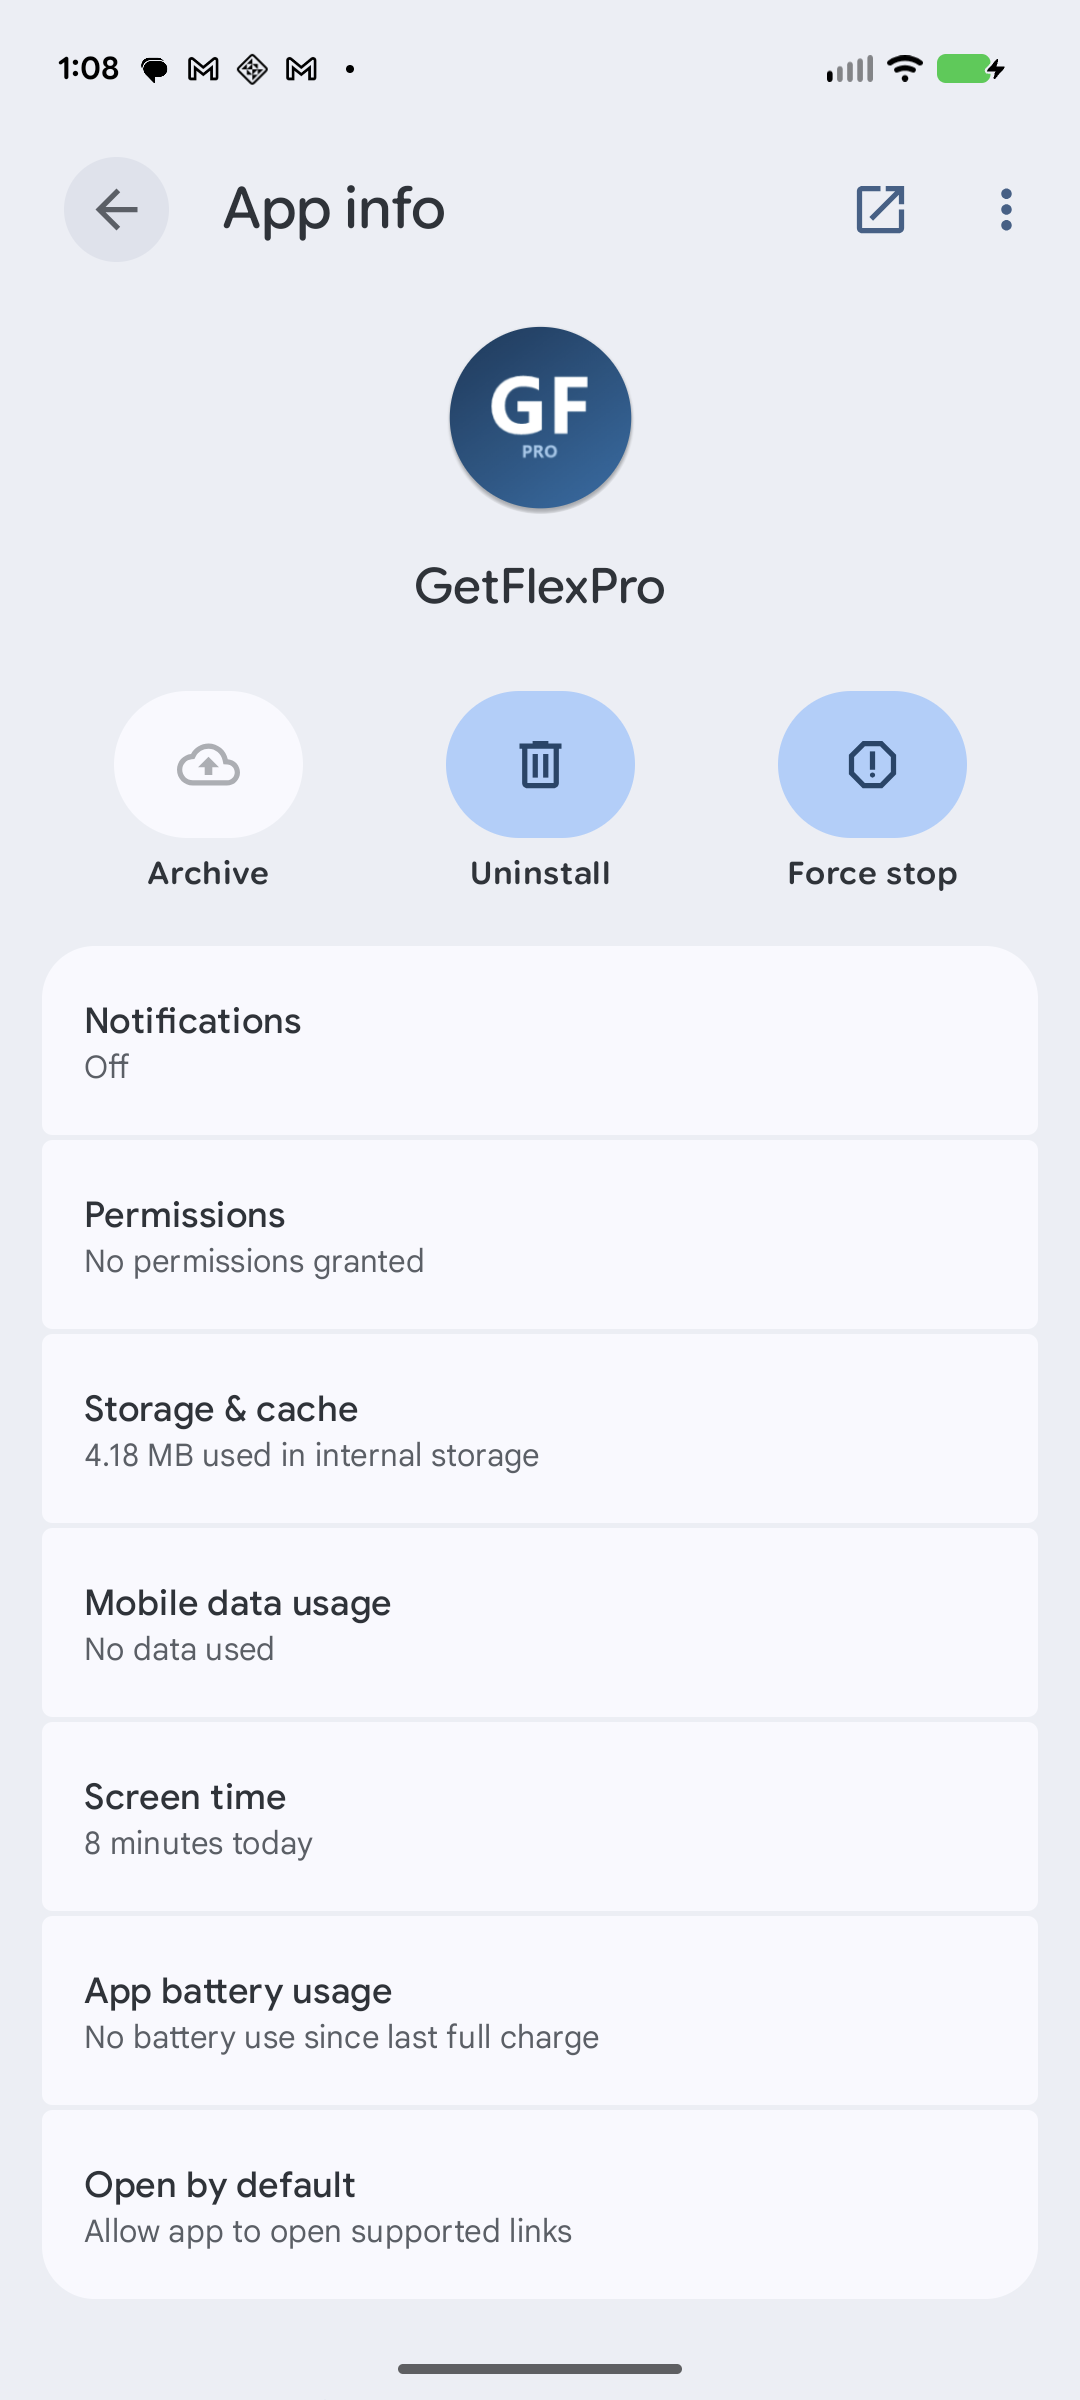
Step 19
The App info page for GetFlexPro opens.
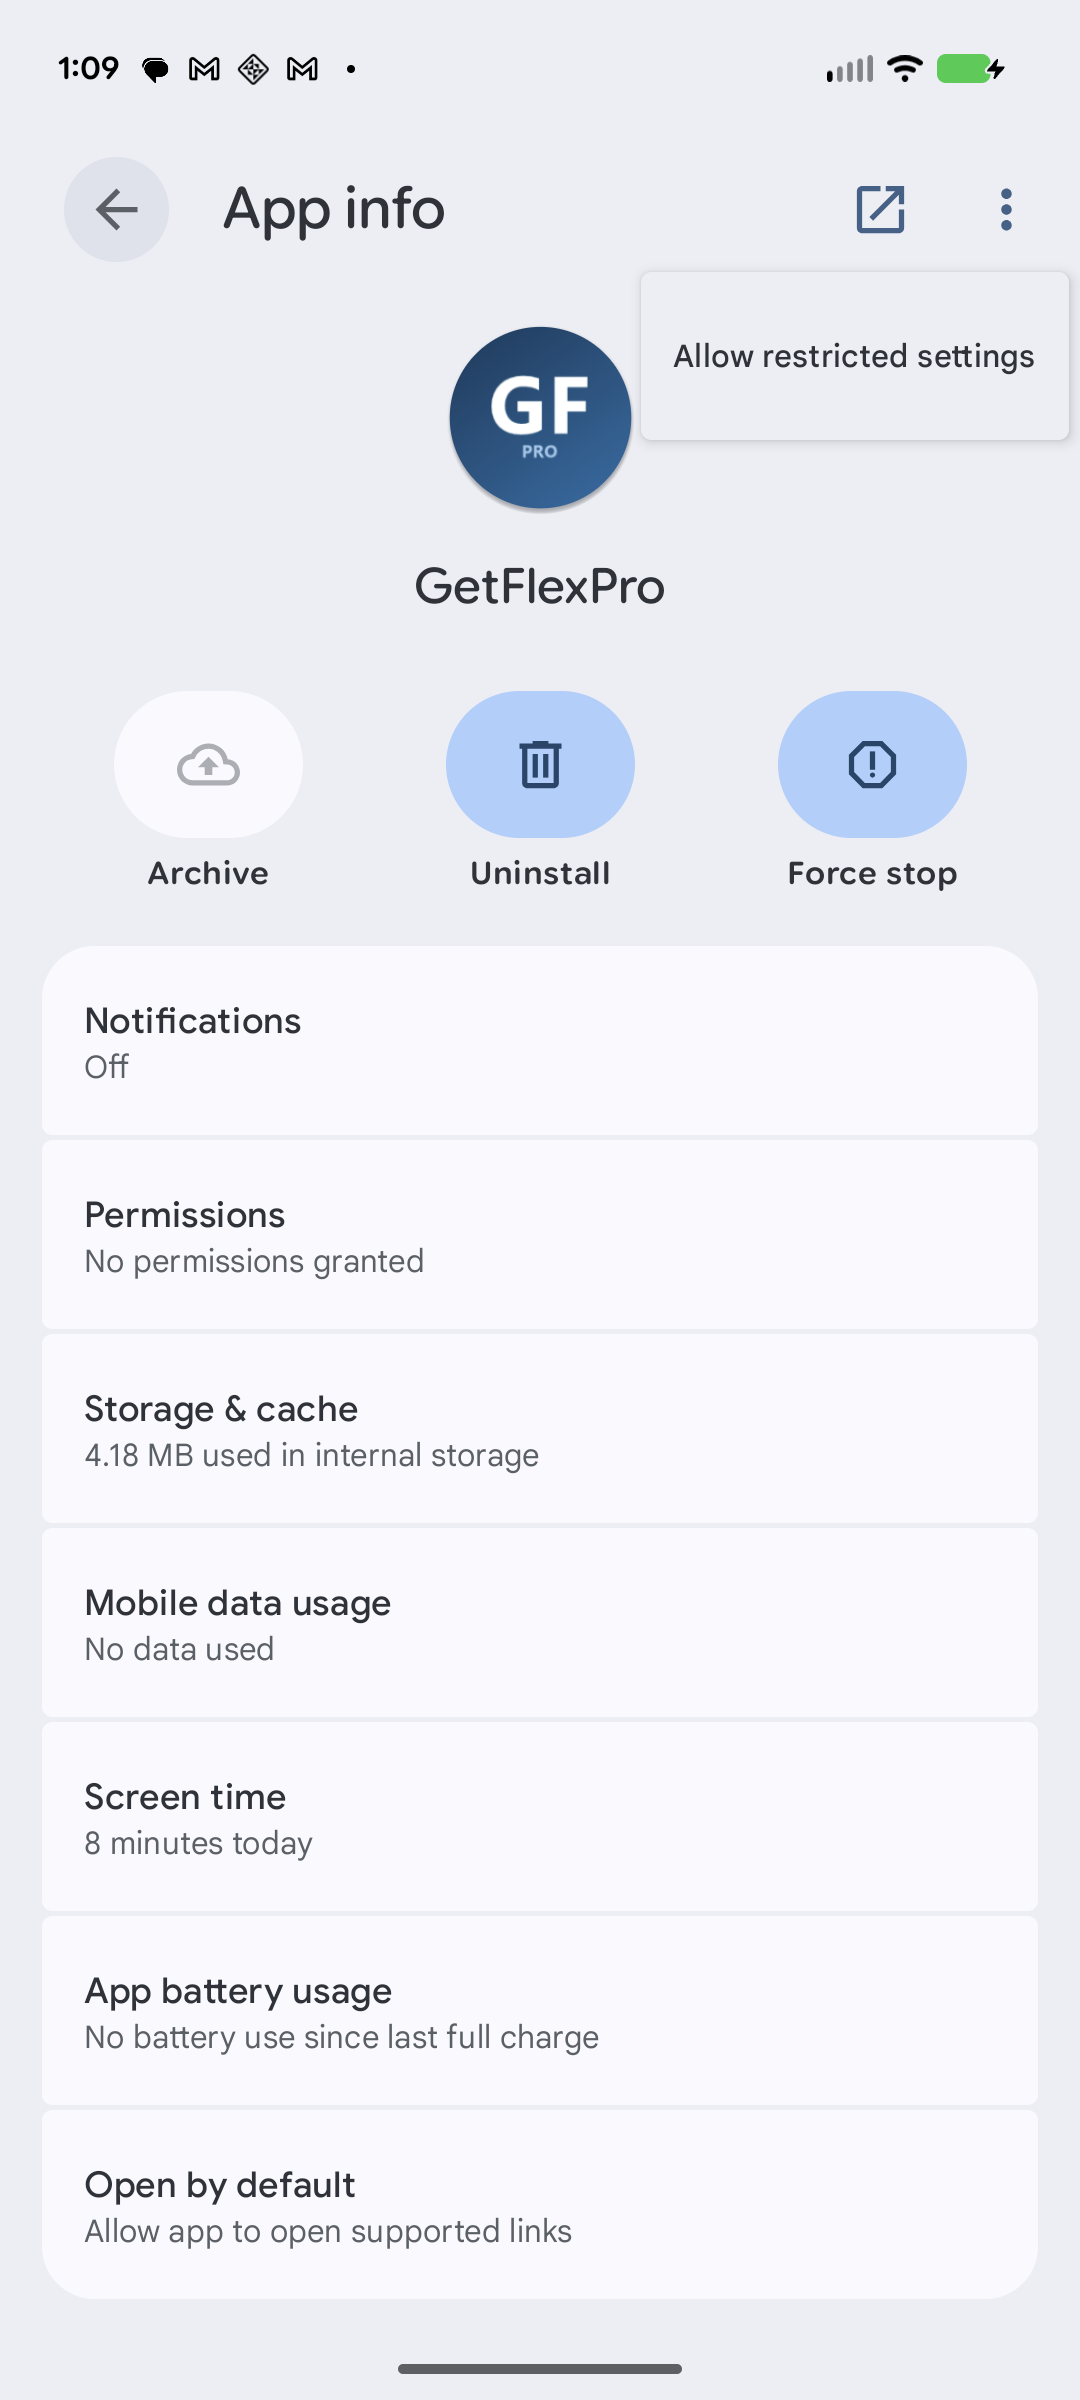
Step 20
Tap the ⋮ (three dots) in the top-right corner and choose Allow restricted settings. Then use the back arrow to return to GetFlexPro.
Step 21
Back in GetFlexPro, tap Start Accessibility Service again.
Step 22
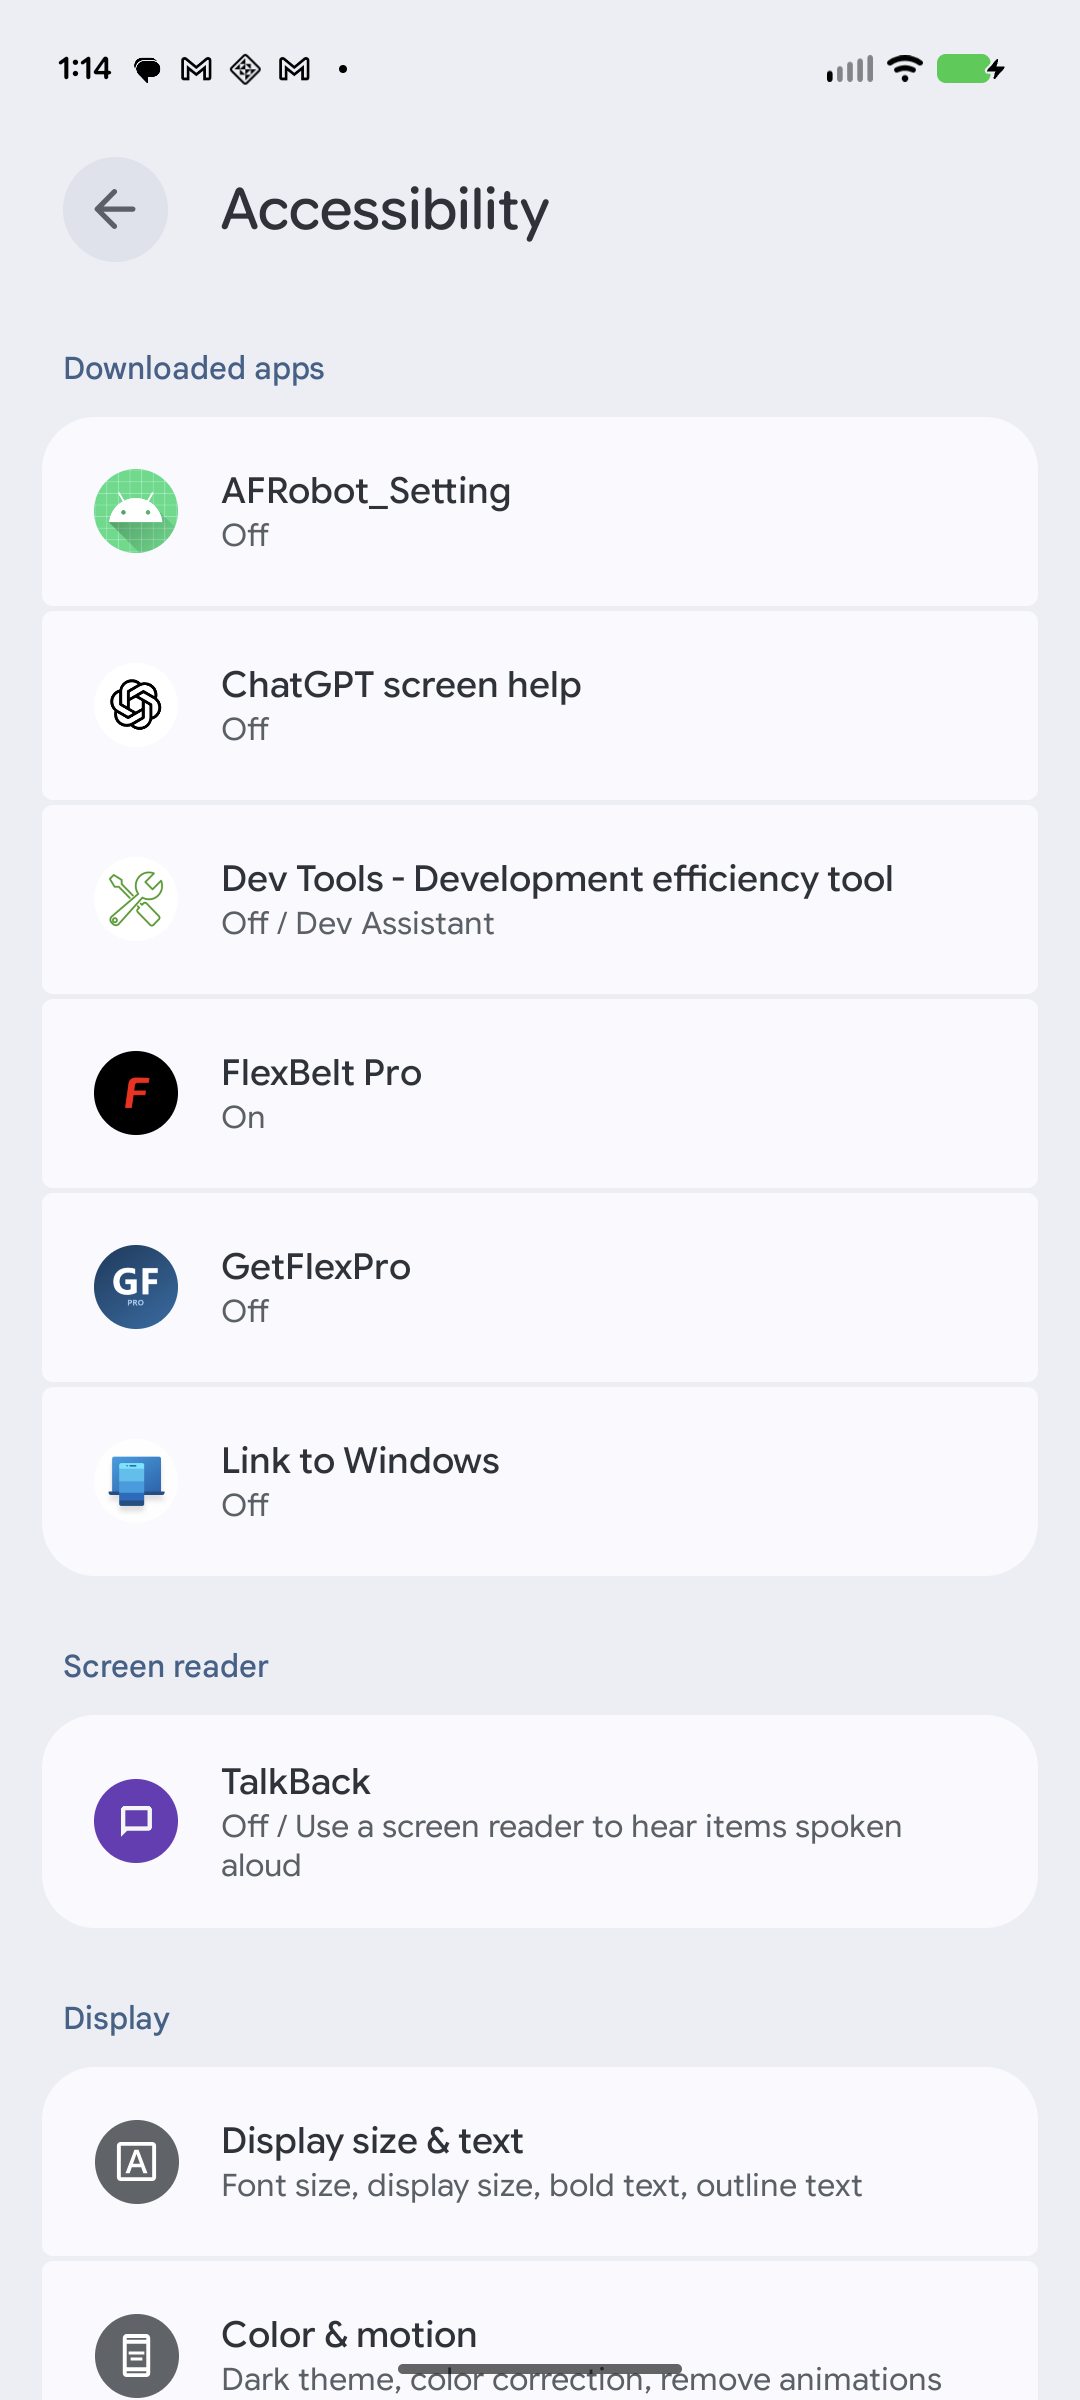
The Accessibility screen opens again — this time find GetFlexPro in the list (no longer greyed out).
Step 23
Open GetFlexPro and turn on Use GetFlexPro.
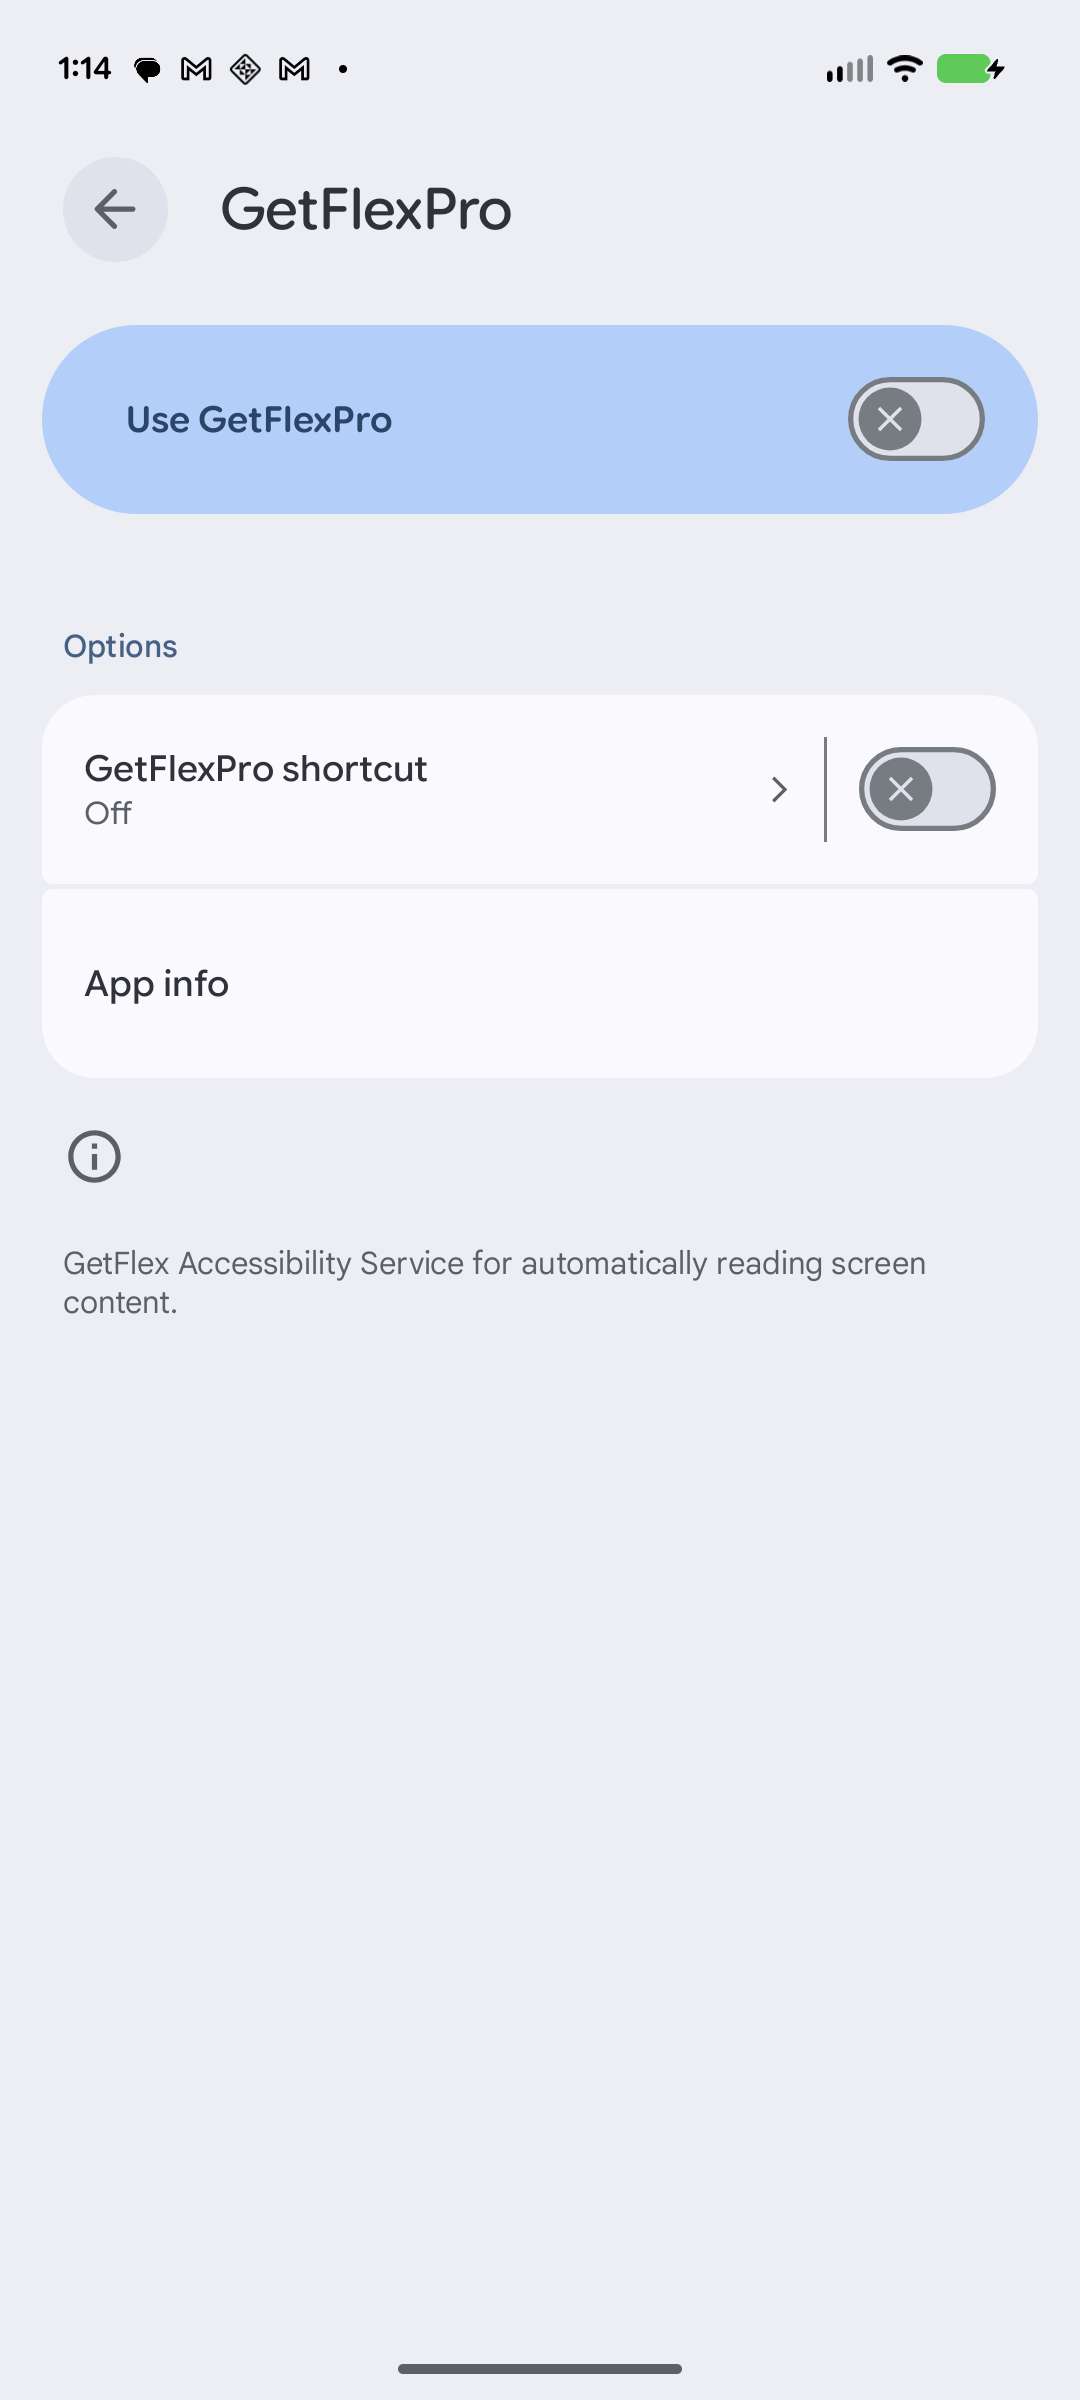
Step 24
A system confirmation appears. Tap Allow.
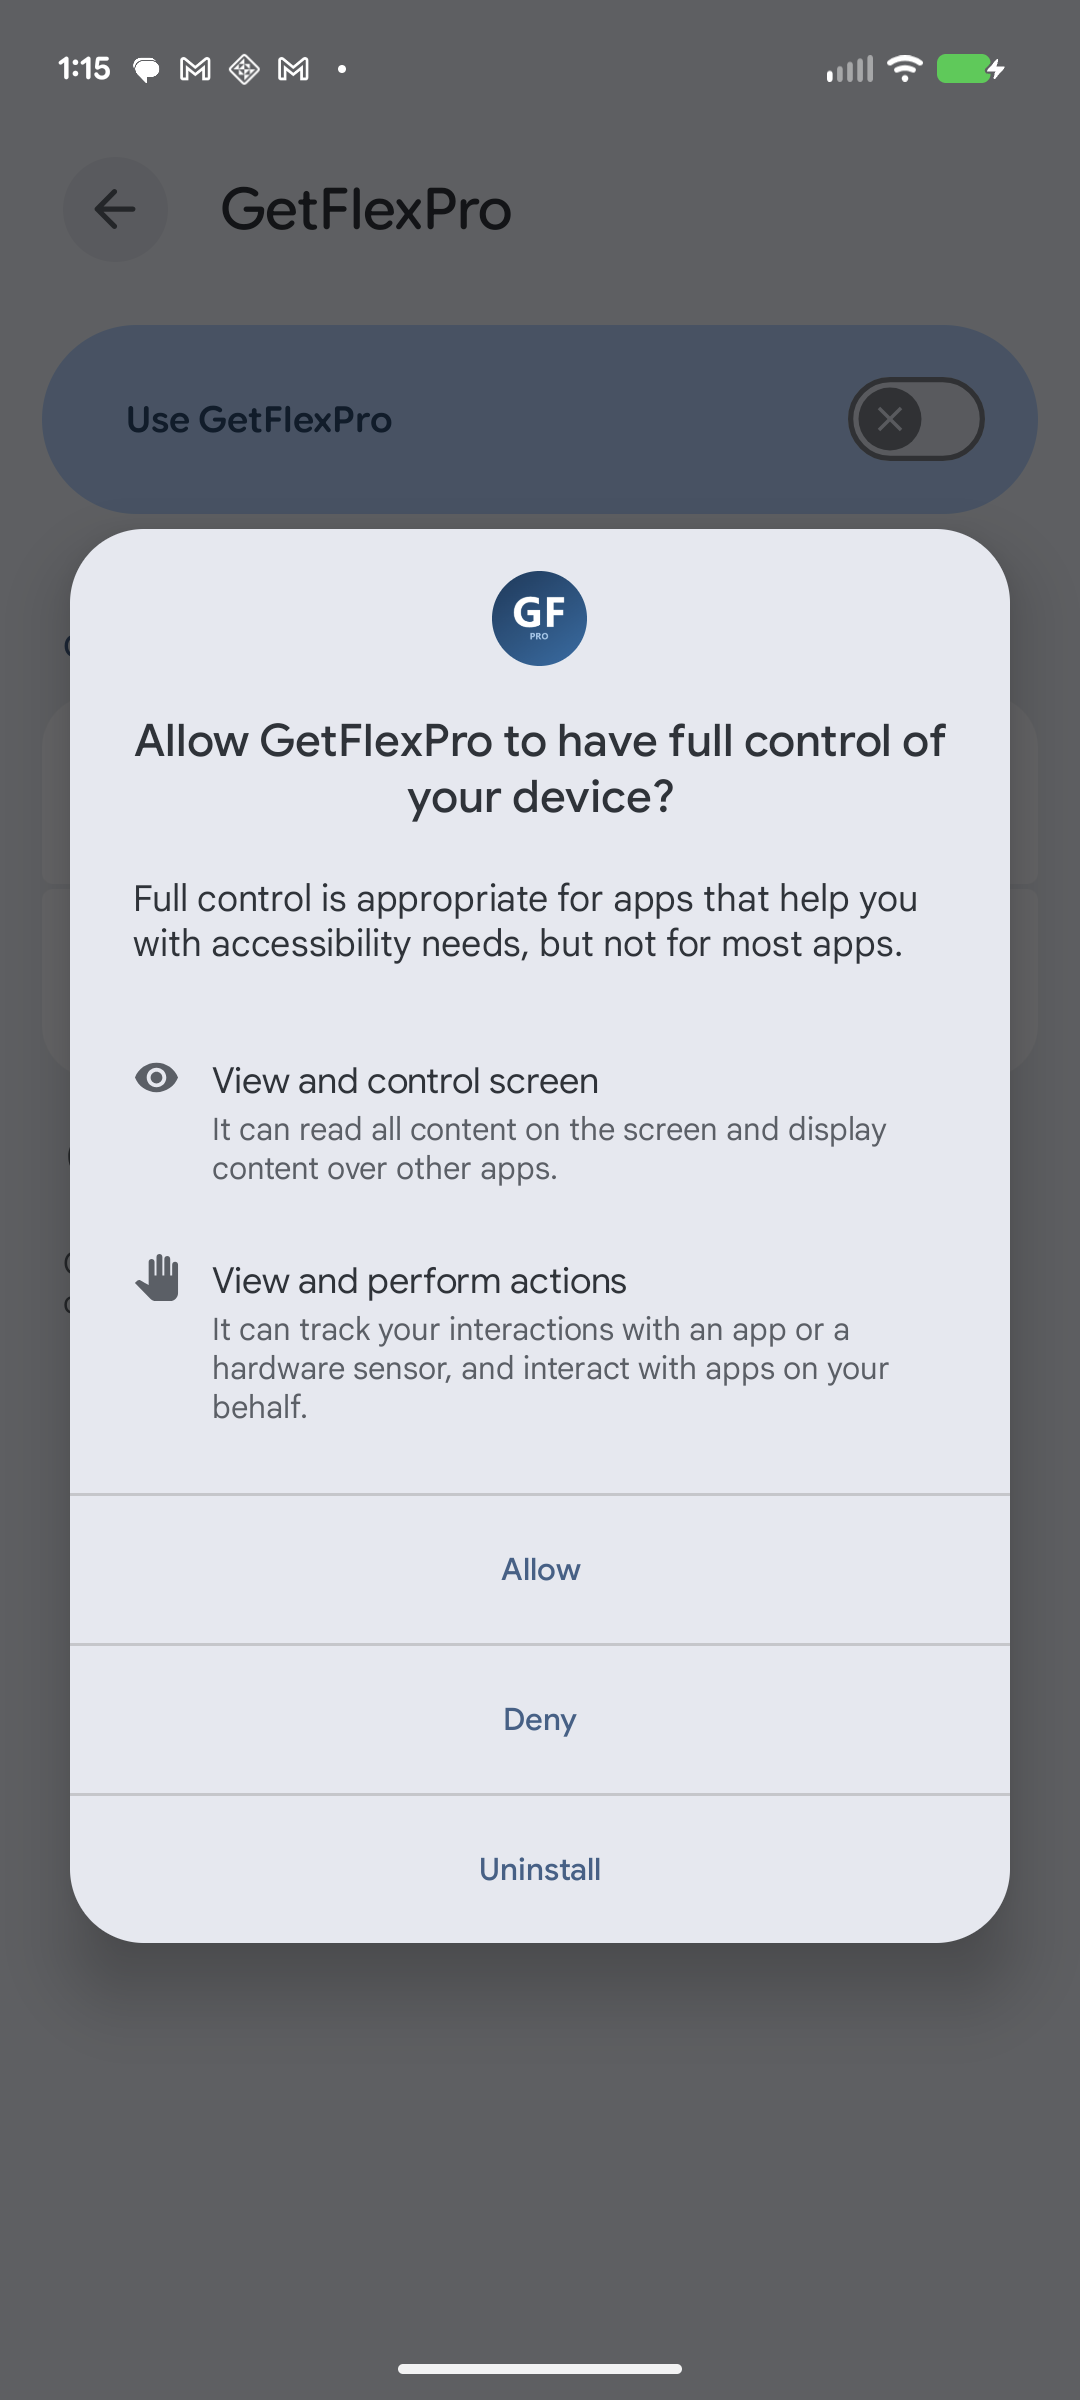
Step 25
The Accessibility Service is now enabled.
Step 26
Tap the back arrow to return to GetFlexPro. The grab assistant is now ready to use.

Part 4 — Set up your filters
Step 27
Tap the Stations tab at the bottom to open the warehouse (filters) screen.
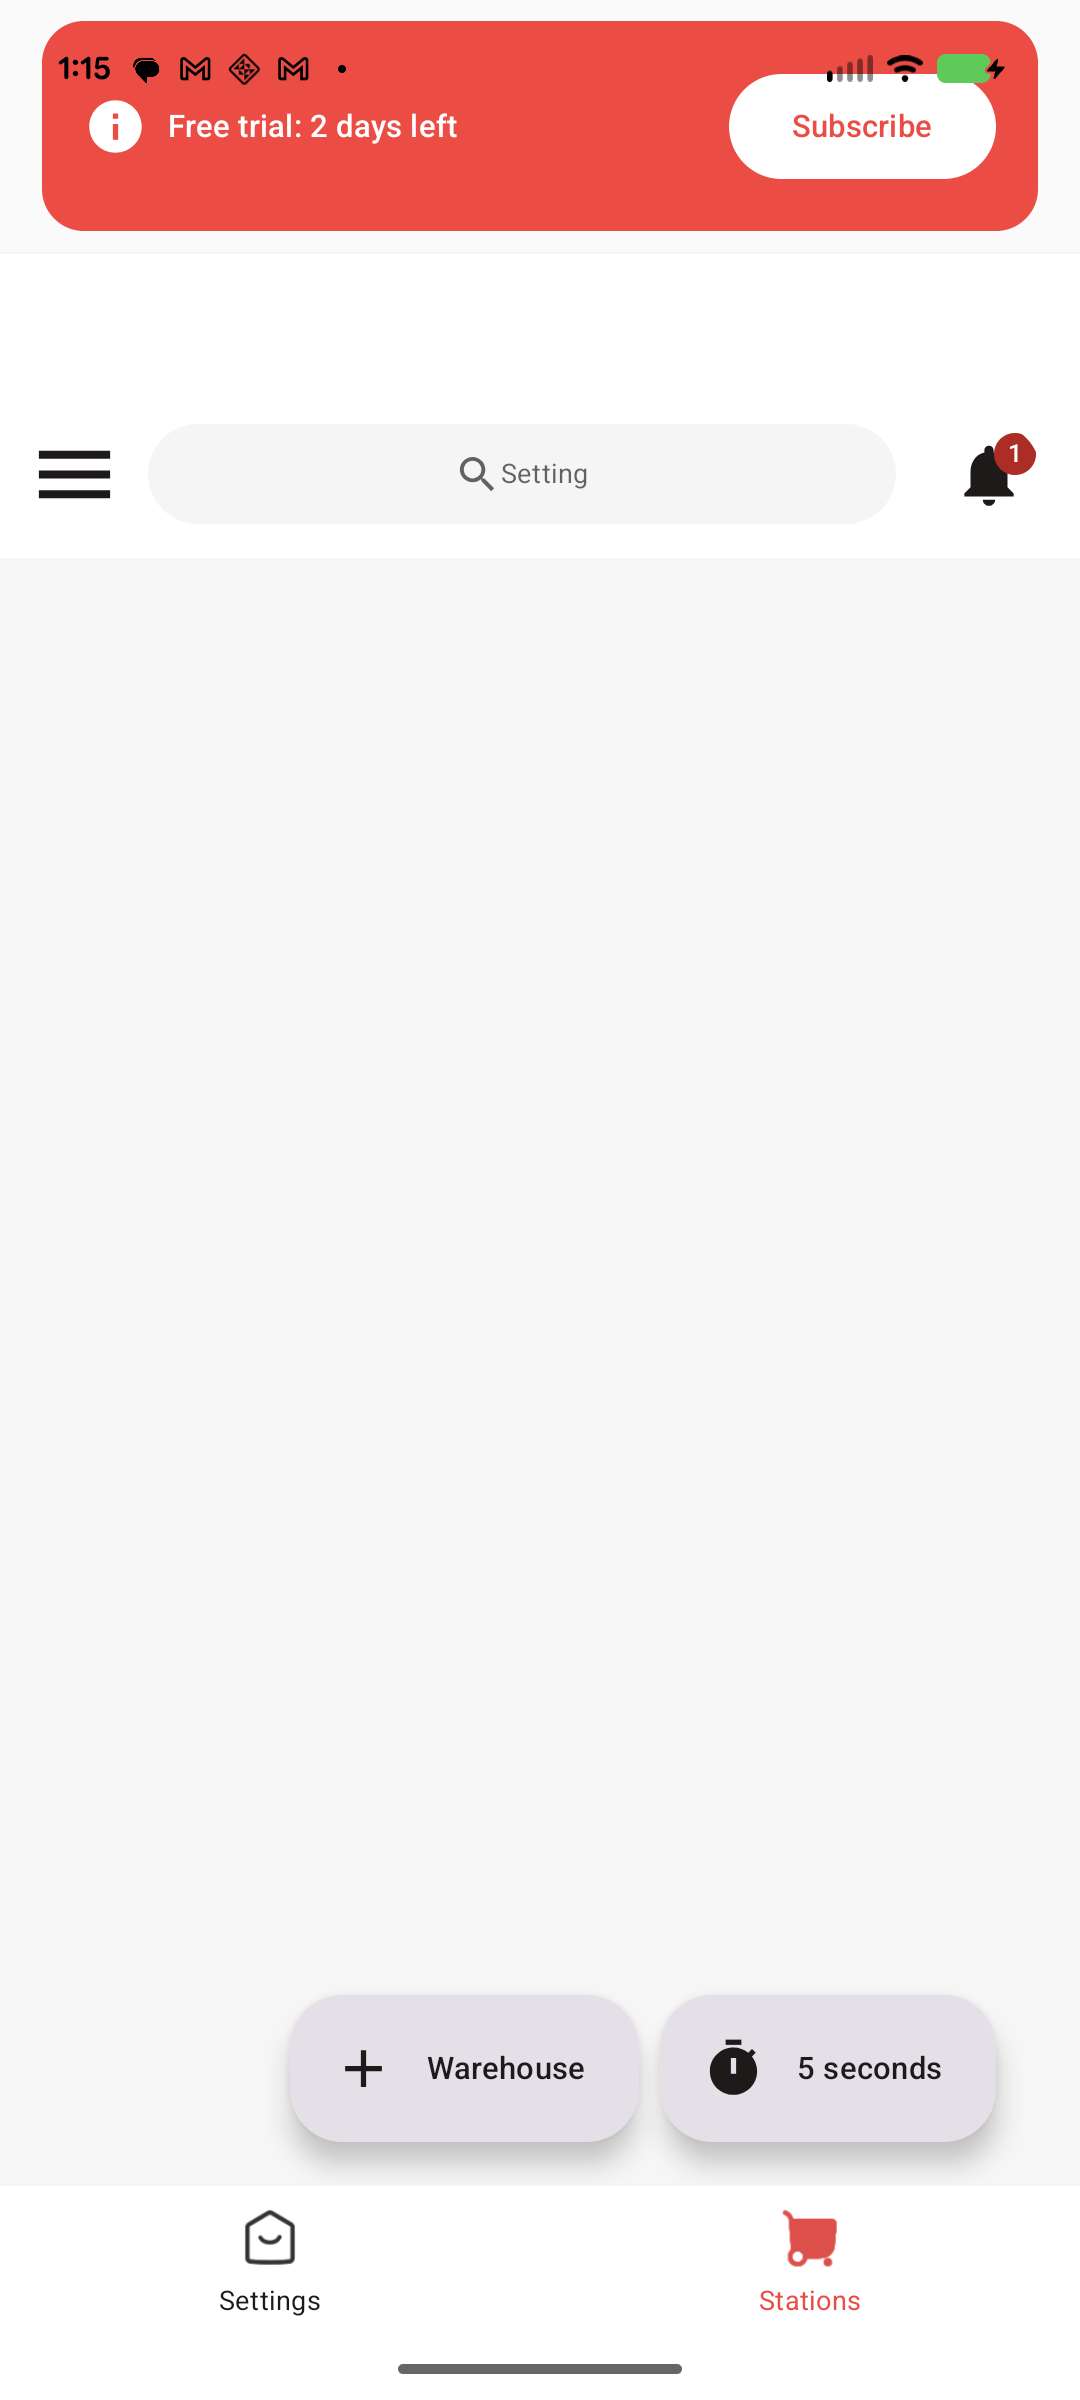
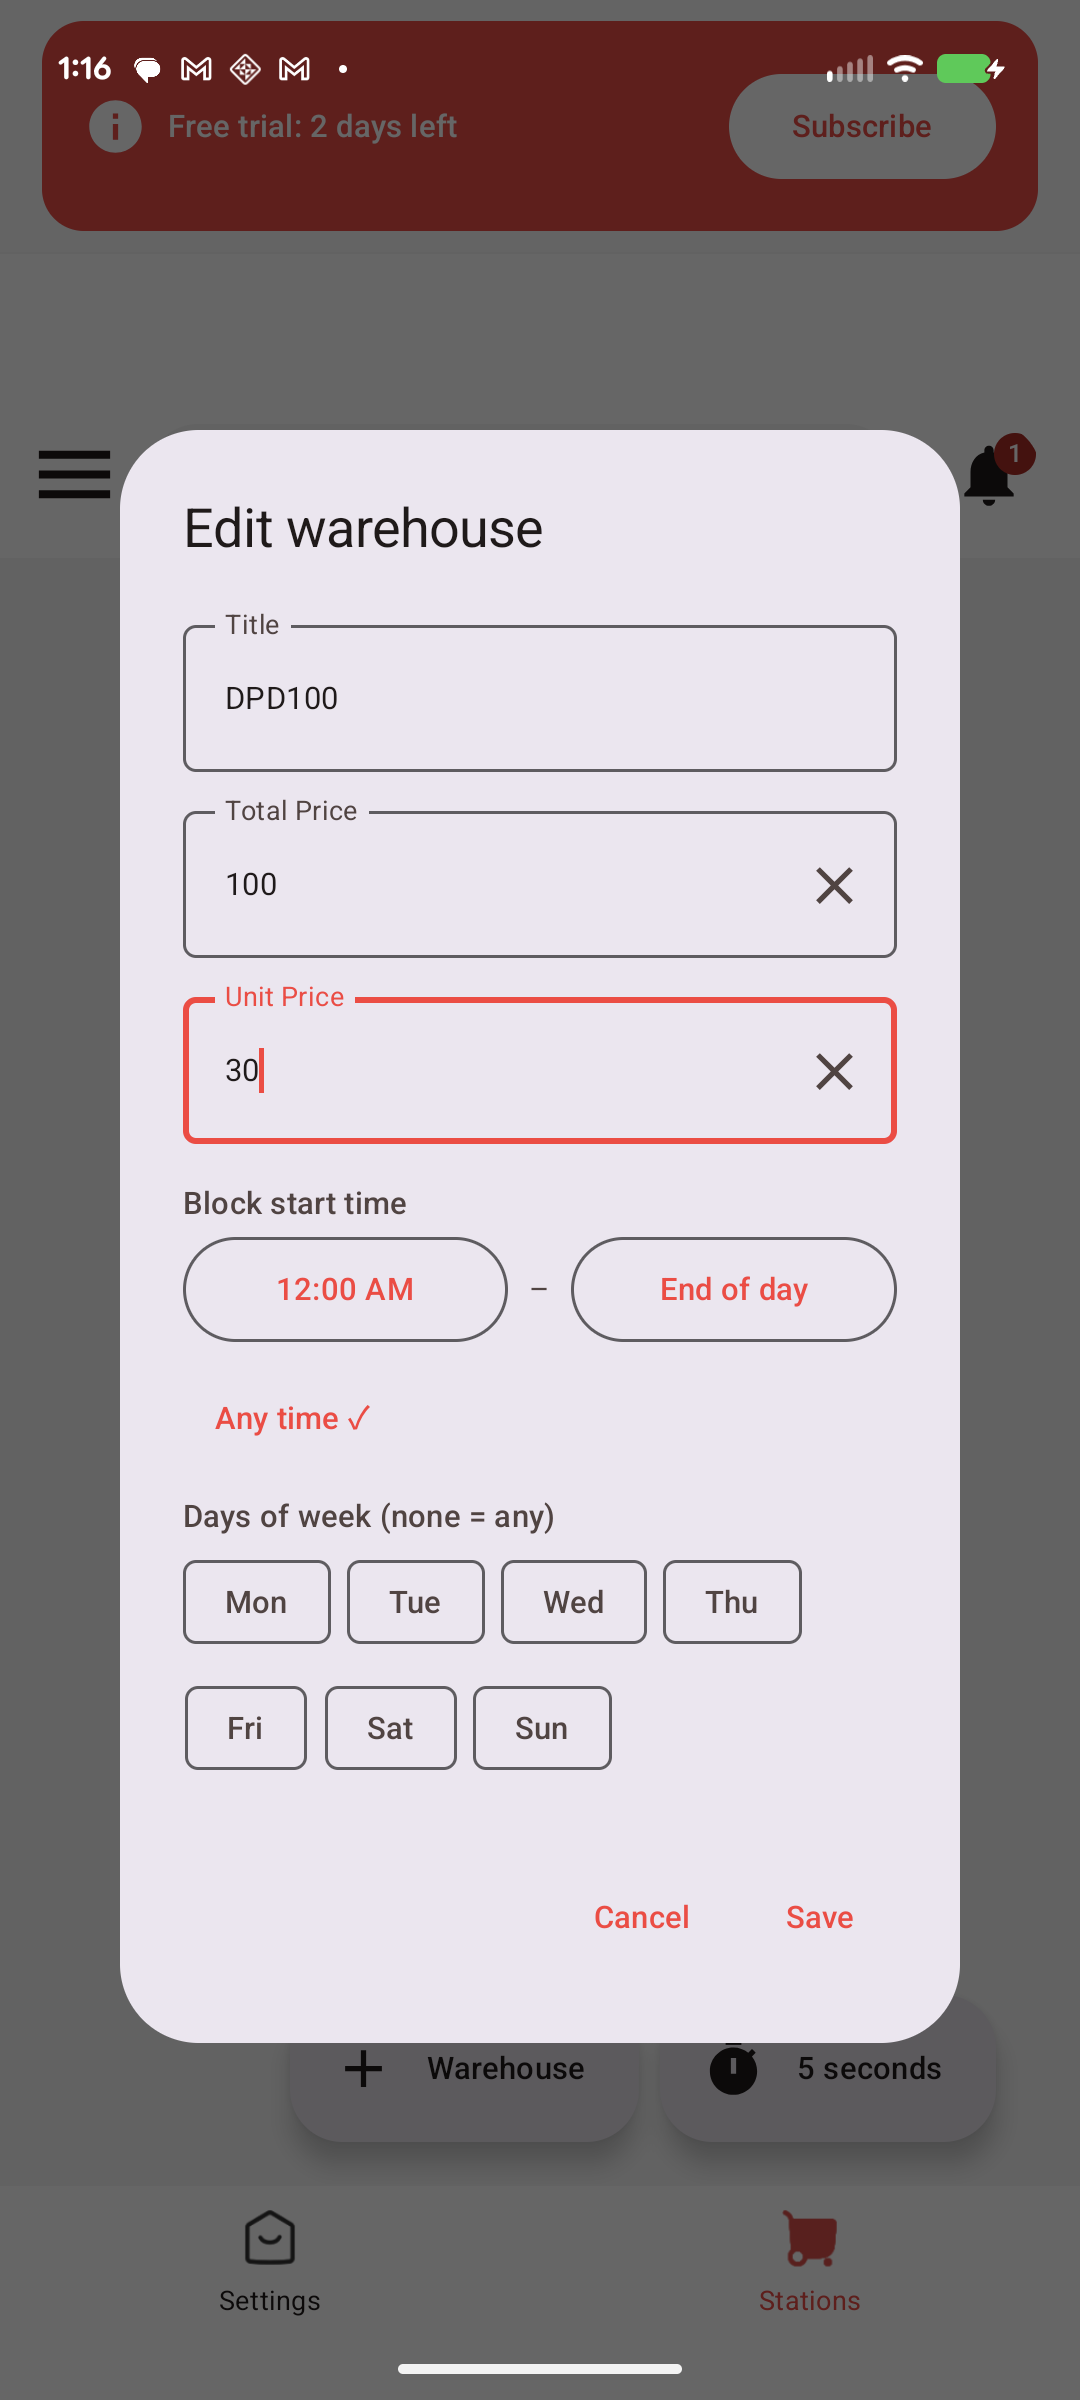
Step 28
Tap WareHouse to open the dialog. Enter your grab criteria — warehouse name, minimum total pay and hourly pay, time window, and weekdays — then tap Save.
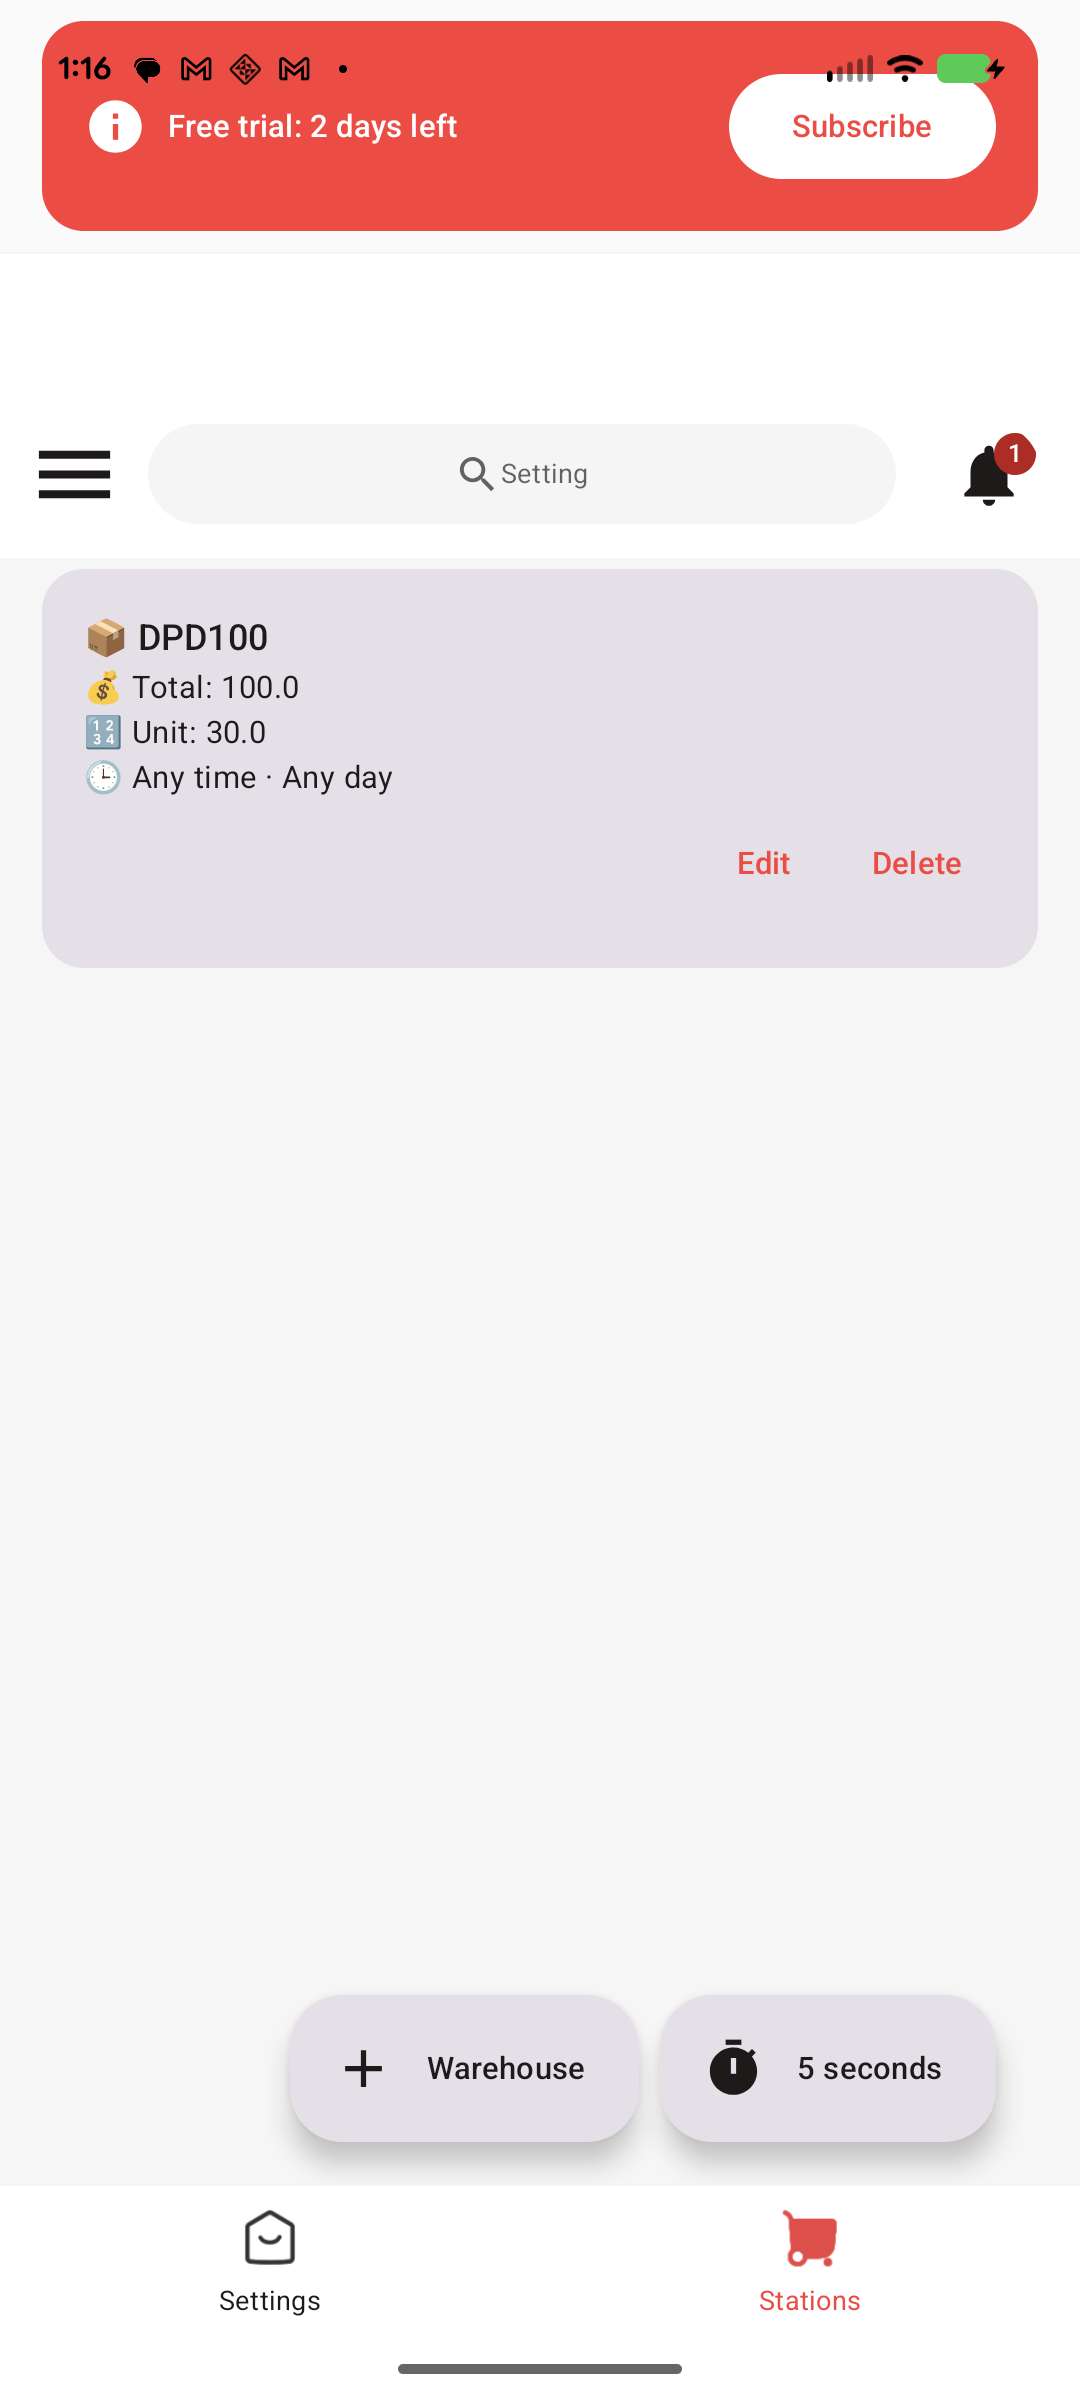
Step 29
Your warehouse filter is saved.
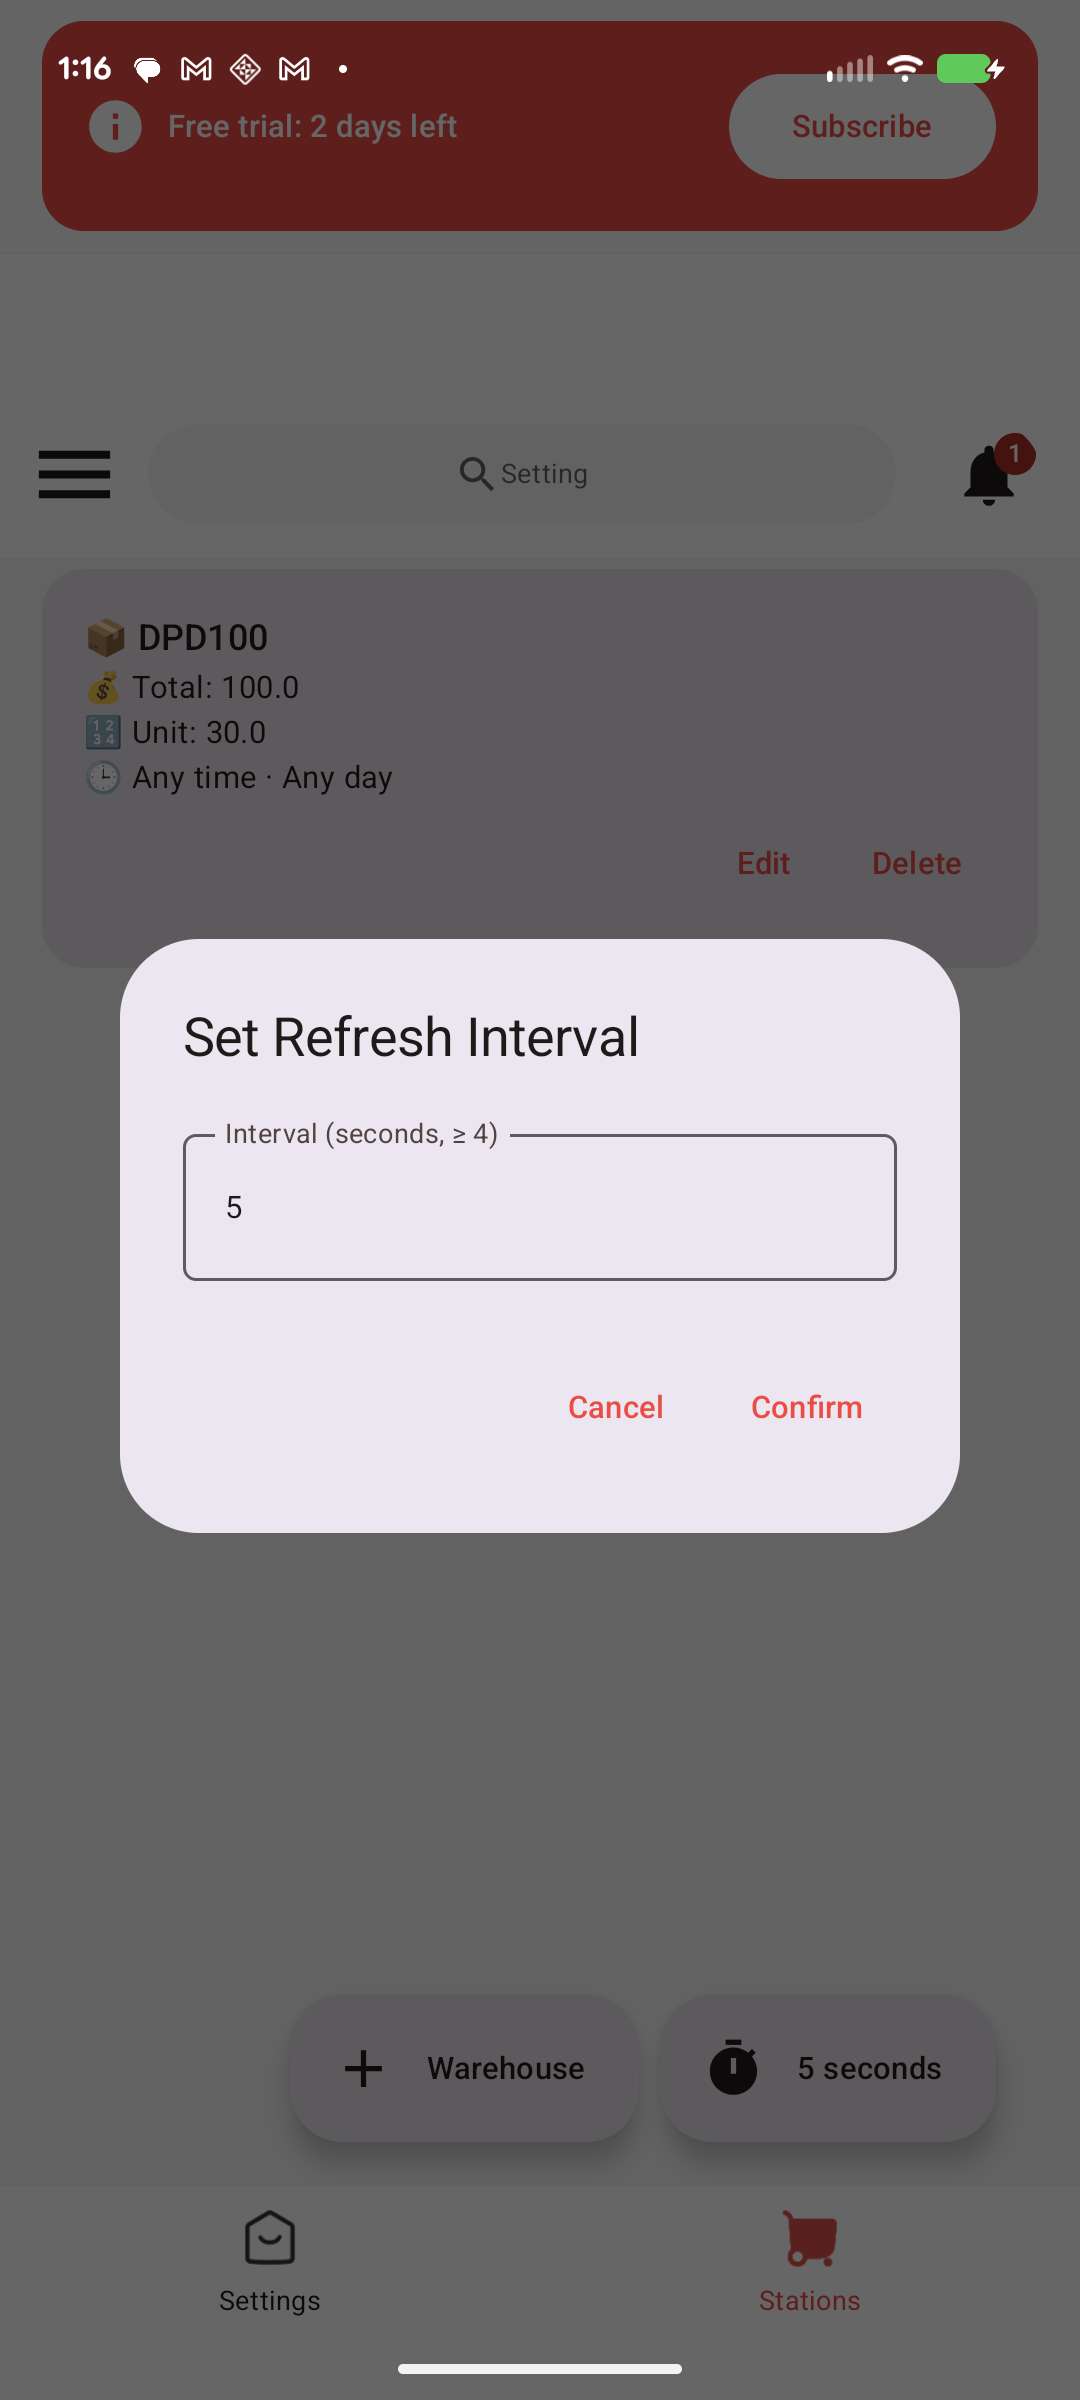
Step 30
Set the refresh interval (in seconds) — how often the assistant re-checks for new offers.
Part 5 — Floating button & grabbing
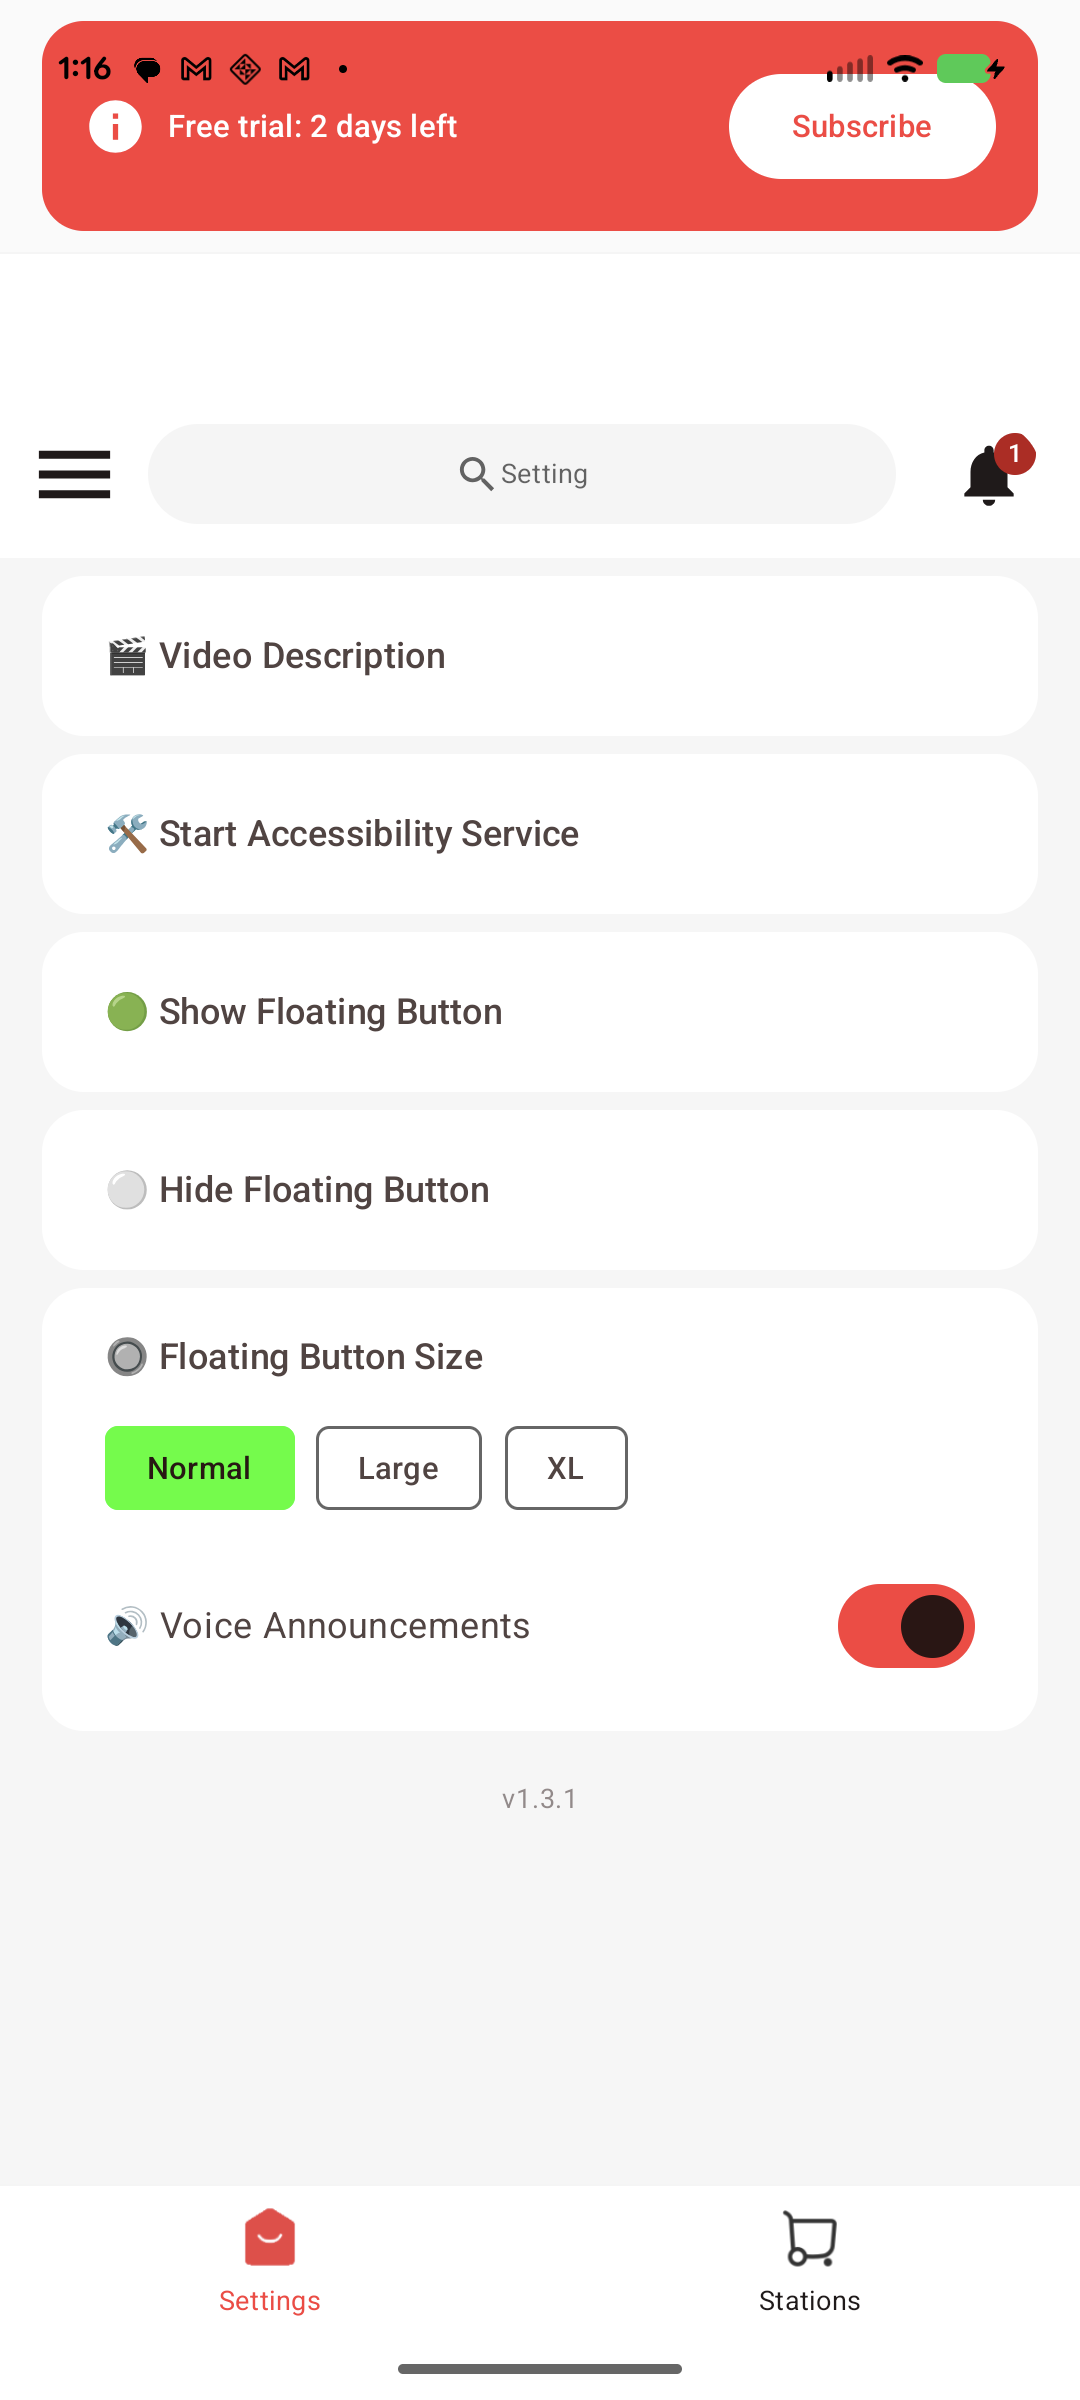
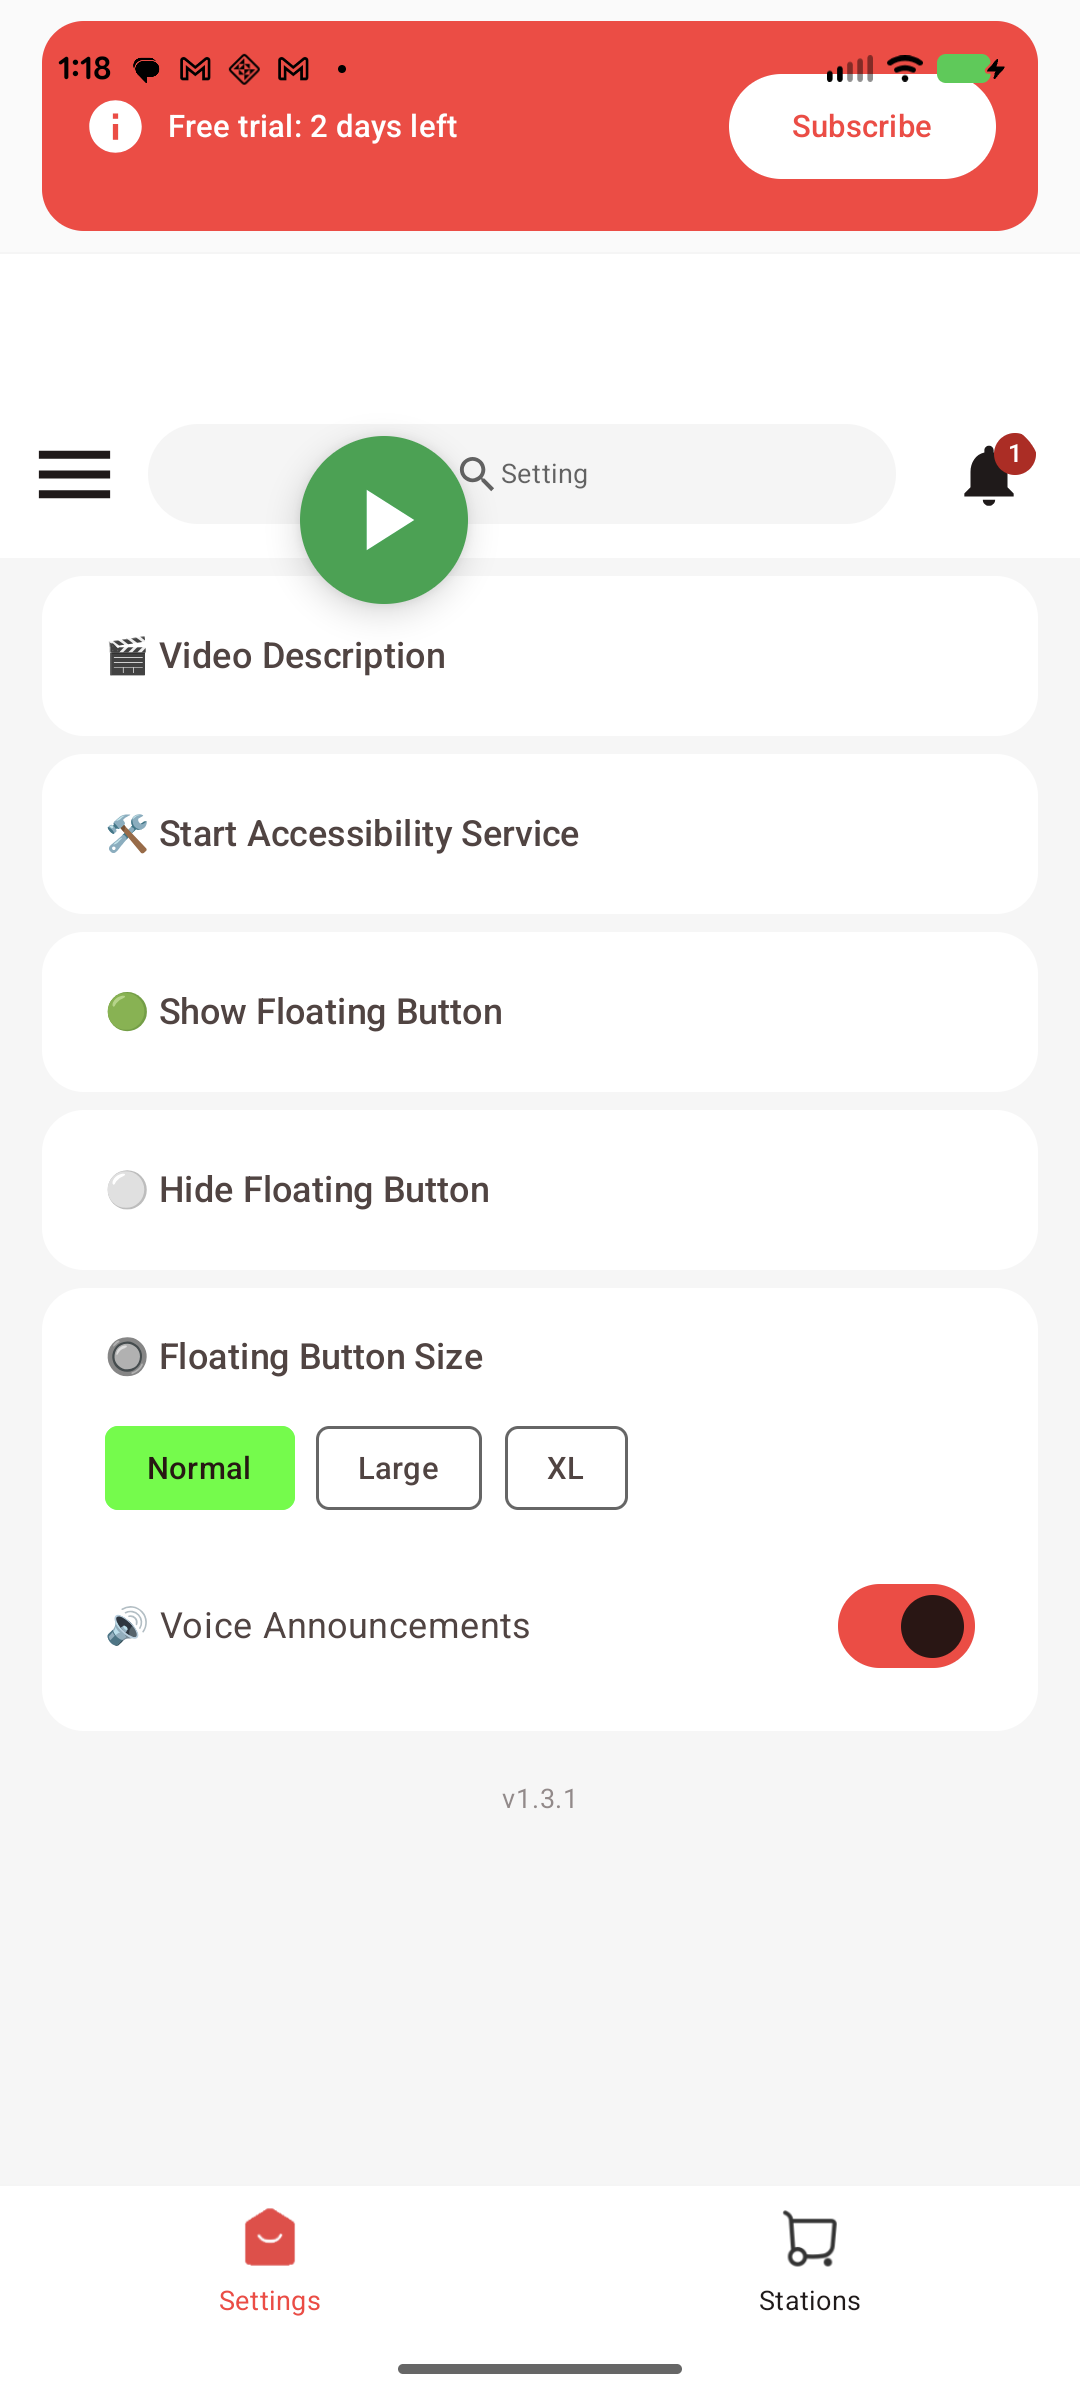
Step 31
Go back to the Settings tab and tap Show Floating Button to start the assistant.
Step 32
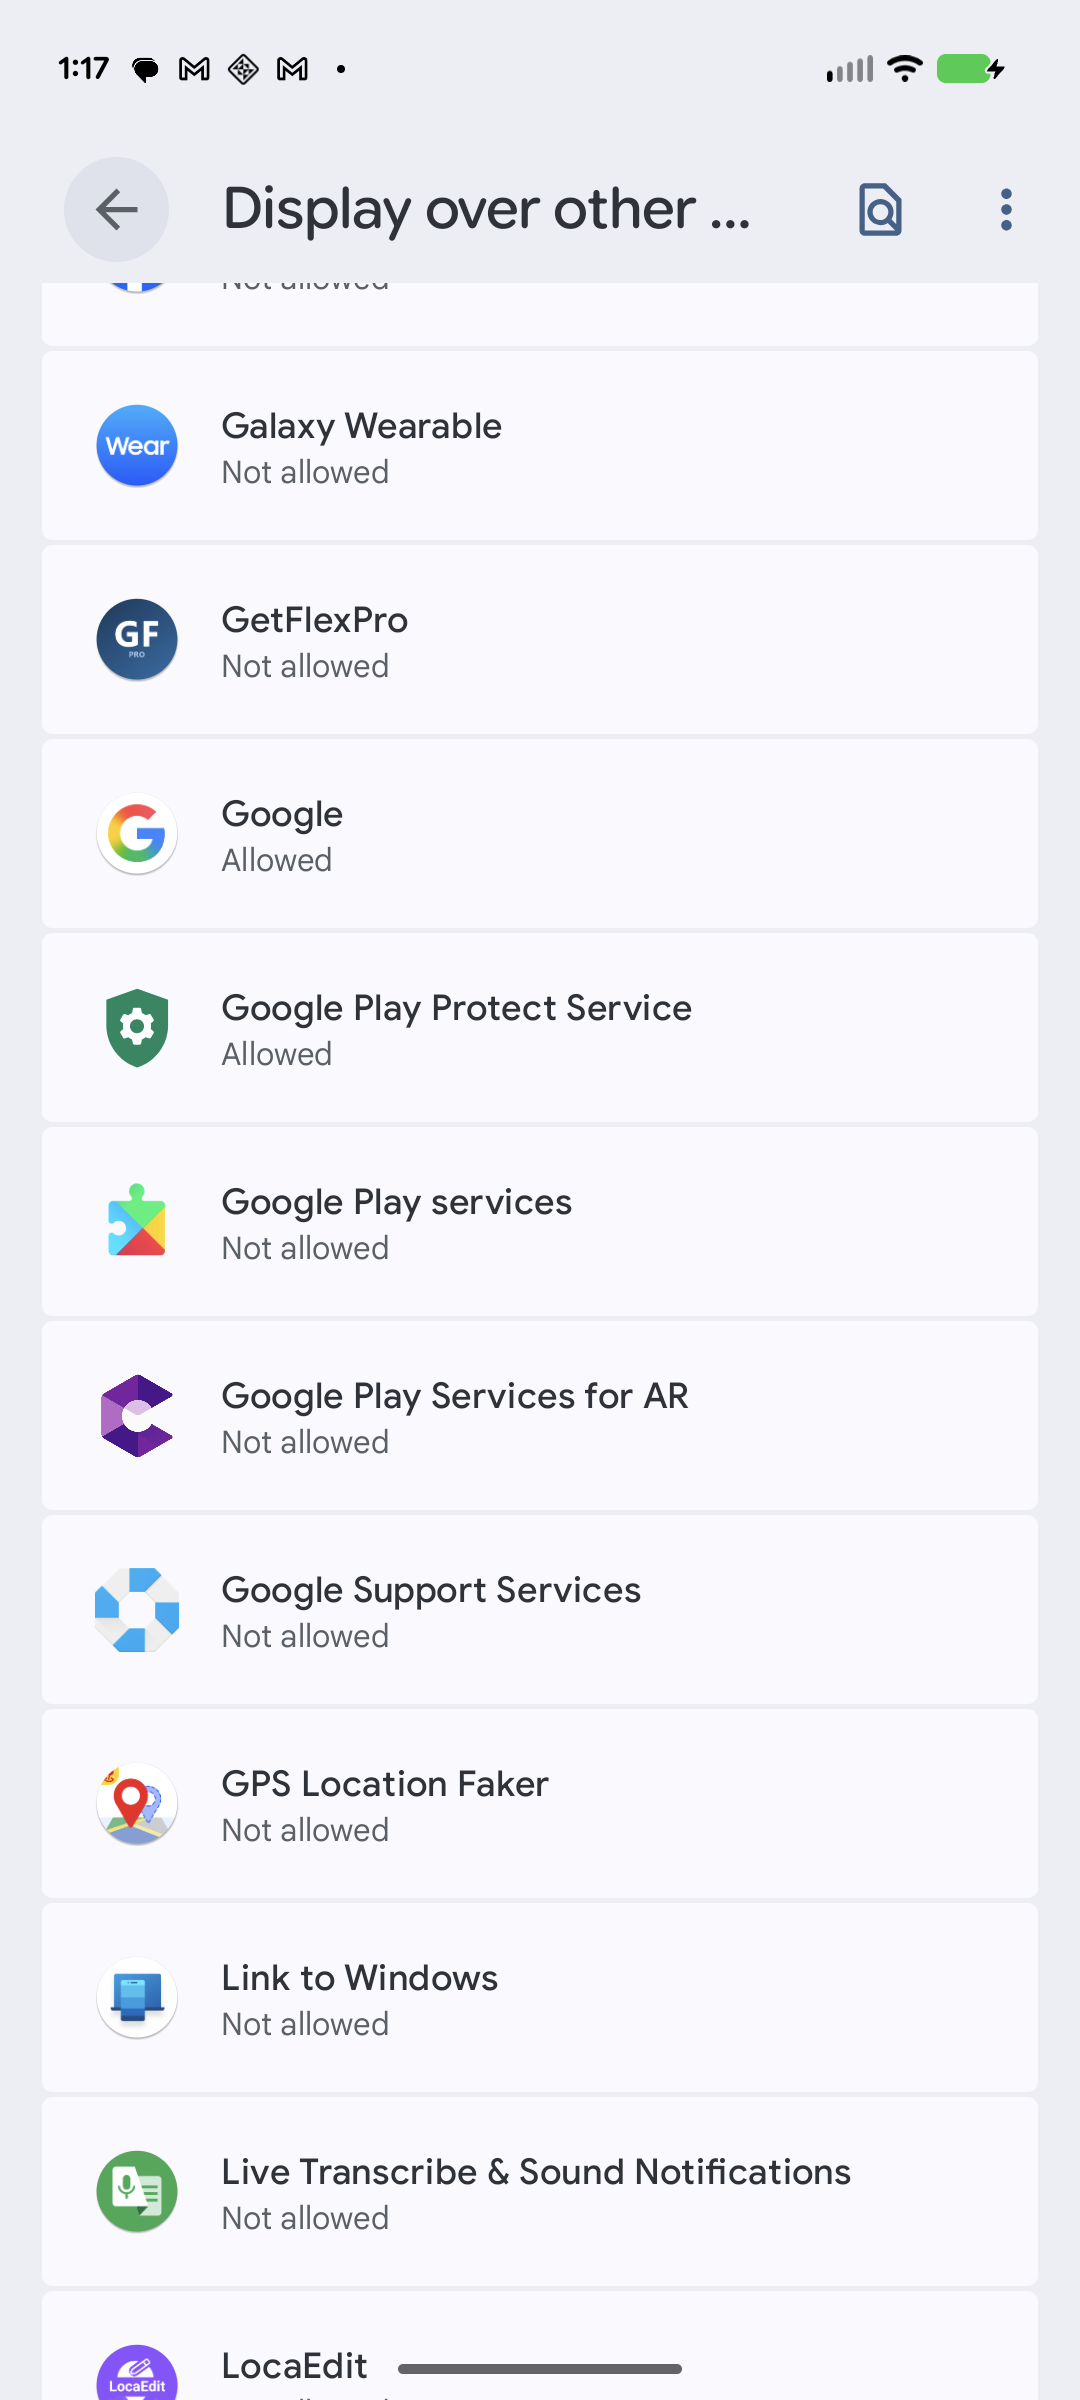
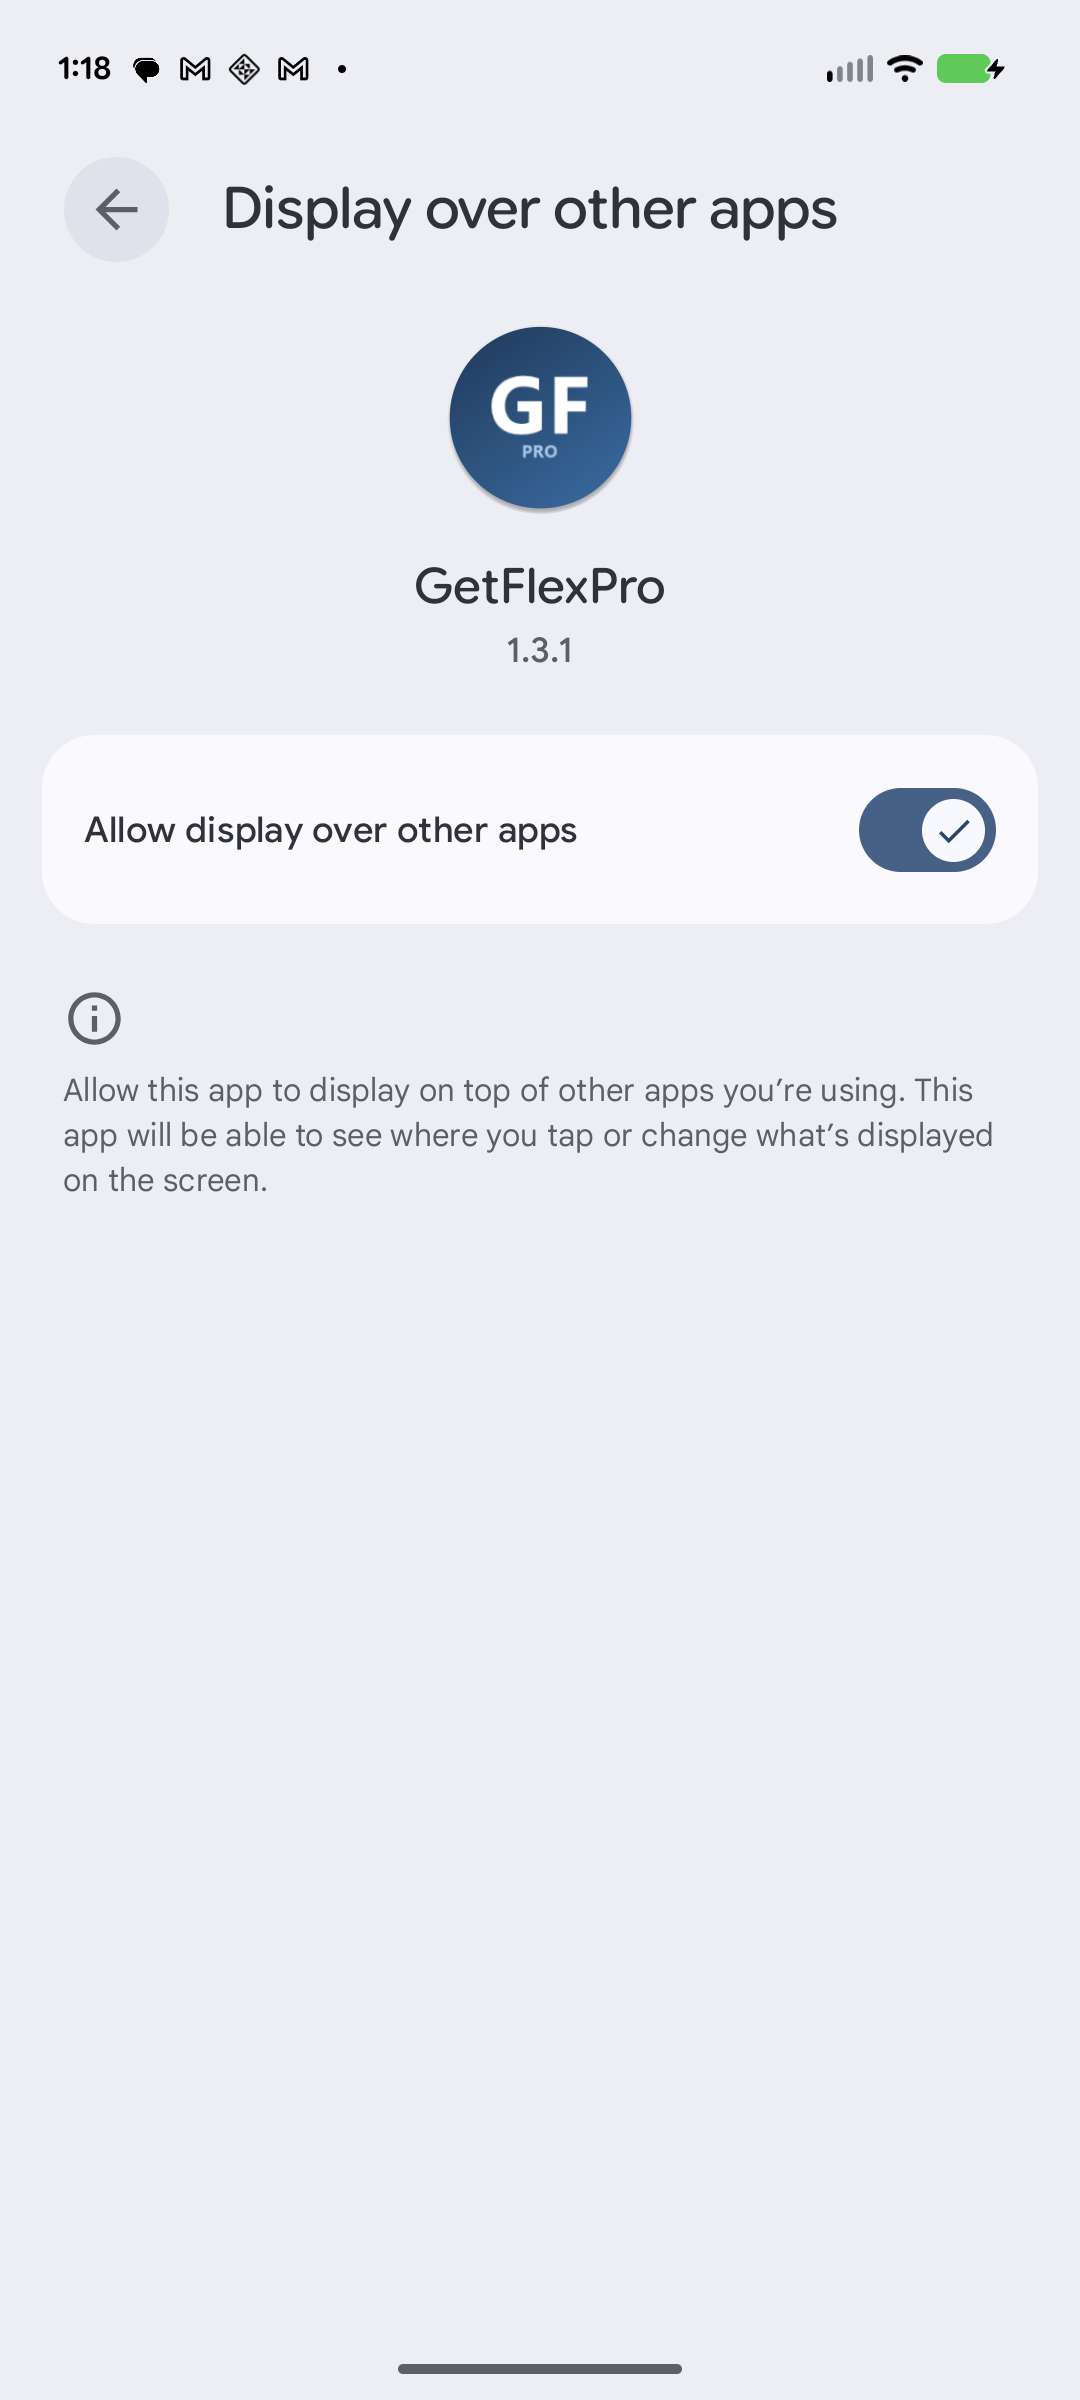
The Display over other apps screen opens (so the floating button can appear on top of Amazon Flex). Find GetFlexPro in the list.
Step 33
Open GetFlexPro’s screen and find Allow display over other apps.
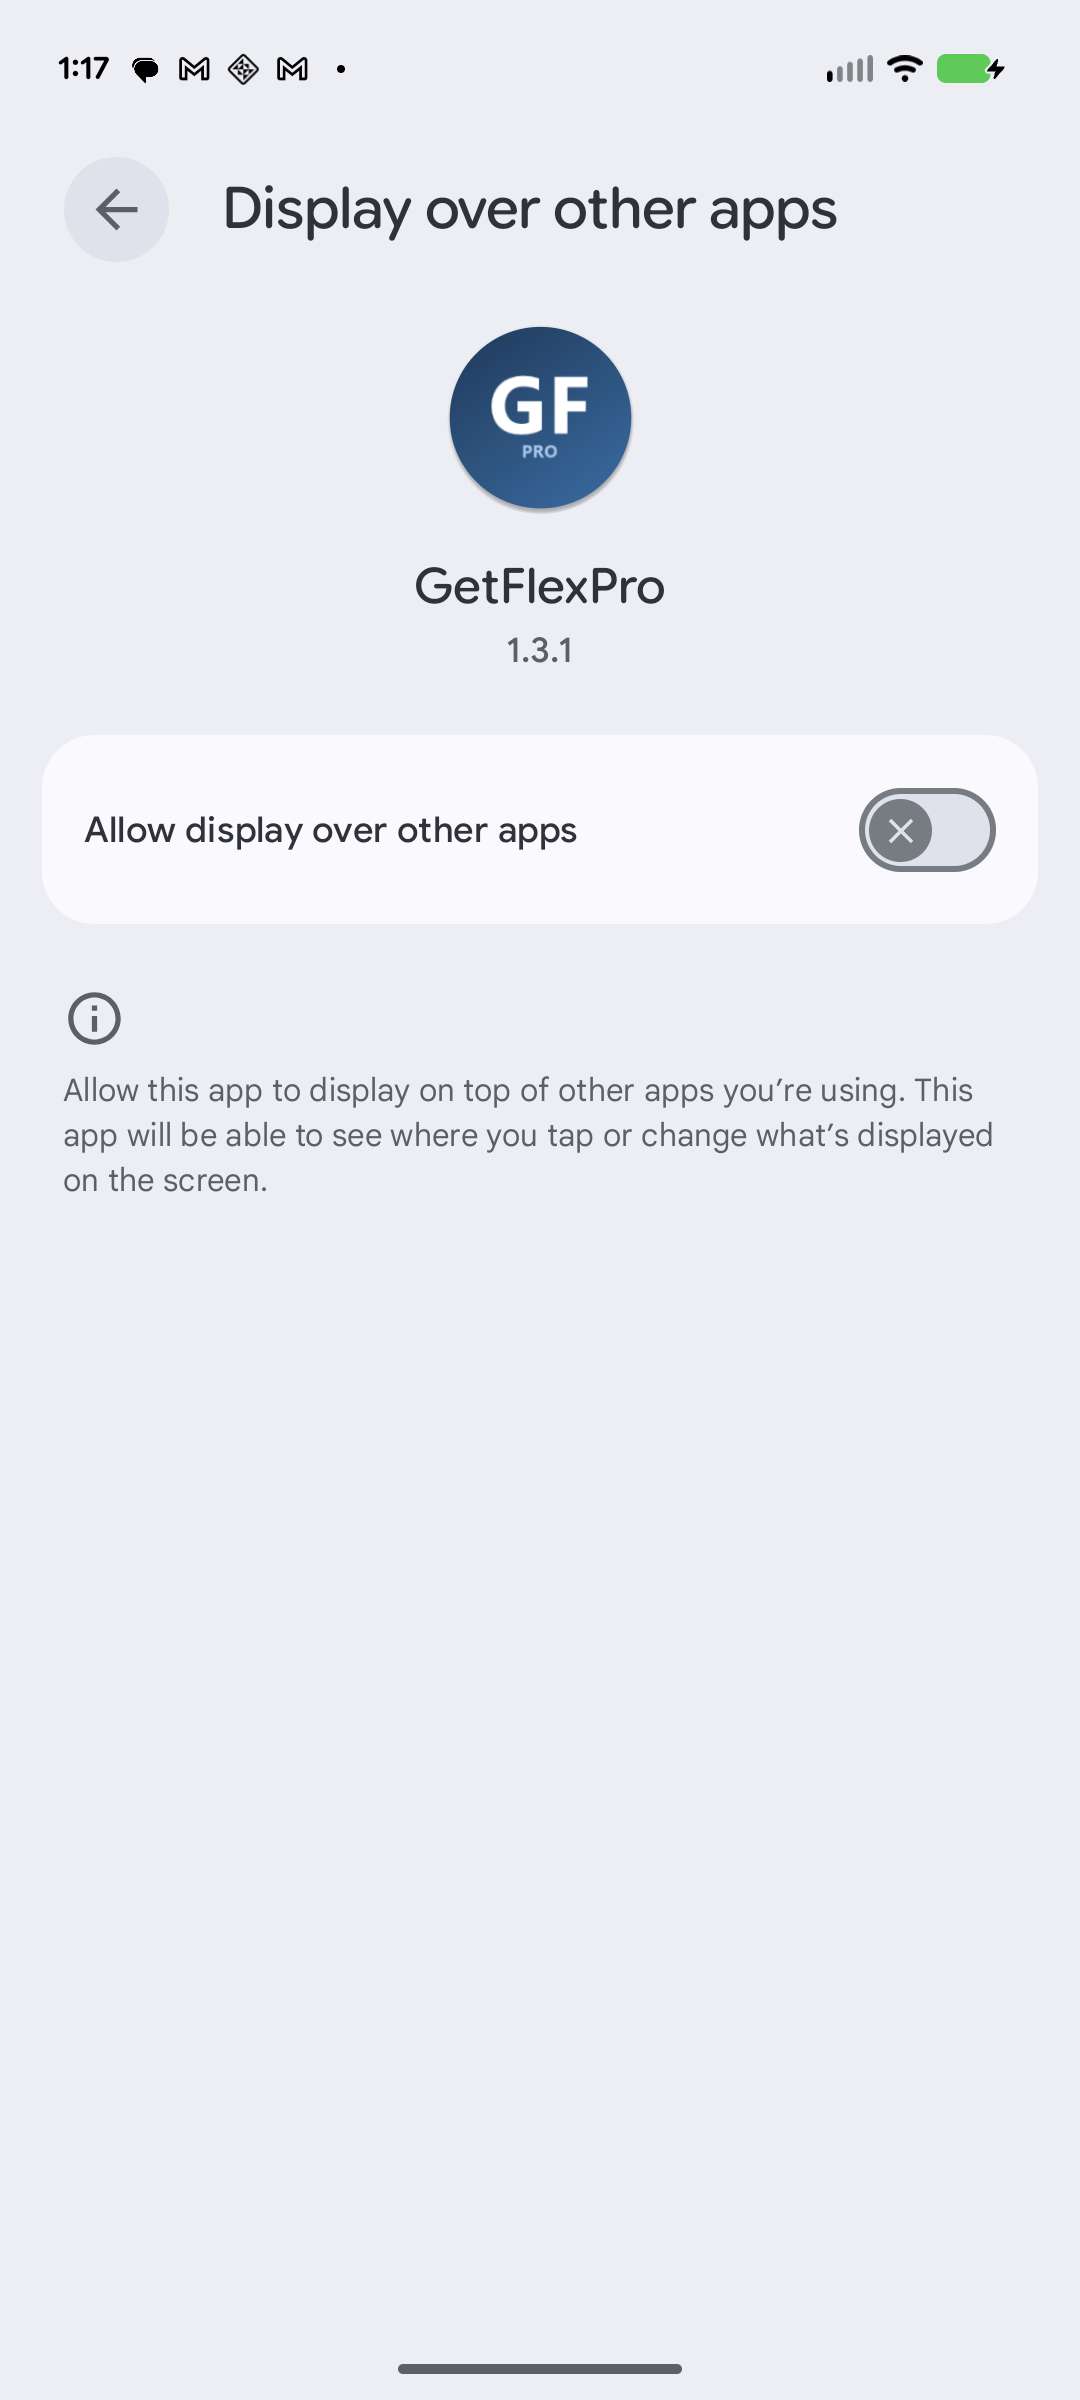
Step 34
Turn on Allow display over other apps.
Step 35
Use the back arrow to return to GetFlexPro’s home screen, then tap Show Floating Button to launch the assistant.
Step 36
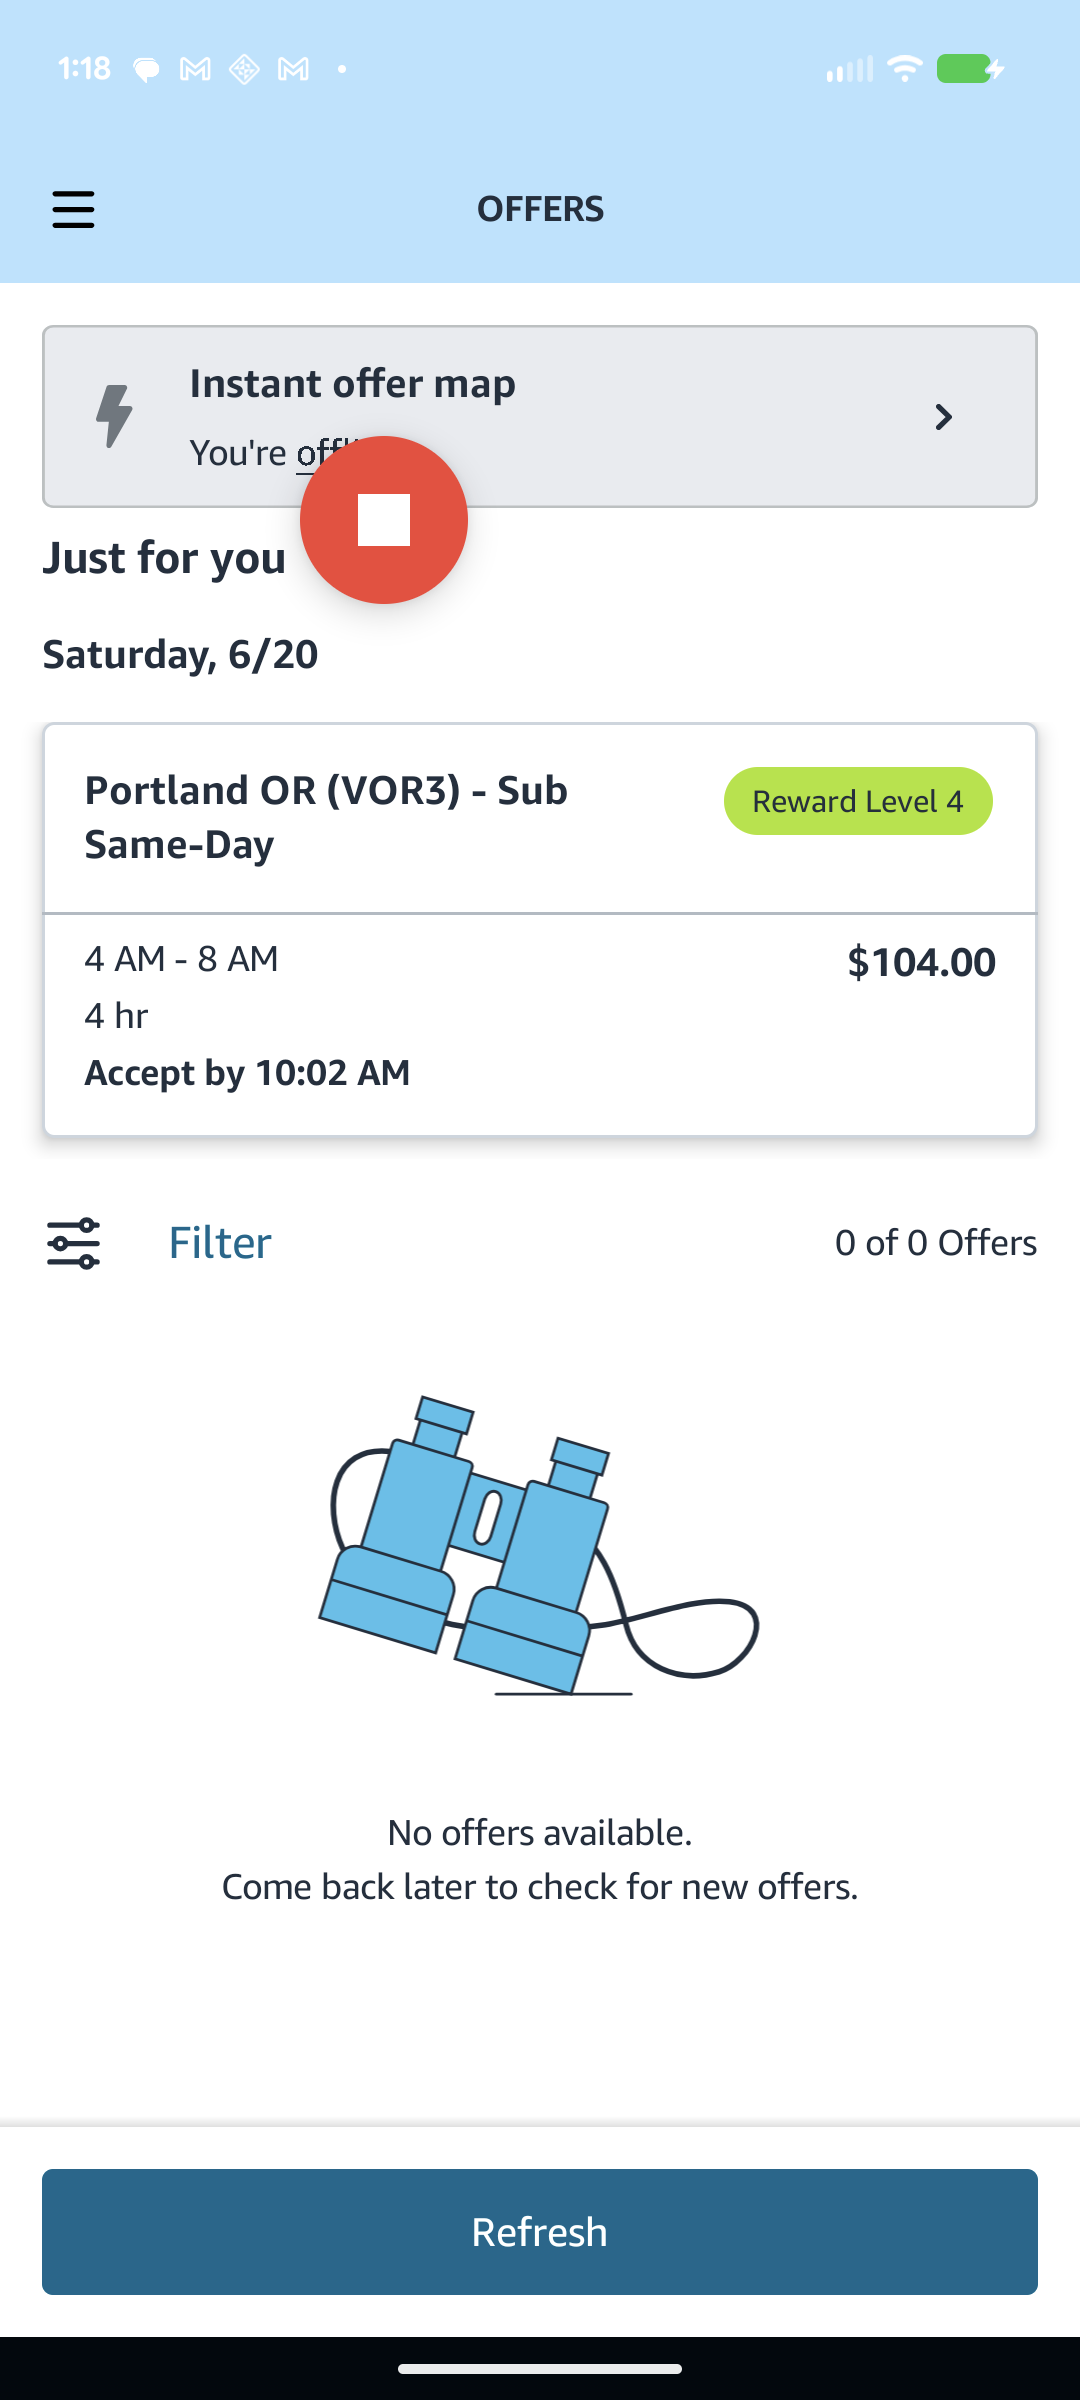
Open the Amazon Flex app.

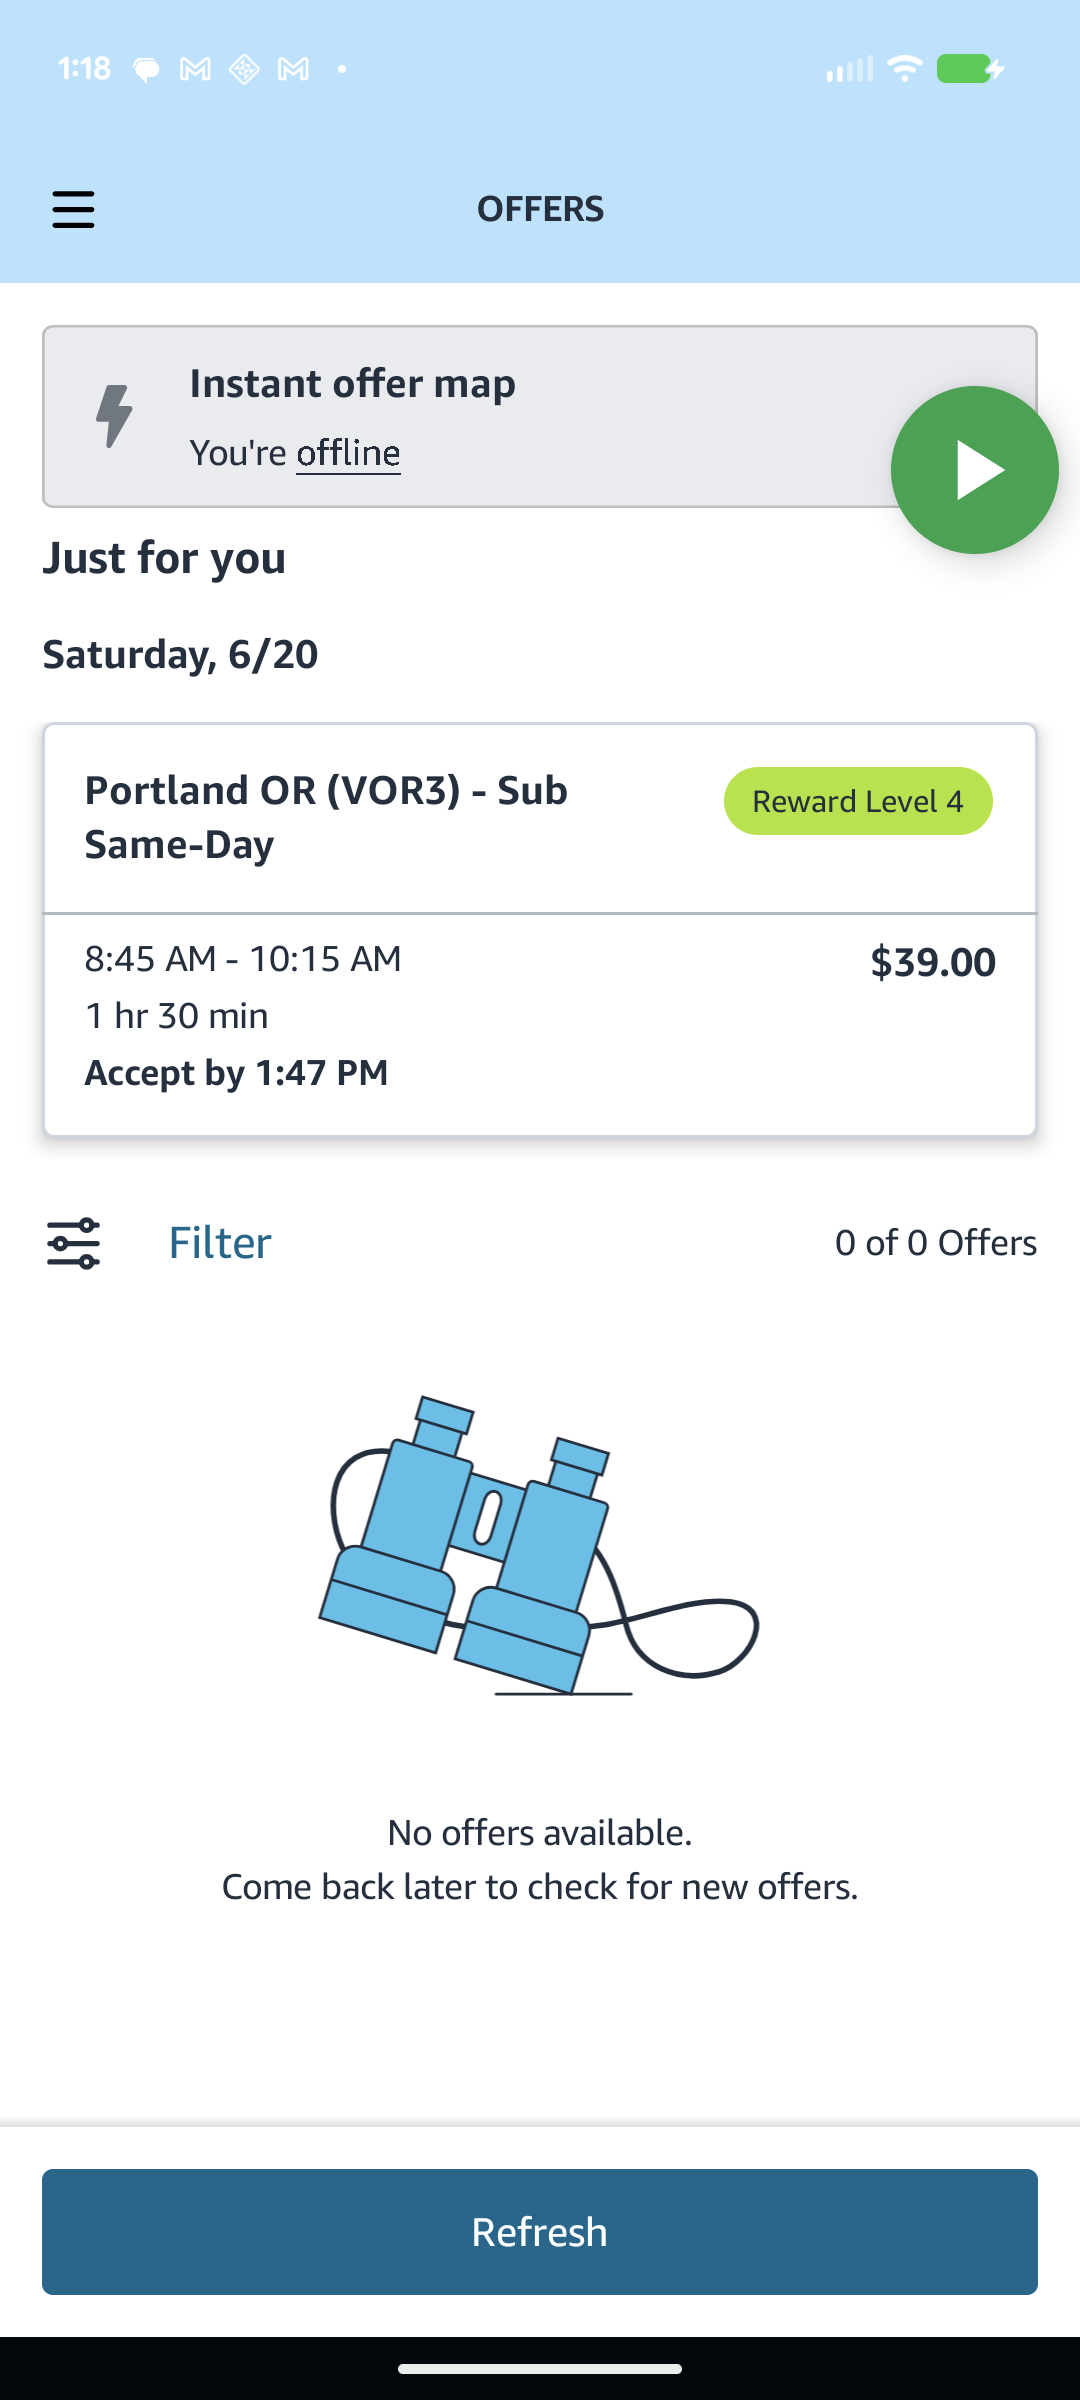
Step 37
Tap the green floating button to start grabbing — it turns red while running.
Step 38
You can drag the floating button and it snaps to the edge of the screen, out of your way.
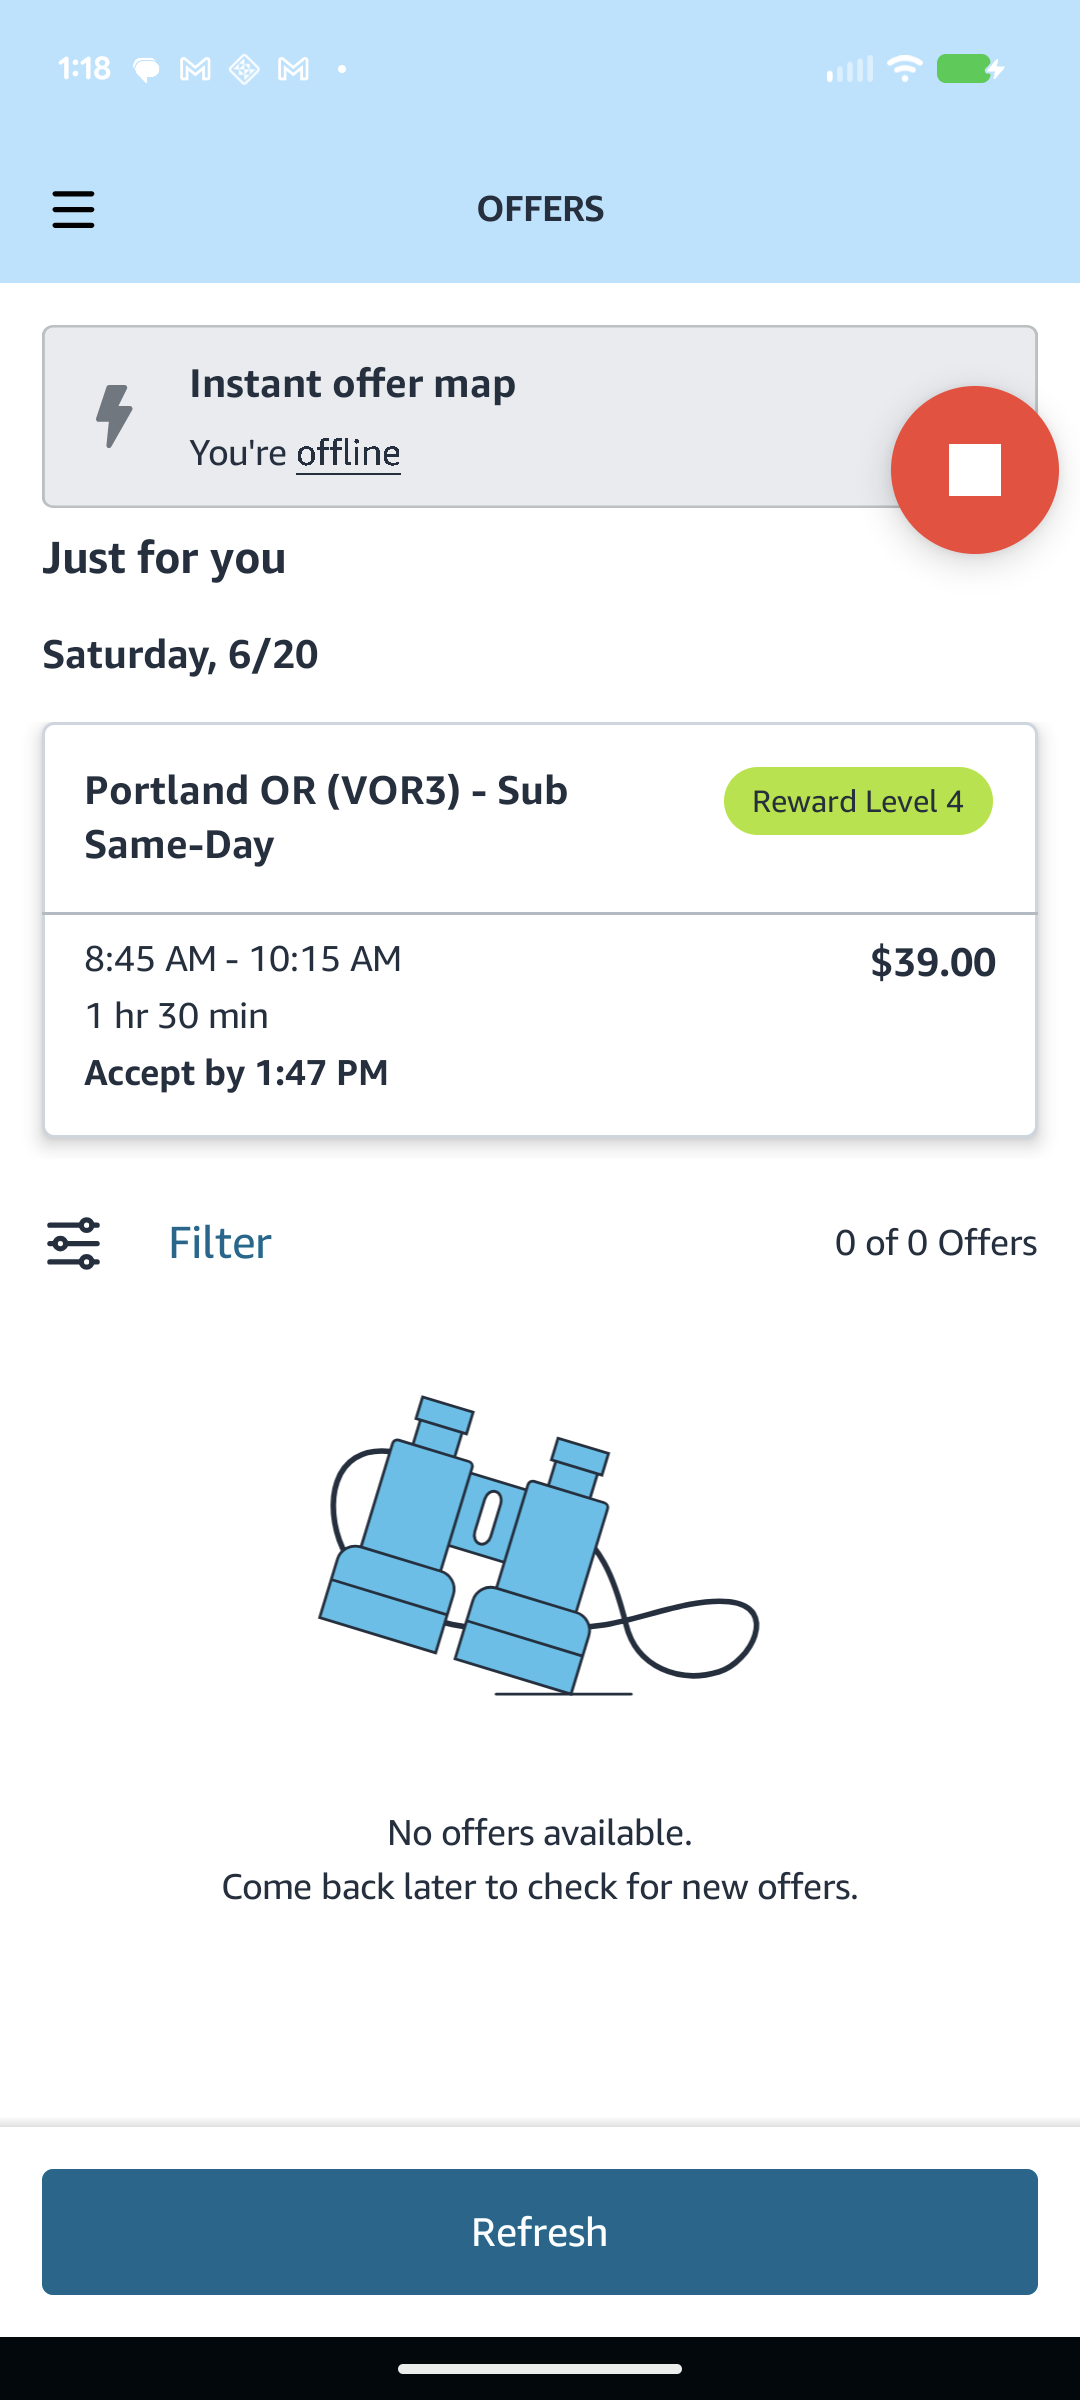
Step 39
Tap the red floating button to stop grabbing — it turns green again.
Step 40
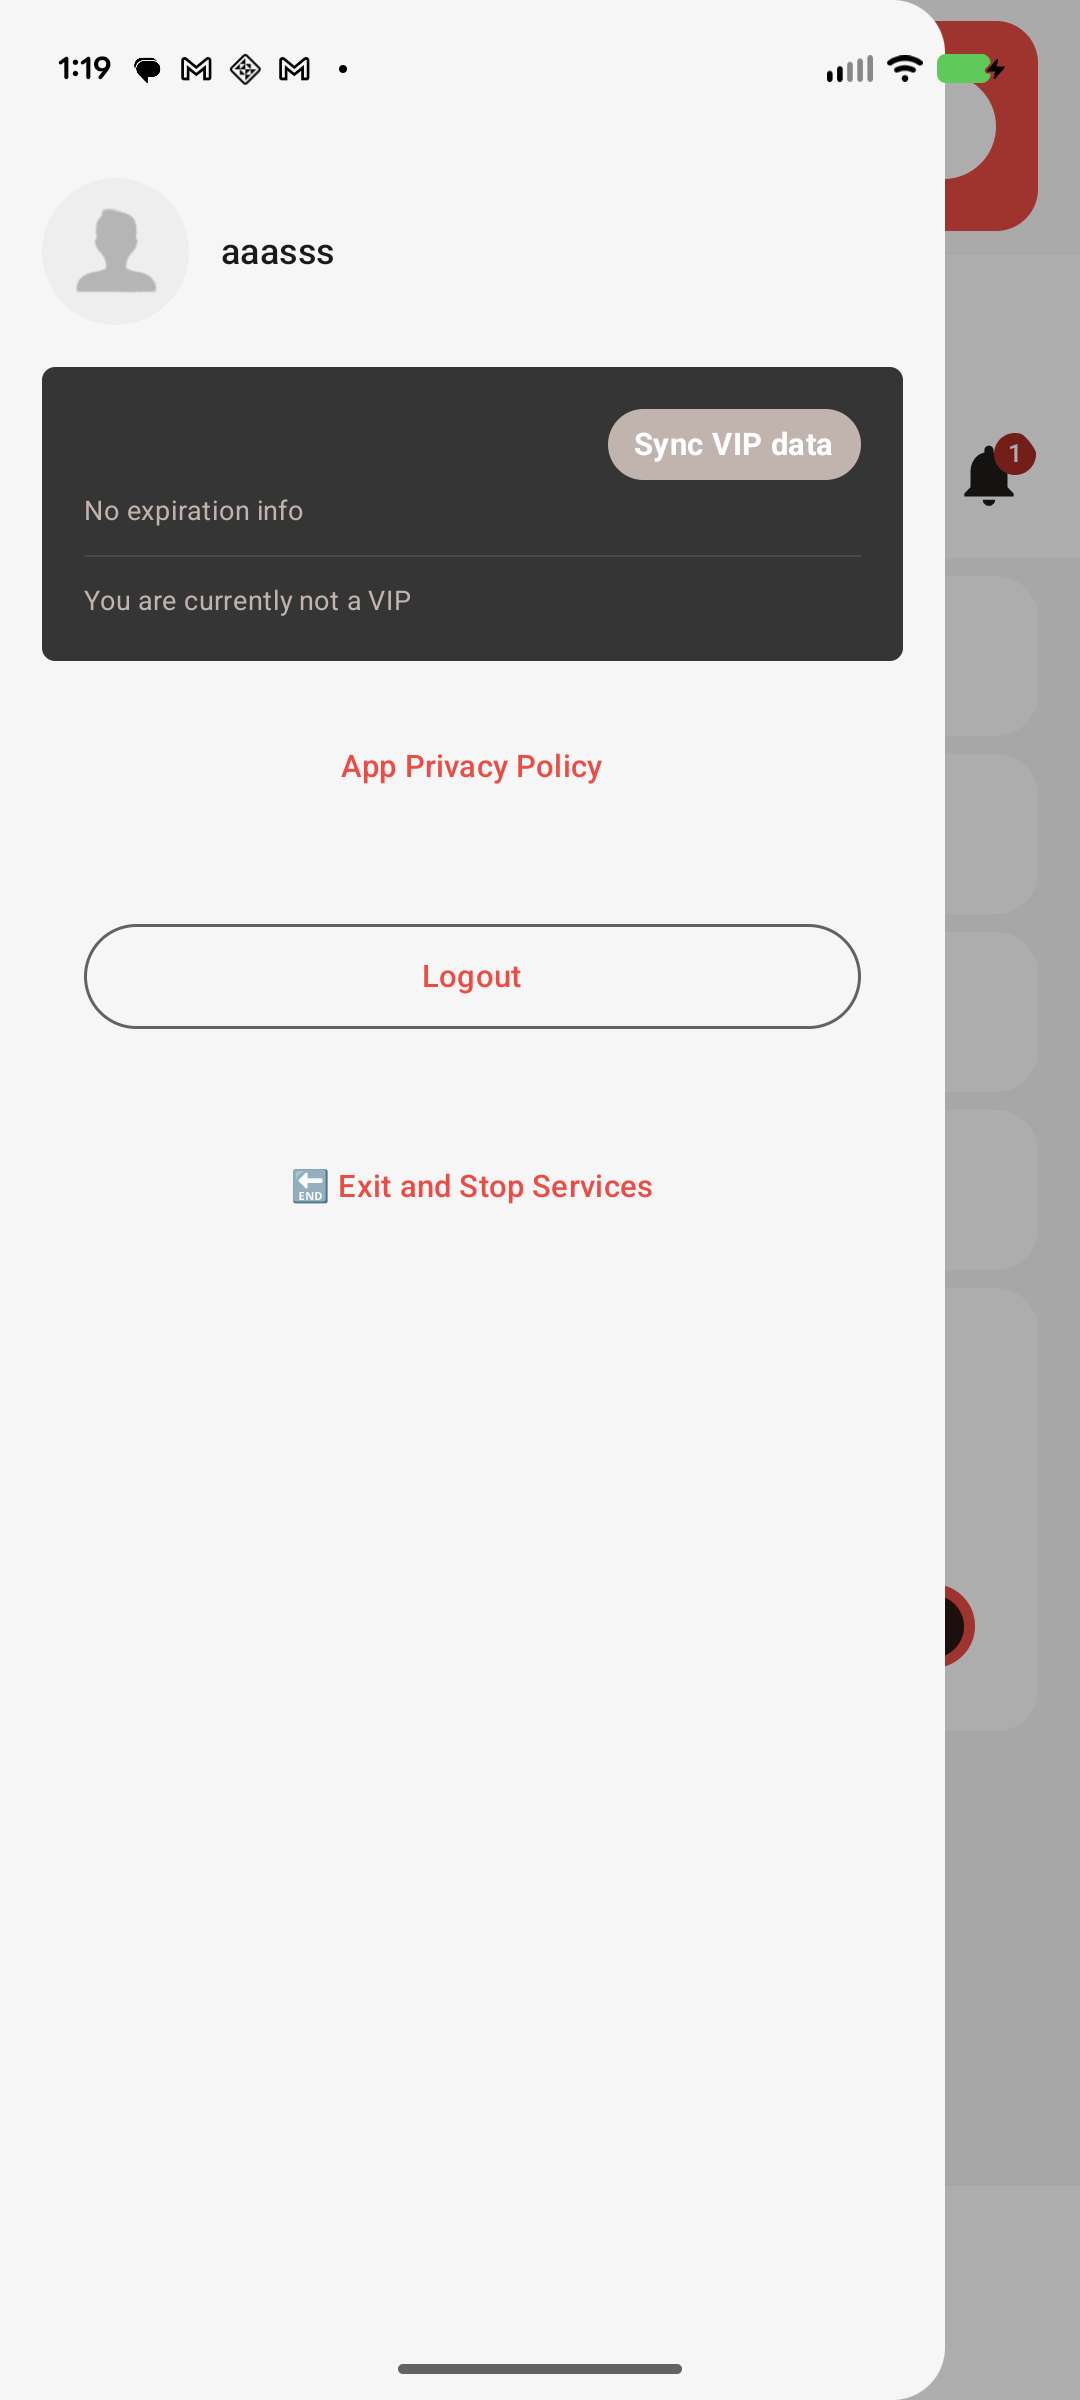
The button at the top-left of GetFlexPro opens your account page, where you can see your membership, sync your status with the website, renew, or sign out.
That’s it — setup is a one-time process. Once accessibility and the floating button are enabled, you only need to open GetFlexPro and tap the floating button to start grabbing.
GetFlex is an independent assistant tool and is not affiliated with, endorsed by, or sponsored by Amazon. Please use it responsibly and in line with the terms of any service you use it alongside.
Comments (0)